Our gardens offer the perfect canvas for unleashing creativity while connecting with nature. We’ve discovered that incorporating handmade crafts into outdoor spaces transforms ordinary yards into personalized sanctuaries that reflect our unique style and personality.
Whether you’re working with a sprawling backyard or a cozy balcony garden, DIY projects can enhance every corner without breaking the budget. From upcycled planters made from household items to decorative wind chimes crafted from natural materials, we’ll show you how simple crafting techniques can create stunning focal points that complement your plants and flowers.
The best part? Most of these garden create projects require minimal supplies and can be completed in a weekend. We’ve curated ideas that work for every skill level, so you don’t need to be a crafting expert to achieve professional-looking results that’ll have your neighbors asking for your secrets.
Create Stunning Garden Stepping Stones With Personalized Designs
Stepping stones offer an excellent way to transform your garden pathways while showcasing your creative flair. We’ll guide you through crafting beautiful, personalized stones that’ll become focal points in your outdoor sanctuary.
Choose the Right Materials for Durable Stepping Stones
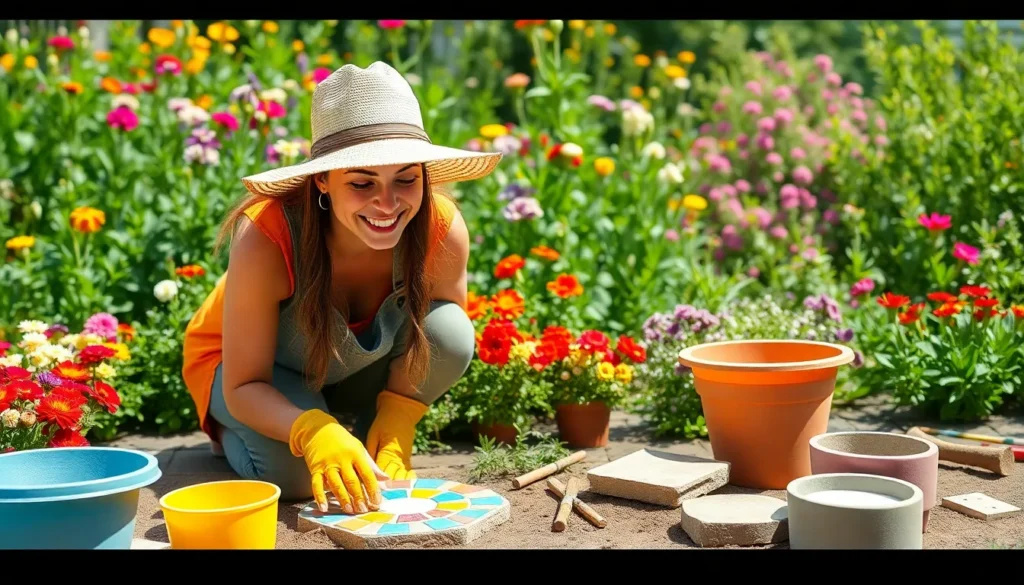
Concrete mix forms the foundation of long-lasting garden stones. We recommend using rapid-set concrete for quick weekend projects, while standard Portland cement creates stronger stones for high-traffic areas. Quick-crete typically sets within 20-40 minutes, making it perfect for beginners who want immediate results.
Molds determine your stone’s final shape and size. Pizza boxes work wonderfully for square stones, while cake pans create perfect circles. Large plant saucers produce organic, rounded shapes that blend naturally with garden landscapes. We’ve found that 12-inch diameter molds create the ideal stepping stone size for most pathways.
Release agents prevent concrete from sticking to your molds. Cooking spray provides the easiest solution, though petroleum jelly works equally well for detailed molds. Apply these agents generously to ensure clean removal once your stones cure completely.
Design Patterns Using Mosaic Tiles and Natural Elements
Broken ceramic pieces create stunning mosaic patterns in your stepping stones. We collect old dishes, tiles, and pottery throughout the year specifically for these projects. Arrange colorful fragments in spiral patterns, geometric designs, or abstract compositions before pouring your concrete mix.
River rocks add natural texture and earthy appeal to garden pathways. Press smooth stones directly into wet concrete, creating mandala patterns or simple border designs. We typically use rocks ranging from 1-3 inches in diameter for optimal visual impact and walking comfort.
Glass marbles catch sunlight beautifully when embedded in stone surfaces. Arrange clear, blue, or green marbles in flower patterns or random clusters throughout your design. These decorative elements create magical light reflections during golden hour garden walks.
Leaf impressions bring organic shapes into your stepping stone designs. We press large hosta leaves, fern fronds, or maple leaves into partially set concrete for lasting botanical imprints. This technique works best when concrete reaches a firm but still workable consistency.
Add Personal Touches With Hand Prints and Garden Quotes
Family handprints transform ordinary stepping stones into treasured keepsakes. We press children’s hands into wet concrete within the first 10 minutes of pouring for clean, detailed impressions. Adult hands work well too, creating meaningful markers along garden paths that celebrate family memories.
Inspirational quotes add personality and wisdom to your garden walkways. We use alphabet stamps or stencils to impress words like “Grow,” “Bloom,” or “Breathe” into fresh concrete surfaces. Favorite garden quotes or family sayings make each stone uniquely yours.
Date stamps commemorate special occasions or seasonal garden milestones. We often include the year we planted exact garden sections or celebrated important family events. These temporal markers create a timeline of memories embedded in your garden’s very foundation.
Pet paw prints honor beloved four-legged family members in your outdoor space. Press dog or cat paws gently into concrete during the optimal setting time for lasting impressions. We’ve created entire memorial pathways celebrating pets who brought joy to our gardens.
Build Functional Garden Planters From Recycled Materials

Recycled materials offer endless possibilities for creating beautiful garden planters that combine sustainability with style. We’ll explore three practical approaches that transform everyday waste into stunning garden features.
Transform Old Tires Into Colorful Hanging Planters
Old tires make excellent hanging planters when properly cleaned and painted with vibrant colors. We recommend starting with smaller tire sizes for easier handling and better visual appeal in most garden spaces.
Clean each tire thoroughly with soap and water to remove dirt and oil residue. Paint them using outdoor acrylic paint in colors that complement your garden’s existing palette. Bright blues, sunny yellows, and earthy greens work particularly well for creating eye-catching displays.
Attach strong rope or chain to create hanging systems that can support the weight of soil and plants. We suggest using three attachment points spaced evenly around the tire’s circumference for better stability. Position these planters at varying heights to create ever-changing visual interest throughout your garden space.
Repurpose Wooden Pallets for Vertical Garden Displays
Wooden pallets provide excellent structure for vertical gardening systems that maximize growing space while minimizing ground footprint. We can easily disassemble pallets using basic tools to create custom planting walls.
Sand the wood surfaces to remove rough edges and splinters before assembly. Apply weather-resistant stain or paint to protect the wood from moisture and extend the planter’s lifespan. Create planting pockets by attaching industry fabric or small containers between the slats.
Build your vertical display by securing the pallet structure against a fence or wall for support. Add plants in graduated sizes with larger specimens at the bottom and smaller trailing varieties toward the top. This arrangement creates natural visual flow while ensuring proper weight distribution.
Create Unique Containers From Household Items
Household items like old teacups, worn boots, and unused containers become charming planters for small plants and succulents. We’ve found that vintage teacups work exceptionally well for herb gardens near kitchen windows.
Drill drainage holes in the bottom of any container that doesn’t already have them to prevent root rot. Old rubber boots make whimsical planters for children’s garden areas and can be painted with fun designs or left in their original colors for rustic appeal.
Place these creative containers along garden pathways to guide visitors through your space. Group containers of different sizes and materials together to create interesting vignettes that showcase your plants while adding personality to your garden design.
Design Eye-Catching Garden Markers and Plant Labels

Garden markers and plant labels transform ordinary garden beds into organized, professional-looking displays. We can create personalized markers using air-dry clay stamped with alphabet letters for a custom appearance.
Create Weatherproof Plant Tags Using Stone and Metal
Stone and metal materials provide the most durable options for long-lasting garden markers that withstand harsh weather conditions. Natural stones offer a rustic appeal when painted or engraved with plant names, while flat metal pieces create sleek, modern labels perfect for contemporary gardens.
Old spoons, washers, and aluminum cans serve as excellent recycled materials for metal tags. We engrave or paint plant names directly onto these surfaces, then attach them to stakes or wire for stability. Metal markers resist both rain and intense sunlight, making them ideal for year-round outdoor use.
River rocks and slate pieces work exceptionally well for stone markers due to their smooth surfaces and weather-resistant properties. Painting plant names with outdoor acrylic paint ensures the text remains visible throughout multiple seasons.
Make Decorative Herb Markers With Natural Materials
Wood, bamboo, and river rocks create beautiful herb markers that complement any garden’s natural aesthetic. Carving plant names into wooden stakes produces rustic markers that age gracefully alongside growing herbs.
Small chalkboards and slate pieces offer flexibility for herb gardens since we can easily update plant names as seasonal herbs change. Bamboo stakes provide lightweight options that won’t damage delicate herb roots when inserted into soil.
River rocks painted with herb names create charming markers that blend seamlessly with garden mulch and surrounding industry elements. Sealing painted rocks with clear outdoor varnish extends their lifespan and prevents color fading.
Create Fun Vegetable Signs for Kids’ Garden Areas
Bright colors and playful fonts make vegetable markers appealing to children while teaching plant identification skills. Create sticks, painted rocks, and laminated cardboard provide safe, kid-friendly materials for creative garden projects.
Encouraging children to personalize their markers using stickers, stamps, and colorful markers fosters a deeper connection with gardening activities. Illustrations of vegetables alongside plant names help young gardeners recognize their crops as they grow.
Waterproof markers and sealed materials ensure children’s creations survive outdoor conditions while maintaining their vibrant appearance throughout the growing season. These captivating projects help develop early gardening enthusiasm and plant recognition skills.
Construct Beautiful Garden Trellises and Support Structures

We can elevate our garden’s functionality and visual appeal by creating sturdy support structures that help climbing plants reach their full potential. These DIY projects transform ordinary materials into beautiful garden features that’ll last for years.
Build Rustic Bamboo Trellises for Climbing Plants
Building bamboo trellises offers an eco-friendly solution that requires no power tools or complex assembly. We simply gather bamboo sticks of varying lengths and lash them together using natural twine or zip ties to create our desired framework. This method works perfectly for supporting sweet peas, morning glories, and other lightweight climbing plants that need gentle guidance.
Bamboo’s natural flexibility allows us to bend it into curved shapes for more artistic designs. We can create A-frame structures by crossing two longer bamboo poles at the top and securing shorter horizontal pieces between them. The rustic appearance blends seamlessly with natural garden settings while providing years of reliable plant support.
Design Decorative Obelisks Using Reclaimed Wood
Decorative obelisks add elegant vertical interest to our garden beds while serving as functional plant supports. We can construct these pyramid-shaped structures using reclaimed cedar or weathered barn wood for authentic character. The tapering design starts wide at the base and narrows toward the top, creating visual drama that draws the eye upward.
Reclaimed wood provides unique textures and natural weathering that new lumber can’t match. We assemble these structures using exterior wood glue and galvanized screws, ensuring they withstand seasonal weather changes. These obelisks work exceptionally well for clematis, climbing roses, and other vigorous vines that need strong support.
Create Living Willow Structures for Natural Support
Living willow structures represent the ultimate sustainable gardening solution that grows more beautiful each season. We weave flexible willow branches into our desired shapes while they’re dormant, then plant the bottom ends directly in moist soil. The branches root naturally and continue growing, creating a living trellis that strengthens over time.
Willow’s rapid growth rate means our structures develop quickly into functional plant supports. We can create arches, tunnels, or traditional upright trellises that become integrated industry features. This technique requires minimal maintenance once established, as the living willow adapts to seasonal changes and develops its own supporting root system.
Make Charming Garden Wind Chimes and Mobiles

We can transform our gardens into melodic sanctuaries by crafting wind chimes and mobiles that dance with every breeze. These musical additions create soothing sounds while adding visual interest to our outdoor spaces.
Assemble Musical Wind Chimes From Garden Tools
Musical garden tool chimes produce unique tones that can’t be found in store-bought versions. We’ll start by gathering old forks, spoons, and small metal objects from our garden sheds or kitchen drawers. Metal rings or pieces of driftwood work perfectly as our base structure for hanging these repurposed items.
Arranging the tools requires careful attention to spacing and sound quality. We should test different combinations by gently tapping each tool to find harmonious tones. Twine or thin wire provides the ideal hanging material since it’s weather-resistant and allows tools to move freely in the wind.
Creating varying lengths adds depth to our chime’s musical range. We can hang shorter pieces closer to the center and longer ones toward the edges. This arrangement ensures each tool catches different air currents and contributes to a layered sound experience.
Create Colorful Mobiles Using Recycled Glass and Beads
Colorful glass mobiles catch sunlight beautifully while reducing waste from our households. We’ll collect glass bottles, jars, and beads in various colors from our recycling bins and create supplies. Different colored glass creates stunning rainbow effects when sunlight filters through each piece.
Wooden dowels or metal rods serve as excellent suspension points for our glass collections. We should drill small holes near the top of glass bottles or use wire wrapping techniques for secure attachment. Arranging pieces at different heights creates visual layers that move independently in gentle breezes.
Strategic placement maximizes the light-catching potential of our glass mobiles. We can position them near windows, patios, or open garden areas where morning and afternoon sun will illuminate the colored glass. Each piece becomes a miniature prism that scatters colored light across our garden surfaces.
Design Seasonal Displays With Natural Found Objects
Seasonal displays using natural materials connect our gardens to the changing rhythms of nature. We’ll collect leaves, twigs, and pinecones during walks through our neighborhoods or local parks. These materials cost nothing while providing authentic textures and colors that complement our garden’s existing plants.
Centerpiece arrangements work wonderfully for garden tables and outdoor dining areas. We can combine different seasonal elements like autumn leaves with decorative gourds or spring flowers with fresh green branches. Each season offers unique materials that reflect the current time of year in our outdoor spaces.
Wreath making extends our seasonal displays to garden gates and doorways. We’ll use flexible branches as our base structure and weave in collected natural materials using thin wire or natural twine. These displays welcome guests while showcasing our creativity and connection to the natural industry around us.
Craft Inviting Garden Seating and Relaxation Areas

We can transform our gardens into peaceful retreats by creating comfortable seating areas that invite relaxation and quiet moments. Our outdoor spaces deserve the same attention to comfort as our indoor rooms.
Build Simple Garden Benches From Reclaimed Materials
Gabion benches offer an eco-friendly seating solution using old stones or bricks within metal cages for a visually striking appearance. We recommend sourcing materials from local demolition sites or home renovation projects to keep costs minimal while creating durable garden furniture.
Wooden box seats provide practical storage while serving as comfortable seating when constructed from reclaimed fencing materials. Paint or stain these versatile pieces to match our garden’s color scheme, ensuring weather protection that extends their lifespan significantly.
Built-in garden benches maximize space efficiency by incorporating storage compartments underneath the seating surface using reclaimed wood planks. We suggest adding hinges to create accessible storage for garden tools, cushions, or seasonal decorations while maintaining a clean aesthetic.
Create Cozy Reading Nooks With DIY Cushions
Weather-resistant cushions transform hard seating surfaces into comfortable retreats when crafted from outdoor fabric and filled with moisture-resistant materials. We recommend selecting fabrics with UV protection to prevent fading during extended sun exposure throughout the growing season.
Strategic nook placement creates intimate spaces by positioning seating in naturally shaded areas or beneath constructed pergolas and trellises. Add pillows and throws in coordinating colors to establish a cohesive design that encourages longer garden stays.
Layered comfort elements enhance the reading experience through combining different textures and heights using multiple cushion sizes and throw blankets. We find that mixing patterns and solid colors creates visual interest while maintaining the peaceful atmosphere essential for relaxation.
Design Meditation Spaces Using Natural Elements
Water features establish calming soundscapes when incorporated into meditation areas through small fountains, birdbaths, or simple water bowls placed strategically around seating. We suggest positioning these elements where gentle water sounds mask nearby street noise or neighbor activities.
Natural stone arrangements create grounding focal points by arranging river rocks, fieldstones, or large boulders in meaningful patterns around meditation seating. Plants like lavender, rosemary, and jasmine add aromatic elements that enhance mindfulness practices naturally.
Minimalist seating arrangements encourage deeper meditation through simple backless benches or hammocks that promote proper posture without excessive comfort distractions. We recommend placing these seats facing east to capture gentle morning light while avoiding harsh afternoon sun exposure.
Develop Creative Garden Lighting Solutions

We can transform our garden into an enchanting nighttime oasis by incorporating thoughtful lighting elements that combine functionality with artistic flair.
Make Solar-Powered Lanterns From Mason Jars
Solar powered mason jar lanterns offer an eco-friendly way to illuminate our garden pathways and seating areas. We’ll need standard mason jars, solar lights or fairy lights, and strong wire for hanging mechanisms. Cleaning the jars thoroughly ensures maximum light transmission while removing any residue that might dim the glow.
Fill each jar with small solar lights or battery-powered fairy lights, creating layers of illumination that cast beautiful shadows through the glass. Position these lanterns along walkways to guide evening strolls or cluster them around seating areas for ambient lighting. Hang the completed lanterns from tree branches using sturdy wire handles, ensuring they receive adequate sunlight during the day for optimal nighttime performance.
Customize each lantern by adding decorative elements like colored glass beads, sand, or small pebbles at the bottom to create unique textures and colors when lit.
Create Magical Fairy Lights Using String and Natural Materials
Magical fairy lights combine the sparkle of string lighting with natural garden elements to create enchanting displays throughout our outdoor space. Wrap solar-powered string lights around tree trunks and branches, eliminating the need for electrical outlets while maintaining consistent illumination. Weave lights through existing garden structures like trellises and pergolas to highlight architectural features.
Incorporate natural materials such as flowers, leaves, and branches directly into the light strings by gently securing them with small clips or wire. Drape fairy lights along fence lines or garden borders to define spaces and create intimate outdoor rooms. Bundle lights with dried branches or driftwood to create organic light sculptures that serve as garden focal points.
Solar powered options prove ideal for avoiding cords and reducing energy consumption while maintaining the magical ambiance we desire.
Build Fire Features for Evening Garden Ambiance
Fire features serve as dramatic focal points that extend our garden’s usability into cooler evening hours. Build fire pits using natural stone or brick materials to create rustic gathering spaces that complement existing garden elements. Position these features away from overhanging branches and structures while ensuring adequate ventilation for safe operation.
Incorporate chimineas as compact alternatives that provide warmth while taking up minimal space in smaller gardens. Surround fire features with comfortable seating arrangements using weather-resistant materials that encourage long conversations under the stars. Use natural materials like fieldstone or recycled bricks to construct permanent fire features that blend seamlessly with garden landscapes.
Create cozy focal points for outdoor gatherings by combining fire features with nearby seating areas and ambient lighting to establish intimate spaces for entertaining guests or quiet reflection.
Establish Helpful Garden Organization Systems

Efficient garden organization transforms chaotic storage areas into functional workspaces. We’ll explore creative answers that maximize space while keeping essential tools and supplies easily accessible.
Design Tool Storage Answers From Repurposed Items
Vintage wooden crates serve as excellent wall-mounted organizers when we add hooks or dividers for various garden implements. Mounting these weathered beauties creates rustic charm while providing designated spots for hand tools, gloves, and seed packets.
DIY PVC tool holders offer customizable storage answers using scrap pieces attached to a sturdy board. We can cut different diameter pipes to accommodate exact tool handles, creating a clean and organized display that prevents tools from falling or getting damaged.
Old kitchen utensil holders find new purpose storing small garden tools like pruning shears, plant ties, and measuring spoons. These compact containers fit perfectly on potting benches or shelf edges, keeping frequently used items within arm’s reach.
Adjustable shelving systems in garden sheds efficiently accommodate items of various sizes, from bulky fertilizer bags to delicate seedling trays. We recommend installing these versatile units to maximize vertical storage space while maintaining easy access to seasonal equipment.
Pegboard tool organizers mounted on shed walls create visible storage for frequently used implements. Hanging tools this way prevents damage while allowing us to quickly identify and retrieve the right tool for each gardening task.
Slat wall organizers with hooks and baskets provide flexible storage for ladders, hoses, and other bulky garden equipment. These systems adapt to changing storage needs throughout the growing season.
Create Seed Starting Stations for Indoor Gardening
Wooden or plastic frame systems with individual compartments create organized seed starting environments that maximize germination success. We position these stations near south-facing windows to capture natural light while maintaining easy access for daily monitoring.
Integrated grow light systems attached to frame structures provide consistent illumination for healthy seedling development. Installing adjustable LED strips allows us to customize light intensity and duration based on exact plant requirements.
Built-in watering systems using drip trays and self-watering inserts maintain optimal moisture levels without oversaturation. We incorporate these features to reduce daily maintenance while ensuring consistent growing conditions.
Temperature control elements such as heat mats and ventilation fans create ideal germination environments for temperature-sensitive seeds. These additions help us achieve higher success rates with challenging varieties like peppers and tomatoes.
Build Compost Bins That Blend With Garden Aesthetics
Wooden compost bins constructed from cedar or reclaimed wood materials harmonize with natural garden settings while providing functional decomposition space. We select weather-resistant wood species that age gracefully and complement existing industry features.
Decorative screening panels or trellises conceal utilitarian compost areas while maintaining visual garden appeal. Installing these attractive barriers allows us to position compost bins in convenient locations without compromising overall garden design.
Strategic landscaping placement behind established plants or near existing foliage camouflages compost structures within the garden environment. We choose locations that provide easy access for adding materials while keeping bins integrated with surrounding plantings.
Multi-compartment designs using matching materials create efficient compost systems that process organic waste at different decomposition stages. These organized systems allow us to maintain continuous compost production while keeping the area tidy and visually appealing.
Conclusion
These garden create projects prove that creativity knows no bounds when it comes to transforming our outdoor spaces. We’ve explored everything from stepping stones and recycled planters to wind chimes and organizational systems that make gardening more enjoyable and efficient.
What makes these projects truly special is their accessibility – we can tackle most of them with basic materials and weekend time commitments. Whether we’re seasoned crafters or complete beginners our gardens benefit from these personal touches that reflect our unique style.
The best part? These DIY creations grow more meaningful over time becoming cherished elements that tell the story of our gardening journey while inspiring us to continue exploring new ways to blend creativity with nature.
Frequently Asked Questions
What types of DIY garden crafts can I make on a weekend?
You can create stunning stepping stones, upcycled planters from tires and pallets, personalized garden markers using clay or painted rocks, rustic bamboo trellises, and musical wind chimes from old tools. Most projects require minimal supplies and basic skills, making them perfect for weekend completion.
How do I make garden stepping stones with personal touches?
Use rapid-set concrete with molds to shape your stones. Add personality with mosaic tiles, river rocks, leaf impressions, family handprints, inspirational quotes, or even pet paw prints. These elements create unique keepsakes while enhancing your garden pathways.
What recycled materials work best for garden planters?
Old tires make excellent hanging planters when cleaned and painted. Wooden pallets can be transformed into vertical garden displays. Household items like teacups, rubber boots, and containers create charming, eco-friendly planters that add character to your garden.
How can I organize my garden tools and supplies effectively?
Use vintage wooden crates for tool storage, create DIY PVC holders for long-handled tools, and install adjustable shelving systems. These solutions maximize space accessibility while keeping your gardening workspace functional and organized.
What materials should I use for durable garden markers?
Stone markers like painted river rocks offer rustic appeal and weather resistance. Metal tags made from recycled spoons or aluminum cans provide modern durability. Air-dry clay works well for temporary seasonal markers and creative personalization projects.
How do I build garden trellises without power tools?
Bamboo trellises are perfect for tool-free construction. Simply tie bamboo poles together with garden twine to create sturdy supports for climbing plants like sweet peas and morning glories. They’re lightweight, natural-looking, and highly functional.
Can I create wind chimes from garden materials?
Yes! Old garden tools like small hand forks, trowels, and metal pieces create unique musical wind chimes with distinctive tones. You can also make colorful glass mobiles from recycled materials that catch sunlight beautifully.
How do I start an indoor seed starting station?
Create a dedicated area with integrated grow lights, built-in watering systems, and organized storage for seeds and supplies. Use adjustable shelving to maximize space and ensure proper lighting distance for optimal germination success.


