Walking through a beautifully designed garden becomes even more enchanting when you’re following a thoughtfully crafted path. We’ve discovered that the right garden path doesn’t just guide visitors through your outdoor space – it transforms your entire industry into a cohesive, stunning masterpiece that reflects your personal style.
Whether you’re dreaming of a rustic stone walkway that meanders between flower beds or a sleek modern design that makes a bold statement, the possibilities are endless. We understand that choosing the perfect path can feel overwhelming with so many materials, styles, and layouts to consider.
That’s why we’ve compiled the most inspiring and practical garden path ideas that work for every budget, skill level, and garden size. From budget-friendly DIY options using recycled materials to luxurious flagstone installations, we’ll show you how to create pathways that not only enhance your garden’s beauty but also increase your property’s value while providing years of enjoyment.
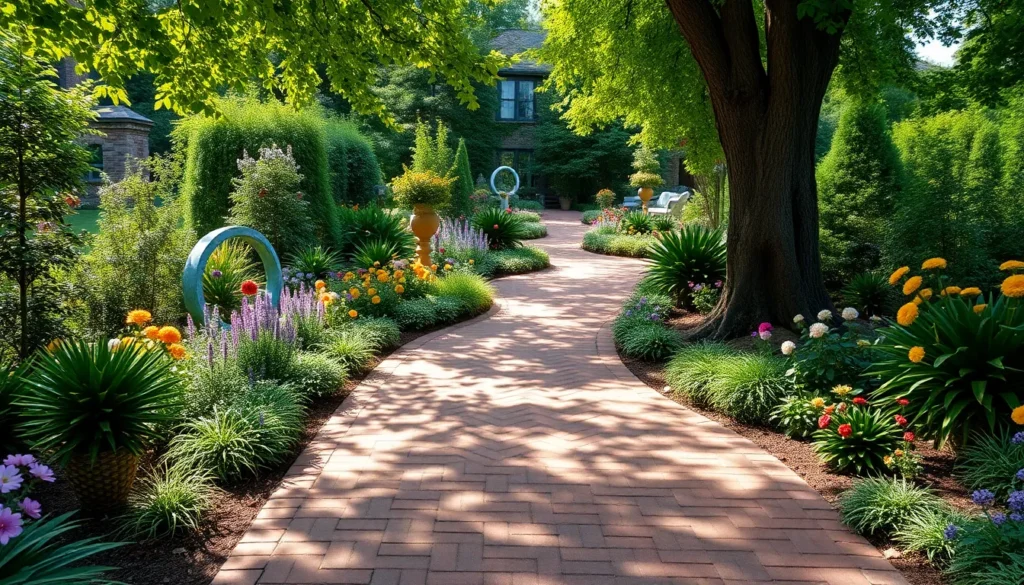
Create a Classic Brick Garden Path for Timeless Appeal
Brick garden paths offer unmatched durability and charm that complements any industry design. We’ll explore the essential elements that make these traditional walkways both beautiful and functional for decades to come.
Choose the Right Brick Pattern
Running bond patterns create the most straightforward installation process while delivering classic appeal. This traditional layout staggers each brick row by half a brick length, providing excellent structural stability and visual flow throughout your garden space.
Herringbone designs offer sophisticated elegance with their interlocking V-shaped arrangement. We recommend this pattern for high-traffic areas since the interlocking structure distributes weight evenly and prevents individual bricks from shifting over time.
Basketweave patterns combine pairs of bricks laid perpendicular to each other, creating geometric squares that add visual interest. This design works particularly well in formal garden settings where symmetry and order enhance the overall aesthetic.
Soldier course borders frame any central pattern beautifully by placing bricks end-to-end along the path edges. These borders define clear boundaries while preventing the main pattern from spreading or losing its shape.
Consider Mortared vs. Sand-Set Installation
Sand-set installations allow for natural drainage and easier future adjustments to your brick pathway. We spread a 2-inch sand base beneath the bricks, which permits water to flow through joints while accommodating seasonal ground movement without cracking.
Mortared systems provide permanent stability for areas with heavy foot traffic or sloped terrain. This method requires a concrete foundation with mortar joints that lock bricks in place, creating a solid surface that won’t shift or settle over time.
Drainage considerations play a crucial role in choosing your installation method. Sand-set paths naturally handle water runoff, while mortared installations need proper grading and drainage systems to prevent water pooling and freeze-thaw damage.
Maintenance requirements differ significantly between these two approaches. Sand-set paths need occasional releveling and joint sand replacement, whereas mortared paths require periodic joint repointing and crack repairs.
Add Moss or Ground Cover Between Bricks
Creeping thyme thrives in the narrow spaces between bricks, releasing fragrant oils when stepped upon. This low-growing perennial produces tiny purple or white flowers that attract beneficial pollinators while requiring minimal maintenance once established.
Irish moss creates a soft green carpet effect that stays attractive year-round in most climates. We plant small plugs directly into sand joints where they gradually spread to form continuous coverage that feels pleasant underfoot.
Corsican mint offers aromatic appeal with its fresh scent and tiny leaves that handle light foot traffic well. This ground cover prefers partially shaded areas and adds a cooling fragrance to your garden path experience.
Sedum varieties provide drought-tolerant options that store water in their succulent leaves. These hardy plants come in multiple colors and textures, creating visual contrast against traditional red brick while requiring virtually no supplemental watering.
Design a Natural Stone Garden Path for Rustic Charm

Natural stone pathways bring timeless beauty and organic texture to our outdoor spaces. We’ll explore how to create a stunning rustic path that complements your garden’s natural character.
Select Appropriate Stone Types
River rocks provide the foundation for creating serene and naturally flowing pathways. These smooth stones weather beautifully over time and work exceptionally well in informal garden settings.
Ozark stones deliver authentic earthy tones that enhance rustic garden themes. We recommend these stones for their ability to blend seamlessly with natural landscapes while providing excellent durability.
Stafford blue stones offer unique coloration that adds visual depth to pathway designs. Their distinctive hue creates striking contrast against green foliage and earth tones.
Flagstones create grand and impressive walkways with their large irregular shapes. We prefer flagstones for main pathways because they provide stable footing and establish a strong visual presence in the garden.
Plan for Proper Spacing and Layout
Even spacing creates order and harmony throughout your stone pathway design. We position stones consistently apart to maintain visual balance while ensuring comfortable walking surfaces.
Varied patterns combine different colored or textured stones to enhance visual interest. Mixing stone types strategically creates unique designs that reflect your personal style preferences.
Pathway width should accommodate comfortable two person walking at approximately 3 to 4 feet wide. We ensure adequate width prevents overcrowding and allows easy garden access for maintenance activities.
Incorporate Native Plants Along Edges
Native plant selection reduces maintenance while creating authentic regional garden character. We choose plants that thrive naturally in local conditions and complement the stone pathway materials.
Edge planting transforms pathway borders into lush garden features using flowers, shrubs, or ornamental grasses. Strategic plant placement along path edges creates inviting atmosphere and defines walkway boundaries clearly.
Regular maintenance keeps plants healthy and pathway edges well defined throughout growing seasons. We establish consistent care routines to preserve the rustic charm and natural beauty of stone garden paths.
Install a Gravel Garden Path for Low-Maintenance Beauty

Gravel garden paths offer an elegant, budget-friendly solution that combines beauty with minimal upkeep requirements. We’ll guide you through creating these versatile walkways that complement any garden style while providing excellent drainage and durability.
Choose the Ideal Gravel Size and Color
Smaller gravel creates the most comfortable walking surface for your garden path. Pea gravel measuring about 3/8 inch in diameter provides optimal drainage while remaining stable underfoot. Larger gravel pieces can shift easily and create an uneven, difficult walking experience.
Color selection allows you to coordinate your path with existing garden features and themes. Warm tan and gray options blend naturally with most landscapes, while white gravel creates striking contrast against dark plants. Brown tones offer earthy sophistication that complements rustic garden designs.
We recommend testing small samples of different gravel types in your garden before making final decisions. Natural lighting conditions and surrounding plants significantly influence how gravel colors appear throughout the day.
Create Proper Edging and Borders
Effective edging contains your gravel and maintains clean, professional looking borders. Galvanized steel edging provides durability and flexibility for curved paths, while pressure treated wood offers a natural appearance. Brick and stone edging create formal boundaries that complement traditional garden styles.
Installation requires positioning the edging flush with surrounding lawn or garden beds. We suggest setting gravel levels about 1/2 inch below the top edge to prevent spillover during rain or foot traffic. This technique keeps your path materials contained while maintaining neat appearances.
Plastic edging works well for budget conscious projects, though it may become visible over time. Stone borders provide the most permanent solution and integrate seamlessly with natural garden aesthetics.
Add Stepping Stones for Visual Interest
Stepping stones transform basic gravel paths into captivating walkways with improved functionality. We recommend placing stones directly on your compacted base layer for standard installations. For enhanced stability, embed stones in mortar before adding surrounding gravel.
Strategic placement creates rhythm and guides visitors naturally through your garden space. Space stepping stones according to comfortable walking strides, typically 18 to 24 inches apart for most adults. This spacing ensures safe, comfortable navigation while maintaining visual appeal.
Combining gravel with stepping stones allows you to blend rustic charm with modern design elements. Natural flagstones create informal, cottage garden aesthetics, while geometric concrete pavers offer contemporary sophistication that suits minimalist landscapes.
Build a Wooden Garden Path for Modern Elegance

Wooden garden paths bring warmth and sophistication to any outdoor space while creating a striking focal point that complements both contemporary and traditional industry designs.
Select Weather-Resistant Wood Materials
Pressure treated lumber stands as our top recommendation for ground contact applications since it prevents rot and insect damage effectively. This treated wood option provides the durability we need for long-lasting garden pathways that withstand moisture and soil contact.
Reclaimed wood materials offer exceptional character with their weathered textures and rustic appeal. We can achieve stunning vintage aesthetics while maintaining durability through proper maintenance and protective treatments.
Composite decking materials like Trex deliver the perfect solution for modern elegance with minimal upkeep requirements. These engineered products resist fading, staining, and warping while providing consistent appearance throughout changing seasons.
Cedar and redwood options naturally resist moisture and insects without chemical treatments. We appreciate these premium choices for their beautiful grain patterns and natural weather resistance properties.
Design Raised or Ground-Level Options
Elevated pathway designs create dramatic visual interest by separating the walkway from surrounding industry elements. These raised structures allow us to navigate uneven terrain while adding architectural dimension to garden spaces.
Ground level installations blend seamlessly into existing garden layouts for natural flow and understated elegance. We can create smooth transitions between different garden areas using flush-mounted wooden planks or decking boards.
Mixed material combinations enhance wooden paths through strategic integration with gravel, stone, or brick accents. These design approaches let us customize the pathway’s appearance while maintaining the warmth of natural wood elements.
Wooden plank sidewalks develop beautiful patina over time as they weather naturally in outdoor conditions. We can arrange planks in various patterns including parallel, diagonal, or herringbone layouts for unique visual effects.
Maintain and Protect Your Wood Investment
Proper base preparation requires installing gravel or crushed granite beneath wooden elements for essential drainage. This foundation prevents water accumulation that leads to premature wood deterioration and structural problems.
Weather resistant sealants protect our wooden pathways from moisture, UV damage, and temperature fluctuations. We should apply these protective coatings every 2-3 years depending on climate conditions and wood type.
Regular inspection schedules help us identify damaged boards, loose fasteners, or worn protective finishes before they become major problems. Monthly visual checks during growing season ensure our wooden paths remain safe and attractive.
Cleaning protocols involve removing debris, moss, and algae buildup that can create slippery surfaces and accelerate wood decay. We can use mild detergent answers and soft brushes to maintain clean, welcoming pathways throughout the year.
Construct a Concrete Garden Path for Durability

Concrete paths offer exceptional longevity and require minimal maintenance compared to other materials. We’ll guide you through creating a sturdy foundation that withstands heavy foot traffic and weather extremes.
Explore Stamped and Textured Finishes
Stamping tools transform plain concrete into beautiful stone, brick, or tile patterns that mimic expensive materials at a fraction of the cost. Professional contractors use rubber mats and specialized stamps to press intricate designs into freshly poured concrete before it fully sets. Timing becomes crucial since we must apply stamps while the concrete remains workable yet firm enough to hold the pattern.
Textured finishes create slip-resistant surfaces that enhance both safety and visual appeal. Broom finishes involve dragging a stiff brush across the surface to create parallel lines that improve traction in wet conditions. Float finishes produce smooth surfaces with subtle texture variations, while exposed aggregate reveals decorative stones within the concrete mix.
Add Color with Stains or Aggregates
Concrete stains penetrate deep into the surface to create permanent color that won’t chip or fade over time. Acid-based stains produce rich, variegated tones in earth colors like browns, greens, and blues. Water-based stains offer broader color options including vibrant reds, yellows, and purples that maintain consistent coverage.
Decorative aggregates mixed directly into the concrete create colorful speckled effects throughout the entire path. River pebbles, crushed glass, and colored stone chips become exposed through surface treatments that reveal these embedded materials. Integral color additives blend pigments throughout the concrete mix for uniform coloration that extends through the entire thickness.
Plan for Proper Drainage Answers
Sloping the path slightly ensures water flows away from walkways and prevents dangerous ice formation during winter months. We recommend a minimum slope of 1/4 inch per foot to achieve effective drainage without creating an uncomfortable walking surface. Cross-slopes direct water toward planted areas or drainage systems rather than allowing pooling.
Drainage channels installed along path edges capture and redirect runoff from surrounding industry areas. French drains beneath the concrete base prevent water accumulation that could cause cracking through freeze-thaw cycles. Permeable concrete mixes allow water to pass through the surface while maintaining structural integrity for pedestrian use.
Develop a Mulch Garden Path for Organic Integration

Mulch garden paths offer the perfect solution for gardeners seeking natural pathways that blend seamlessly with their industry. We’ll explore how organic materials create functional walkways while improving soil health over time.
Choose Between Bark, Wood Chips, or Leaves
Pine bark mulch stands as our top recommendation for durability and visual appeal. This material decomposes slowly while adding valuable organic matter to surrounding soil. We find it particularly attractive for formal garden settings where longevity matters most.
Cypress mulch provides excellent decay resistance and naturally repels insects. But, we must consider the higher cost and potential sustainability concerns when sourcing this material. This option works best for high-traffic areas requiring minimal maintenance.
Pine straw offers an affordable alternative that’s incredibly easy to spread across pathways. We recommend this material for budget-conscious gardeners, though it requires frequent replenishment and can become slippery when wet. The natural golden color complements most garden color schemes beautifully.
Leaves create the most economical mulch path option using materials readily available in most yards. We suggest shredding leaves before application to prevent matting and improve decomposition rates. Fresh leaf applications need more frequent maintenance than other mulch materials.
Create Defined Borders with Natural Materials
Stone edging provides the most permanent solution for containing mulch pathways. We recommend using fieldstone, river rocks, or limestone pieces to create clear boundaries between paths and garden beds. These materials offer excellent drainage while maintaining natural aesthetics.
Wood log borders bring rustic charm to organic garden paths. We suggest using naturally rot-resistant woods like cedar or locust for longevity. Half-buried logs create attractive raised edges that prevent mulch migration.
Bamboo edging delivers a sustainable option that’s both flexible and durable. We find bamboo particularly effective for curved pathway designs where rigid materials would create awkward angles. This material weathers naturally to complement organic garden themes.
Refresh and Maintain Your Mulch Path
Regular replenishment keeps mulch paths looking fresh and functioning properly. We recommend adding 1-2 inches of new material annually to maintain adequate depth and weed suppression. Spring applications work best for most climates.
Weed suppression becomes easier with proper preparation techniques. We suggest laying cardboard or newspaper beneath new mulch to block existing weeds effectively. This barrier decomposes naturally while preventing unwanted plant growth.
Leveling maintenance ensures safe, accessible walkways throughout the growing season. We recommend raking paths monthly to redistribute settled mulch and eliminate uneven surfaces. This practice prevents erosion and maintains consistent pathway width.
Plan a Mixed-Material Garden Path for Unique Character

Mixed-material garden paths create distinctive walkways that showcase our personal style and add visual depth to outdoor spaces. We can combine different textures, colors, and shapes to create unique pathways that stand out from traditional single-material designs.
Combine Complementary Textures and Colors
Selecting materials that harmonize in color, texture, or style ensures our mixed-material path looks intentional rather than chaotic. We achieve the best results when we pair materials that share common design elements while offering contrasting textures.
Pavers and gravel create balanced combinations where smooth surfaces meet textural variety. The gravel provides excellent drainage while pavers offer stable walking surfaces for high-traffic areas.
Stepping stones and bark deliver natural appeal that blends seamlessly with garden surroundings. This combination works particularly well in woodland gardens or areas where we want to maintain an organic feel.
Grass and bricks produce clean finishes that define pathway edges while maintaining softness. The brick borders contain the grass sections and prevent spreading into adjacent garden beds.
Cobblestones with gravel generate rustic appearances perfect for cottage-style gardens. The contrasting sizes create visual interest while both materials age beautifully over time.
Wooden walkways with mosaic tiles blend warmth and artistic elements for creative pathway designs. This combination allows us to incorporate colorful accents while maintaining natural wood tones.
Balance Different Material Proportions
Achieving proper proportions prevents any single material from overwhelming the pathway design. We maintain visual harmony by distributing materials thoughtfully throughout the path length.
Alternating patterns like checkerboard layouts create rhythm and prevent monotony in our pathway design. This approach works especially well with square or rectangular materials of similar sizes.
Transition marking uses different materials to signal changes between garden areas or pathway sections. We can employ contrasting materials at entrance points, curve locations, or destination areas.
Dominant and accent ratios follow the 70-30 rule where one material covers most of the path while accent materials provide visual interest. This proportion ensures our pathway maintains cohesion while adding character.
Pattern repetition throughout longer paths creates consistency and guides visitors along the route. We establish rhythm by repeating material combinations at regular intervals.
Ensure Smooth Transitions Between Materials
Creating seamless connections between different materials requires proper ground preparation and installation techniques. We achieve professional results by focusing on level surfaces and secure material placement.
Ground preparation starts with leveling the entire pathway area to prevent uneven surfaces. Compacted gravel or sand base layers provide stable foundations that accommodate different material thicknesses.
Seamless arrangement involves carefully positioning materials to eliminate gaps or awkward joints. We test layouts before final installation to identify potential problem areas.
Securing methods include appropriate adhesives or fillers that match our climate conditions and material types. Polymeric sand works well for filling joints between pavers, while industry adhesive secures loose stones.
Regular maintenance preserves both visual appeal and structural integrity over time. We schedule seasonal inspections to address settling, weed growth, or material displacement before problems worsen.
Design Curved Garden Paths for Dynamic Flow

Curved garden paths create movement and visual interest that transforms static landscapes into ever-changing experiences. These flowing walkways guide visitors naturally through your outdoor space while following the contours of your garden’s unique features.
Use Flexible Materials for Smooth Curves
Flexible materials like gravel, wood chips, and mulch excel at creating seamless curves without cracking or structural issues. We recommend these adaptable options because they conform easily to curved shapes, unlike rigid materials such as concrete or stone that can develop stress fractures along bends.
Gravel paths offer excellent drainage and can navigate tight curves effortlessly. Wood chips provide a natural woodland aesthetic while maintaining flexibility for gentle sweeping turns. Mulch pathways blend organically with garden beds and allow for easy adjustments as plants mature and landscapes evolve.
These materials also accommodate slope changes more effectively than rigid alternatives. Installation becomes simpler since you won’t need specialized cutting tools or complex fitting techniques required for inflexible materials.
Create Focal Points Along the Journey
Strategic focal points transform ordinary walks into captivating garden experiences that draw visitors deeper into your industry. We suggest placing statues, water features, or specimen plants at key locations along curved paths to create natural stopping points.
Garden sculptures work particularly well at path intersections or where curves create natural viewing areas. Water features like small fountains or birdbaths add both visual appeal and soothing sounds that enhance the sensory experience. Strategically placed plants such as ornamental grasses, flowering shrubs, or architectural specimens provide seasonal interest and frame pathway views.
These focal elements encourage exploration while preventing paths from feeling monotonous. Position them where curves naturally slow foot traffic, allowing visitors to pause and appreciate your garden’s carefully planned details.
Plan Sight Lines and Hidden Surprises
Thoughtful sight line planning creates anticipation and discovery throughout your curved garden path experience. We recommend framing distant views through strategic plant placement while concealing surprises that reveal themselves as visitors navigate each bend.
Frame attractive garden features or architectural elements using trees, large shrubs, or trellises to create natural windows along your path. These planned views draw people forward while providing preview glimpses of what lies ahead. Hide seating areas, garden art, or special plant collections behind curves so they surprise and delight visitors as they explore.
Vary the width of your curved paths to create intimate spaces that feel secluded and open areas that provide broader garden views. This rhythm of revelation keeps the journey interesting while encouraging slower, more contemplative movement through your outdoor space.
Illuminate Your Garden Path for Evening Enjoyment

Garden path lighting transforms your outdoor space into an enchanting nighttime sanctuary. Proper illumination extends the usability of your garden while creating a magical atmosphere that invites evening strolls.
Install Solar or Low-Voltage Lighting
Solar lighting offers the most straightforward installation option for garden paths. These fixtures harness sunlight during the day and automatically illuminate your walkways at dusk without requiring any electrical wiring. We recommend solar lights for homeowners seeking cost-effective answers that won’t impact electricity bills.
Low-voltage lighting systems provide superior customization and brightness control compared to solar alternatives. These energy-efficient fixtures operate at 12 volts, making them safer than traditional line voltage systems while delivering consistent illumination throughout the night. Installation involves running low-voltage cables from a transformer, allowing you to create intricate lighting designs with different fixture types.
Both options eliminate the need for hiring electricians, making them accessible DIY projects for most garden enthusiasts. Solar lights work best in areas receiving at least 6-8 hours of direct sunlight daily, while low-voltage systems perform reliably regardless of weather conditions.
Position Lights for Safety and Ambiance
Safety positioning requires strategic placement to illuminate uneven surfaces, steps, and path transitions. We suggest installing lights every 8 to 12 feet along your walkway to prevent the harsh “runway look” while ensuring adequate visibility for safe navigation. Focus on areas where the path changes direction or elevation to prevent trips and falls.
Ambiance lighting highlights your garden’s most attractive features beyond basic path illumination. Position fixtures to showcase specimen plants, architectural elements, water features, or garden sculptures that deserve nighttime attention. This layered approach creates depth and visual interest while drawing visitors along your carefully designed route.
Consider using different light intensities to establish hierarchy within your garden lighting scheme. Brighter lights guide movement along main pathways, while softer accent lighting creates intimate spaces and highlights decorative elements without overwhelming the overall design.
Choose Weather-Resistant Fixtures
Brass fixtures offer exceptional durability and develop an attractive patina over time that complements natural garden settings. These premium materials withstand harsh weather conditions while maintaining their structural integrity for decades with minimal maintenance requirements.
Copper lighting fixtures provide similar longevity with distinctive aesthetic appeal that ages gracefully in outdoor environments. The natural oxidation process creates unique color variations that enhance rather than detract from the fixture’s appearance over time.
High-quality plastic fixtures deliver reliable performance at budget-friendly price points when manufactured with UV-resistant materials. Look for fixtures specifically rated for exterior use with IP65 or higher ratings to ensure protection against rain, snow, and temperature fluctuations.
Verify that all chosen fixtures carry appropriate outdoor ratings before installation. Weather-resistant design features include sealed electrical connections, corrosion-resistant hardware, and impact-resistant lenses that maintain clarity even though exposure to the elements.
Conclusion
We’ve explored many garden path options that can transform your outdoor space into a personalized sanctuary. From timeless brick patterns to natural stone walkways each material offers unique benefits that suit different budgets and design preferences.
The key to success lies in matching your path choice to your garden’s character and your maintenance preferences. Whether you opt for elegant gravel curves or sophisticated wooden boardwalks the right path will enhance both functionality and visual appeal.
Remember that thoughtful lighting and proper installation techniques ensure your garden paths remain beautiful and safe for years to come. With these ideas as your foundation you’re ready to create pathways that truly reflect your style while adding lasting value to your property.
Frequently Asked Questions
What are the most popular materials for garden paths?
The most popular materials for garden paths include brick, natural stone, gravel, wood, concrete, and mulch. Each material offers unique benefits: brick provides classic charm and durability, natural stone offers rustic appeal, gravel is budget-friendly and elegant, wood adds warmth, concrete ensures longevity, and mulch creates a natural look that integrates seamlessly with gardens.
How do I choose the right garden path material for my budget?
For budget-friendly options, consider gravel or mulch paths, which are cost-effective and easy to install. Mid-range choices include brick and concrete paths that offer good value and durability. For higher budgets, natural stone and premium wood materials provide luxury appeal and long-term investment value while significantly enhancing property worth.
What’s the difference between sand-set and mortared brick paths?
Sand-set brick paths allow for natural drainage and easier adjustments, making them ideal for DIY projects and areas with changing weather conditions. Mortared systems provide permanent stability and are better for high-traffic areas, but require professional installation and don’t allow for easy modifications or natural water drainage through the surface.
How do I maintain different types of garden paths?
Maintenance varies by material: brick paths need occasional re-leveling and weed control, stone paths require gap cleaning and repositioning, gravel needs regular raking and replenishing, wooden paths need weather treatment and rot inspection, concrete requires crack sealing, and mulch paths need regular replenishing and border maintenance for optimal appearance and functionality.
Can I combine different materials in one garden path?
Yes, mixed-material paths create distinctive walkways with visual depth and personal style. Popular combinations include pavers with gravel, stepping stones with bark, or grass with bricks. Success depends on choosing complementary textures and colors, proper proportion balancing, seamless transitions, and thorough ground preparation for structural integrity.
How do curved garden paths enhance landscape design?
Curved paths create movement and visual interest, transforming static landscapes into dynamic experiences. They encourage exploration by revealing hidden surprises and focal points along the journey. Curves work best with flexible materials like gravel, wood chips, and mulch, allowing for smooth installation and natural integration with existing landscape features.
What lighting options work best for garden paths?
Solar and low-voltage lighting are the most popular options due to their energy efficiency and easy installation. Position lights strategically for safety and ambiance, highlighting garden features without overwhelming the space. Choose weather-resistant fixtures for durability, and consider various styles like stake lights, lanterns, or embedded fixtures to match your garden’s aesthetic.
How wide should a garden path be?
Garden path width depends on intended use and garden size. Primary walkways should be 4-5 feet wide to accommodate two people walking side by side. Secondary paths can be 2-3 feet wide for single-person access. Varying width along curved paths creates intimate spaces and broader views, enhancing the overall garden experience and visual interest.


