Transform your outdoor space into a stunning garden paradise without very costly. We’ve all dreamed of having that picture-perfect garden but assumed it’d cost a fortune. The truth is you can create an amazing outdoor oasis using simple DIY techniques and affordable materials you probably already have at home.
Whether you’re working with a sprawling backyard or a tiny balcony we’ll show you how to maximize every inch of your space. From vertical planters made with repurposed materials to clever container gardens that move with the seasons these projects are perfect for beginners and seasoned gardeners alike.
Ready to get your hands dirty and create something beautiful? We’ve gathered the most effective DIY garden ideas that’ll transform your space into the envy of the neighborhood while keeping your budget intact.
Create a Stunning Container Garden With Repurposed Materials
Container gardening with repurposed materials lets us transform everyday items into extraordinary planters while keeping costs minimal. We can create beautiful garden displays using items we already have at home.
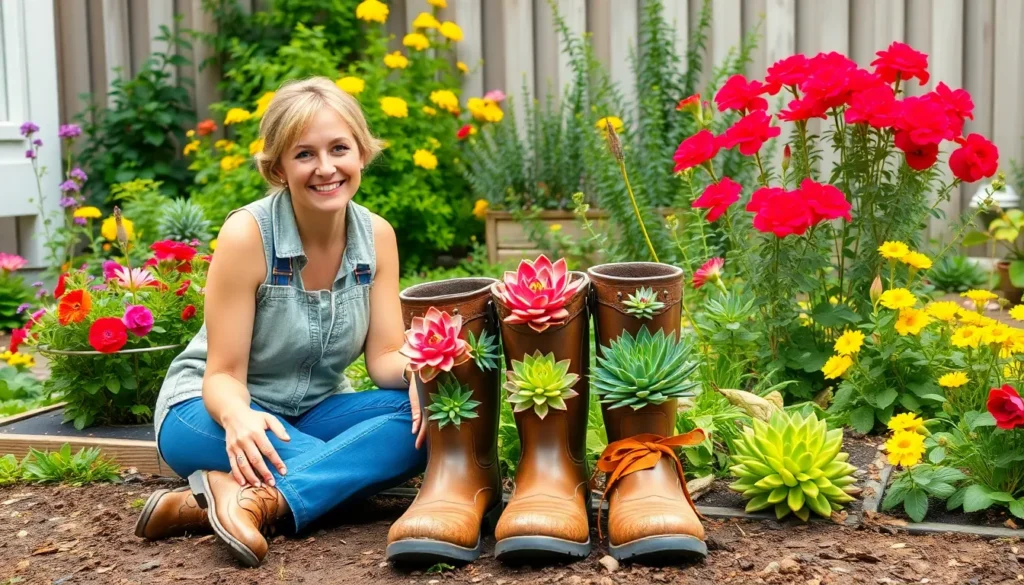
Use Old Boots and Shoes as Unique Planters
Old boots make charming planters that add personality to our garden spaces. We drill drainage holes in the soles and fill them with potting soil for small plants like succulents, herbs, or trailing flowers. Rubber boots work exceptionally well since they’re waterproof and durable.
Worn sneakers create whimsical displays when we pair them with colorful flowers or cascading plants. We arrange multiple pairs on shelves, steps, or fence posts to create an eye-catching garden feature. Tennis shoes with fabric uppers work best for plants that need good drainage.
Children’s outgrown shoes provide perfect mini planters for small succulents or air plants. We can paint or decorate them to match our garden theme before adding plants. These tiny containers work wonderfully for windowsill gardens or tabletop displays.
Transform Wooden Crates Into Tiered Garden Displays
Wooden fruit crates stack perfectly to create multi-level garden displays that maximize our growing space. We line them with industry fabric to prevent soil spillage while maintaining proper drainage. Apple crates and wine boxes work exceptionally well for this purpose.
Staggered arrangements create visual depth when we position crates at different heights and angles. We fill each level with different plants like herbs on top, flowers in the middle, and trailing plants at the bottom. This technique works perfectly for balconies and small patios.
Weatherproofing extends their lifespan significantly when we apply wood sealant or paint before planting. We can customize the colors to match our outdoor decor while protecting the wood from moisture damage. Darker stains help wooden crates blend naturally with garden surroundings.
Convert Plastic Bottles Into Hanging Gardens
Two-liter bottles become excellent hanging planters when we cut them strategically and add drainage holes. We remove the labels, cut openings in the sides, and thread rope through the cap area for hanging. These work perfectly for herbs, small vegetables, or trailing flowers.
Self-watering systems form easily by inverting bottles and creating wicks from cotton string. We fill the cap end with water and thread the wick through to the soil section above. This method keeps plants consistently watered for several days.
Vertical garden walls develop quickly when we mount multiple bottles at different heights along fences or walls. We space them 12 to 18 inches apart and stagger the heights for visual appeal. Clear bottles showcase root systems while colored ones add decorative elements to our garden displays.
Build Vertical Gardens for Small Spaces
 1")
Maximizing growing space becomes effortless when we think vertically instead of horizontally. These space-saving answers transform bare walls and fences into productive garden areas.
Construct a Pallet Wall Garden
Old pallets offer an excellent foundation for creating stunning wall gardens that maximize our planting potential. We can transform these discarded wooden structures by attaching them directly to existing fences or walls using sturdy brackets.
Arranging the pallets in either staggered or straightforward patterns gives us flexibility in our design approach. Staggered arrangements create visual interest and accommodate plants of different sizes, while straight patterns provide clean lines for a more organized appearance.
Filling the pallet slats with industry fabric helps contain soil while allowing proper drainage. We then add potting mix and plant directly into the openings, creating pockets of greenery that cascade beautifully down the wooden structure.
Design a Ladder Plant Stand
Repurposing an old ladder transforms forgotten items into functional garden features that add vertical growing space. We can convert these household items by attaching window boxes or sturdy hooks to each rung, creating multiple planting levels.
Leaning the prepared ladder against a fence or wall provides instant stability and support. This positioning also allows us to use the structure as a natural trellis for climbing plants like beans, peas, or flowering vines.
Securing the ladder with additional brackets ensures safety while supporting the weight of soil and plants. We can paint or stain the wood to match our garden aesthetic and protect it from weather damage.
Install Gutter Gardens on Fences
Using old gutters as horizontal planters creates continuous growing space along fence lines without taking up ground area. We attach these repurposed materials directly to fence posts using heavy-duty brackets designed for outdoor use.
Spacing the gutters evenly at different heights allows us to plant various crops while ensuring each level receives adequate sunlight. This arrangement works particularly well for shallow-rooted plants like lettuce, herbs, and strawberries.
Drilling drainage holes every 12 inches prevents water buildup that could damage both plants and fence materials. We can also add end caps to contain soil while allowing excess water to escape through the drainage holes.
Design Beautiful Garden Pathways on a Budget
 2")
Creating stunning garden pathways doesn’t require expensive materials or professional installation. We can transform our outdoor spaces with affordable DIY answers that deliver impressive results.
Lay Stepping Stones From Concrete Molds
Concrete molds offer an excellent way to create faux stones that mimic natural stone’s appearance without the hefty price tag. We can create puzzle piece paths using these molds that blend seamlessly with our garden environment. Pour concrete into the molds and let them set for 24-48 hours before carefully removing each stone. Position the stones strategically to create a natural walking flow through flower beds and landscaped areas. These stepping stones cost significantly less than genuine stone while providing the same visual appeal and durability.
Create Gravel Paths With Edging
Gravel paths require minimal materials and deliver maximum impact for budget conscious gardeners. We need just three basic components: gravel, industry fabric, and edging materials like wood or plastic strips. Install the industry fabric first to prevent weeds from growing through the gravel surface. Add edging materials along both sides to contain the gravel and create clean, defined borders. Choose from pea gravel, crushed stone, or decorative rock based on your garden’s aesthetic and your budget at approximately $5 per bag.
Build Wooden Walkways From Reclaimed Lumber
Reclaimed wood provides an eco friendly and budget conscious solution for constructing rustic garden walkways. We can source weathered boards from old fences, pallets, or construction sites to create charming wooden paths. Sand the boards lightly to remove splinters while preserving their natural character and patina. Lay the boards perpendicular to the walkway direction for stability or arrange them in interesting patterns like herringbone or basket weave designs. Apply a clear wood sealant to extend the lifespan of your reclaimed lumber walkway while maintaining its rustic appeal.
Craft Custom Plant Markers and Garden Signs
 3")
Creating personalized plant markers and garden signs adds both functionality and charm to our outdoor spaces. We can transform simple materials into beautiful identification systems that help us keep track of our plants while improving our garden’s visual appeal.
Make Painted Rock Plant Labels
Painted rock plant labels offer a natural and weatherproof solution for identifying our garden plants. We start by collecting smooth, flat rocks from our yard or local area, choosing stones that are large enough to write plant names clearly. Clean rocks thoroughly with soap and water, then let them dry completely before painting.
Use acrylic paints to write plant names on the rocks, applying a base coat of white or light color first to make the text more visible. We can add decorative elements like small drawings of the plants or colorful borders to make each marker unique. Seal the painted rocks with clear outdoor varnish to protect them from weather damage and fading.
Place these rock labels directly next to plants or partially bury them in the soil for a natural look. They work especially well in herb gardens, vegetable patches, and flower beds where we need clear plant identification.
Design Wooden Stake Markers
Wooden stake markers provide a classic and rustic appearance while offering excellent durability in outdoor conditions. We can create these markers using cedar or pine wood stakes, which naturally resist weather damage and insects. Cut stakes to uniform lengths of 8 to 12 inches, with one end pointed for easy soil insertion.
Sand the wood smooth and apply wood stain or paint in colors that complement our garden design. We write plant names using permanent markers, wood burning tools, or stencils with outdoor paint for professional looking results. Create decorative tops by cutting the stakes into arrow shapes, rounded edges, or adding small carved details.
Insert wooden stakes 2 to 3 inches deep into the soil next to each plant, ensuring they remain stable in wind and rain. These markers work particularly well in vegetable gardens and herb plots where we need clear, readable identification from a distance.
Create Chalkboard Plant Tags
Chalkboard plant tags offer the ultimate flexibility for gardeners who frequently change their planting arrangements. We can make these tags using small pieces of wood painted with chalkboard paint, or purchase pre made chalkboard tags from create stores. The erasable surface allows us to update plant information as needed throughout growing seasons.
Create stakes by attaching the chalkboard tags to wooden dowels or metal garden stakes using waterproof adhesive or small screws. We can also make hanging versions by drilling small holes and adding twine or wire for attachment to plant cages or trellises.
Write on the chalkboard surface using chalk markers rather than regular chalk, as these markers resist rain and provide clearer text. Update tags easily when replanting areas or when plants mature and require different care instructions. These tags work exceptionally well in container gardens and raised beds where plant varieties may change seasonally.


Establish Low-Maintenance Garden Borders
 4")
Creating defined borders doesn’t require expensive materials or constant upkeep. We’ll show you how to establish beautiful boundaries that practically maintain themselves.
Build Raised Beds With Recycled Materials
Raised beds offer superior drainage and soil quality while reducing waste through creative material reuse. We can construct these garden features using old pallets, weathered bricks, or reclaimed wooden planks that might otherwise end up in landfills.
Functionality drives our design choices when selecting recycled materials. Old pallets work exceptionally well because they’re already structured for stacking and provide natural drainage gaps. Weathered bricks create permanent borders that improve over time, developing character through natural aging processes.
Cost savings become substantial when we source materials from construction sites, demolition projects, or our own storage areas. Reclaimed wooden planks from old fences or decking create rustic charm while serving practical purposes. These materials often perform better than new alternatives because they’re already weathered and stable.
Install Stone and Rock Edging
Stone edging creates permanent boundaries that require virtually no maintenance once installed. We position these natural materials to define clear separations between lawn areas, flower beds, and walkways.
Aesthetic appeal increases dramatically when we select stones that complement our existing industry colors and textures. River rocks work well in curved borders, while flat fieldstones create clean geometric lines. Natural stone weathers beautifully, developing moss and patina that enhances visual interest over time.
Durability makes stone edging our most reliable long term border solution. These materials withstand freeze thaw cycles, heavy rainfall, and foot traffic without shifting or deteriorating. We can install them once and expect decades of reliable service with minimal intervention.
Plant Natural Living Borders
Living borders provide year round beauty while requiring less maintenance than traditional flower beds. We select plants that naturally thrive in our local conditions, reducing the need for fertilizers, pesticides, and frequent watering.
Perennials like clematis and English lavender return annually without replanting, making them ideal choices for busy gardeners. These plants establish strong root systems over time, becoming more drought tolerant and self sufficient with each growing season.
Evergreen options maintain color and structure throughout winter months when other plants go dormant. We choose native shrubs and trees that provide habitat for local wildlife while creating natural barriers. These plants adapt to local soil conditions and climate patterns, thriving with minimal intervention once established.
Set Up Efficient Watering Systems
 5")
Water management becomes crucial when you’re creating a beautiful garden on a budget. We’ll show you three cost-effective DIY watering answers that conserve water while keeping plants healthy and thriving.
Create Drip Irrigation From Plastic Bottles
Plastic bottles transform into effective drip irrigation systems with minimal effort and materials. We recommend collecting empty bottles of various sizes and using a drill or hammer with nail to create small holes in each bottle cap. Fill the bottles with water and screw the caps on tightly before inverting them into the soil near your plants.
Position these DIY drip systems about 2-3 inches from plant stems to ensure proper water distribution. The slow water release reduces evaporation by up to 50% compared to traditional watering methods and prevents wasteful runoff. Large bottles work best for established plants while smaller ones suit seedlings and delicate herbs perfectly.
Benefits include consistent moisture levels and reduced watering frequency from daily to every 3-4 days. We’ve found this method particularly effective for tomatoes, peppers, and container plants that require steady hydration.
Build Self-Watering Planters
Self-watering planters eliminate guesswork from garden maintenance while promoting healthier root development. We suggest choosing planters with built-in water reservoirs at the bottom or creating your own using nested containers with wicking systems. Add water to the reservoir section which plants draw from as needed through capillary action.
These systems maintain optimal soil moisture without overwatering and reduce watering frequency by 60-70% during growing season. Fill the reservoir completely and watch as plants regulate their own water intake naturally. Root growth improves significantly because roots extend deeper searching for consistent moisture rather than staying shallow.
Commercial self-watering planters range from $15-50 but DIY versions cost under $10 using plastic storage containers and cotton rope wicks. We recommend this method for busy gardeners and vacation plant care since systems can sustain plants for 1-2 weeks unattended.
Install Rain Barrel Collection Systems
Rain barrels capture free water from your roof while reducing stormwater runoff and utility costs. We start by positioning food-grade barrels under downspouts and installing diverter kits that redirect rainwater into storage containers. Connect hoses to barrel spigots for easy water distribution throughout garden areas.
A single inch of rainfall on a 1,000 square foot roof generates approximately 600 gallons of collectible water. Systems pay for themselves within one growing season through reduced water bills and provide chemical-free irrigation that plants prefer over treated municipal water.
Installation requires basic tools and takes 2-3 hours for most homeowners to complete. We recommend screens or covers to prevent mosquito breeding and debris accumulation. Position barrels on stable platforms or concrete blocks for better water pressure and easier hose attachment.
Storage capacity varies from 50-100 gallons per barrel depending on your roof size and local rainfall patterns. Multiple barrels can connect together for increased water storage during dry periods.


Add Decorative Elements to Enhance Garden Appeal
 6")
Transforming our garden’s visual impact doesn’t require expensive purchases when we know how to repurpose materials creatively. Strategic placement of handmade decorative features creates focal points that draw the eye and add personality to our outdoor spaces.
Create Garden Art From Salvaged Items
Repurposing old materials into garden art gives our space character while keeping costs minimal. Old pallets transform into stunning vertical planters or rustic trellises that support climbing plants beautifully. Worn boots and containers become whimsical planters that spark conversation and add unexpected charm to garden corners.
Sculptural elements from recycled materials create unique focal points throughout our industry. Metal scraps weld together into abstract garden sculptures, while broken pottery pieces mosaic into stepping stones or decorative borders. Weathered wood pieces stack into artistic installations that complement natural surroundings perfectly.
Vintage finds from thrift stores or garage sales become garden treasures with minimal modification. Old wheelbarrows convert into mobile planters, while antique watering cans serve as decorative displays when filled with seasonal flowers. These salvaged pieces tell stories while improving our garden’s visual narrative.
Build Trellises for Climbing Plants
Climbing plants need sturdy support structures that we can build affordably using common materials. DIY trellis herb gardens combine functionality with aesthetics by attaching buckets to simple frame structures for vertical growing space. This approach maximizes our planting area while creating an organized display of herbs and climbing vegetables.
Pallet trellises offer robust support for heavier climbing plants like roses or grape vines. We secure pallets vertically against fences or walls, then train plants to grow through the natural openings. The rustic appearance complements cottage garden styles while providing excellent structural support.
Bamboo and wire trellises work perfectly for lighter climbing plants such as peas, beans, or morning glories. These materials bend easily into custom shapes and sizes that fit our exact garden layouts. The natural bamboo weathers beautifully over time, blending seamlessly with surrounding plantings.
Create Outdoor Lighting With Solar Options
Solar powered lighting eliminates electrical work while providing eco friendly illumination for our garden spaces. Pathway lighting using solar fixtures guides visitors safely while highlighting our garden’s best features during evening hours. These lights charge during the day and automatically illuminate at dusk without ongoing electricity costs.
String lights powered by solar panels create magical ambiance around seating areas, pergolas, or garden structures. We position solar panels in sunny locations while running light strings to shaded areas where we want atmospheric lighting. This flexibility allows us to illuminate any garden feature regardless of sun exposure.
Accent lighting with solar spotlights showcases our favorite plants, sculptures, or architectural elements after dark. We angle these adjustable fixtures to highlight exact features like specimen trees, water features, or decorative planters. The focused beams create dramatic shadows and visual interest that transforms our garden’s nighttime appearance.
Conclusion
We’ve shown you that creating your dream garden doesn’t require very costly. From repurposed containers to DIY irrigation systems these budget-friendly projects prove that creativity matters more than cash when it comes to outdoor transformation.
Your garden is waiting for that personal touch that only you can provide. Whether you’re working with a tiny balcony or sprawling backyard these adaptable ideas will help you maximize every square inch of space.
Start small with one or two projects that excite you most. As your confidence grows you’ll discover endless possibilities for turning everyday items into garden treasures. Remember that the most beautiful gardens are built over time not overnight.
Your outdoor oasis is just a weekend project away. Grab those recycled materials and let’s get growing!
Frequently Asked Questions
Can I create a beautiful garden on a tight budget?
Yes, you can create a stunning garden without spending a lot of money. Use simple DIY techniques and affordable materials found at home, such as repurposing old boots, plastic bottles, and wooden crates as planters. Focus on vertical gardening and container solutions to maximize space while minimizing costs.
What materials can I repurpose for container gardening?
Common household items make excellent planters. Old boots and shoes work great for succulents and herbs after drilling drainage holes. Wooden crates can be transformed into tiered displays, plastic bottles into hanging gardens, and even old ladders can become multi-level plant stands.
How do I start vertical gardening in small spaces?
Vertical gardening maximizes planting potential in limited areas. Attach pallets to fences or walls for pallet gardens, repurpose old ladders as plant stands, or install gutter gardens on fences. These solutions create multiple planting levels while saving valuable ground space.
What are some budget-friendly garden pathway ideas?
Create affordable pathways using concrete molds to mimic natural stone, build gravel paths with landscape fabric and edging, or construct wooden walkways from reclaimed lumber. These options provide attractive, functional pathways without breaking the budget while adding charm to your garden.
How can I make my own plant markers and garden signs?
Create personalized plant markers using painted rocks for weatherproof labels, wooden stakes for a rustic look, or chalkboard tags for flexibility. These DIY markers enhance both functionality and visual appeal while helping you keep track of your plants affordably.
What are low-maintenance border options for gardens?
Build raised beds using recycled pallets or weathered bricks for improved drainage. Create stone and rock edging for permanent, durable boundaries, or plant natural living borders that provide year-round beauty with minimal upkeep. These options reduce maintenance while enhancing aesthetic appeal.
How can I create efficient watering systems on a budget?
Implement DIY watering solutions like drip irrigation using inverted plastic bottles, build self-watering planters with built-in reservoirs, or install rain barrel systems to collect free water from your roof. These methods reduce water waste and lower utility costs.
What decorative elements can I add using repurposed materials?
Transform salvaged items into garden art, such as converting old wheelbarrows into unique displays or building trellises from affordable materials. Add solar-powered lighting for eco-friendly illumination and create herb gardens from pallets to combine functionality with visual appeal.