Growing fresh tomatoes indoors has never been easier thanks to AeroGarden’s innovative hydroponic systems. We’ve discovered that these compact countertop gardens can produce surprisingly robust tomato harvests year-round without soil mess or outdoor space requirements.
AeroGarden tomatoes offer home gardeners the perfect solution for enjoying vine-ripened flavor regardless of season or living situation. Whether you’re dealing with harsh winters limited outdoor space or simply want fresh tomatoes at your fingertips these smart growing systems deliver consistent results.
We’ll explore everything you need to know about successfully growing tomatoes in your AeroGarden from selecting the best varieties to maximizing your harvest. You’ll learn proven techniques that ensure your indoor tomato garden thrives while avoiding common mistakes that can limit your success.
What You Need to Get Started
Growing AeroGarden tomatoes requires exact equipment and materials to create the optimal hydroponic growing environment. We’ve compiled the essential components to ensure your tomato growing success from day one.
AeroGarden System Requirements
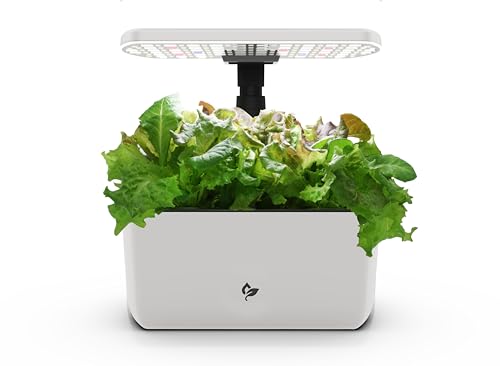
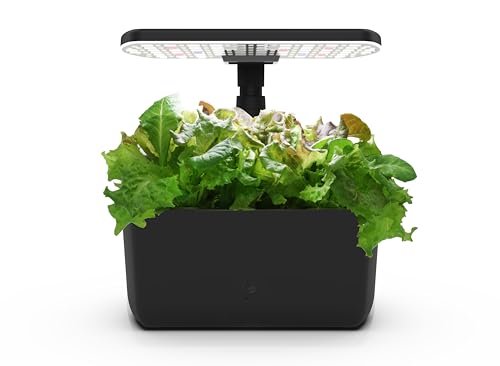
AeroGarden models with 12 inches or more height clearance accommodate tomato plants throughout their growing cycle. The AeroGarden Bounty Elite provides 24 inches of adjustable height and supports up to 9 plants simultaneously. AeroGarden Farm models offer 24 to 36 inches of growing space for larger tomato varieties like cherry and grape tomatoes.
Water reservoir capacity determines maintenance frequency and plant health. Models with 4-liter reservoirs require refilling every 2-3 weeks during peak growing season. LED grow lights must deliver full spectrum illumination with automatic 15-hour daily cycles. Built-in pump systems circulate water and nutrients every 30 minutes to maintain proper root oxygenation.
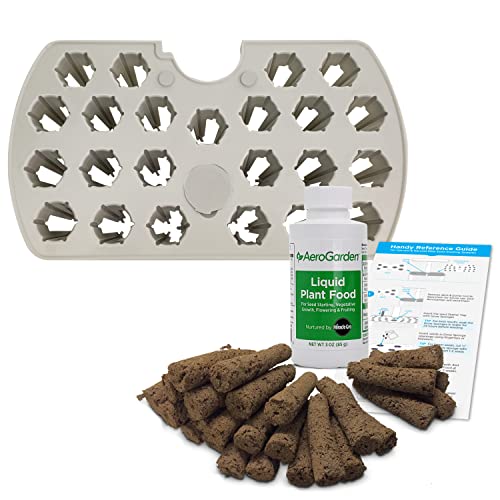
Seed Pod Kit Selection
Cherry tomato seed pods produce the highest yields in AeroGarden systems with harvest periods extending 4-6 months. Red Heirloom Cherry varieties mature in 65-75 days and generate 200-300 tomatoes per plant. Golden Harvest cherry tomatoes ripen in 60-70 days with sweet yellow fruits measuring 1 inch in diameter.
Mighty Mini tomatoes reach full size in 50-60 days and produce compact plants ideal for smaller AeroGarden models. Patio tomatoes grow to 12 inches tall and yield medium-sized fruits perfect for slicing. We recommend starting with 3-6 tomato pods depending on your AeroGarden’s capacity and desired harvest volume.
Additional Supplies and Tools
AeroGarden liquid nutrients provide essential minerals through concentrated formulas designed for hydroponic systems. Each 4-ounce bottle supports 24-36 weeks of continuous growing across multiple harvest cycles. pH test strips monitor water acidity levels between 5.5-6.5 for optimal nutrient absorption.
Plant stakes and ties support tomato vines once they exceed 8 inches in height. Pruning shears remove dead leaves and encourage productive growth patterns. Grow lights replacement bulbs extend system lifespan beyond the standard 2-year LED warranty period. Clean microfiber cloths maintain equipment hygiene and prevent algae buildup in water reservoirs.
| Supply Category | Essential Items | Quantity Needed |
|---|---|---|
| Nutrients | Liquid plant food | 1 bottle per 6 months |
| Support Tools | Plant stakes | 2-3 per tomato plant |
| Maintenance | pH test strips | 1 pack per growing season |
| Harvesting | Pruning shears | 1 pair |

Setting Up Your AeroGarden for Tomatoes

Proper setup creates the foundation for successful tomato growth in your hydroponic system. Following these essential steps ensures optimal growing conditions from day one.
Assembling the AeroGarden Unit
Unpack all components from your AeroGarden box and lay them out on a clean, flat surface. Locate the instruction manual and identify each piece before beginning assembly.
Attach the base components according to the manufacturer’s specifications. Connect the water reservoir to the growing deck by aligning the tabs and pressing firmly until you hear a click.
Position your assembled unit in a stable location near an electrical outlet. Avoid areas with direct drafts or extreme temperature fluctuations that could stress your tomato plants. Choose a spot where the unit sits level and has access to at least 24 inches of vertical clearance for plant growth.
Test the unit’s stability by gently rocking it from side to side. A properly assembled AeroGarden remains steady and does not wobble when touched.
Installing the Grow Light
Secure the light arm to the base unit by inserting it into the designated mounting holes. Push down firmly until the arm locks into place with an audible click.
Extend the light hood to its starting position approximately 12 inches above the growing deck. Most AeroGarden models feature adjustment markings on the light arm for precise positioning.
Maintain a 3 to 5 inch distance between the light hood and the tops of your tomato plants throughout their growth cycle. Adjust the height weekly as plants develop to prevent burning while ensuring adequate light exposure.
Connect the power cord to your electrical outlet and test the light system. The LED lights activate immediately when plugged in and follow the programmed 15 hour on, 9 hour off cycle.
Adding Water and Nutrients
Fill the water reservoir with fresh, clean water up to the maximum fill line marked inside the bowl. Use room temperature water between 65°F and 75°F for optimal nutrient absorption.
Add the recommended amount of AeroGarden liquid nutrients as specified on the bottle label. Most systems require 8ml of nutrients per gallon of water for the initial setup.
Mix the nutrient solution by gently stirring with a clean spoon or by running the pump for 30 seconds if your model includes this feature. The water changes from clear to a light amber color when properly mixed.
Monitor nutrient levels every 14 days and replenish according to the AeroGarden feeding schedule. The control panel displays “Add Nutrients” when the system requires feeding, typically occurring every two weeks during active growing periods.
Planting Your Tomato Seeds

Planting tomato seeds in your AeroGarden requires selecting the right varieties and following exact techniques for hydroponic success. Microdwarf tomato varieties work best as these determinate plants typically stay 12 inches tall or less, making them perfect for AeroGarden units.
Preparing the Seed Pods
AeroGarden seed pods come pre-designed for hydroponic growth and require minimal preparation before planting. Remove the seed pods from their packaging and examine each pod for any damage or defects. Check that the growing medium inside each pod appears moist and properly positioned. Place the pods in your AeroGarden according to the spacing guidelines provided with your exact model.
Nutrient solution preparation involves using AeroGarden’s specialized liquid nutrients mixed with water at the recommended ratios. Fill your reservoir with the appropriate amount of water for your model size. Add the nutrient solution according to package directions, typically 2 capfuls for smaller units or 4 capfuls for larger models.
Proper Seed Placement Techniques
Seed depth placement follows the exact guidelines marked on each AeroGarden seed pod for optimal germination rates. Center each tomato seed in the designated planting hole within the pod. Cover the seed completely with the included growing medium, ensuring no seed remains exposed to light. Press the growing medium gently around the seed without compacting it too firmly.
Single seed placement per pod prevents overcrowding and ensures each plant receives adequate nutrients and space for development. Avoid placing multiple seeds in one pod as this creates competition for resources. Label each pod if growing different tomato varieties to track their progress and harvest times accurately.
Initial Watering Guidelines
Hydroponic water systems eliminate traditional watering requirements since the AeroGarden automatically circulates nutrient solution to plant roots. Fill the water reservoir completely when first setting up your system. Monitor the water level indicator weekly and refill as needed to maintain proper circulation.
Reservoir maintenance involves checking water levels every 3-4 days during active growing periods. Top off the reservoir with plain water between full nutrient changes. Replace the entire nutrient solution every 2 weeks to prevent salt buildup and maintain optimal growing conditions. Keep water temperature between 70º-76ºF for optimal fruit set and healthy root development.
Caring for Your AeroGarden Tomatoes

Proper care ensures your hydroponic tomatoes produce abundant harvests throughout their growing cycle. Daily monitoring and weekly maintenance create the foundation for successful AeroGarden tomato cultivation.
Daily Maintenance Routine
Position grow lights 3-5 inches above plant tops to prevent leaf burning while providing adequate illumination. Moving lights too close causes heat stress and yellowing leaves.
Inspect plants for signs of stress or disease during your daily check. Look for wilting leaves, unusual discoloration, or pest activity that requires immediate attention.
Adjust light height as plants grow to maintain the optimal 3-5 inch distance throughout the growth cycle. Plants can grow several inches weekly during peak growing periods.
Monitor water levels in the reservoir to ensure roots receive consistent hydration. The water level indicator shows when refilling becomes necessary.
Weekly Water and Nutrient Changes
Change water every 2-3 weeks when growing tomatoes due to their extended production period and high nutrient consumption. Extended growing cycles require more frequent water changes than leafy greens.
Add liquid nutrients according to manufacturer instructions to maintain optimal plant health. Nutrient buildup occurs when answers remain unchanged for extended periods.
Replace entire reservoir contents rather than simply topping off water levels. Fresh nutrient answers prevent salt accumulation that affects plant growth.
Clean the water reservoir during changes to remove algae buildup and maintain system hygiene. Empty reservoirs allow for thorough cleaning and inspection.
Monitoring pH Levels
Test water pH weekly using pH test strips to ensure levels remain between 6.0 and 6.8 for optimal tomato growth. This pH range maximizes nutrient absorption in hydroponic systems.
Adjust pH using appropriate answers when readings fall outside the optimal range. High pH reduces iron and phosphorus availability to plants.
Record pH measurements to track patterns and identify potential system issues before they affect plant health. Consistent monitoring prevents nutrient deficiency problems.
Check pH after adding nutrients since liquid fertilizers can alter water chemistry. Fresh nutrient additions often change pH levels temporarily.

Managing Light and Growth Conditions

Proper light management and environmental control directly impact the success of your AeroGarden tomato harvest. These key factors determine fruit development and overall plant health.
Adjusting Light Height as Plants Grow
Maintaining 6 to 8 inches of distance between LED lights and plant tops prevents burning while ensuring adequate illumination. Most AeroGarden models feature automated light settings, though manual adjustments become necessary as tomato plants mature.
Monitor plant height daily and raise the lights accordingly. Cherry tomato varieties typically require height adjustments every 7 to 10 days during their peak growth phase. Position the grow panel to accommodate the tallest plant in your garden.
Excessive proximity causes leaf scorching and wilting. Insufficient light distance results in leggy growth and reduced fruit production. Check for yellowing or browning leaf tips as indicators of light stress.
Optimal Light Timing Settings
AeroGarden models operate on pre-programmed 16-hour light cycles with 8 hours of darkness to simulate natural day-night patterns. This timing supports healthy photosynthesis and flowering in tomato plants.
Consistent lighting schedules promote steady growth and fruit development. Most units automatically manage these cycles without intervention. Some advanced models allow manual timing adjustments for exact growing requirements.
Avoid disrupting the established light cycle once plants begin flowering. Tomatoes require darkness periods for proper fruit set and sugar development. Extended light exposure can stress plants and reduce overall yields.
Temperature and Humidity Control
Maintaining temperatures between 70°F and 76°F (21°C to 24°C) optimizes fruit set in AeroGarden tomato systems. Position your unit away from sunny windows to prevent overheating that damages plant development.
| Temperature Range | Plant Response |
|---|---|
| Below 70°F (21°C) | Slow growth and poor fruit set |
| 70°F – 76°F (21°C – 24°C) | Optimal growth and flowering |
| Above 76°F (24°C) | Heat stress and flower drop |
Room temperature fluctuations affect nutrient uptake and root health. Place the AeroGarden in locations with stable ambient temperatures. Avoid areas near heating vents or air conditioning units.
AeroGarden systems internally regulate humidity levels through their hydroponic design. Adequate air circulation around the unit prevents excessive moisture buildup. Monitor for condensation on the grow light hood as an indicator of humidity balance.
Pruning and Training Your Tomato Plants

Proper pruning and training techniques maximize your AeroGarden tomato harvest while maintaining optimal growing conditions. Strategic plant management ensures healthy growth within the system’s compact growing environment.
When to Start Pruning
Pruning begins during the germination phase when seedlings reach approximately 1 inch in height. AeroGarden recommends this early intervention as thinning rather than traditional pruning methods. Remove weaker seedlings from each seed pod and leave one healthy plant per pod to prevent competition for nutrients and space.
Early thinning occurs around week 2-3 after germination when plants develop their first true leaves. Multiple seedlings in a single pod compete for resources and produce smaller harvests. Select the strongest seedling with the most robust stem and darkest green foliage for retention.
Removing Suckers and Lower Leaves
Sucker removal focuses on maintaining plant size rather than promoting extensive growth in AeroGarden systems. Microdwarf tomato varieties typically require minimal sucker management due to their compact growth habit. Remove only the largest suckers that emerge between main stems and leaf branches when they exceed 2 inches in length.
Lower leaf removal becomes necessary when leaves turn yellow or brown from natural aging. Cut these leaves at the stem using clean pruning shears to maintain plant energy for fruit production. Focus removal efforts on leaves touching the water reservoir or blocking light from reaching developing fruit clusters.
Compact varieties like microdwarf tomatoes stay under 12 inches tall and require less aggressive pruning than traditional varieties. These determinate plants naturally limit their growth and concentrate energy on fruit development.
Supporting Heavy Branches
Tomato clips and stakes provide essential support for fruit-laden branches in AeroGarden systems. Install support structures when plants reach 6-8 inches in height and begin developing flower clusters. Position stakes vertically through the growing medium and secure branches using soft ties or clips.
Heavy fruit clusters stress plant stems and can cause breakage without proper support. Attach branches to stakes at 3-4 inch intervals along the main stem to distribute weight evenly. Use adjustable clips that expand as stems grow thicker throughout the growing season.
AeroGarden models include compatible support accessories designed specifically for compact growing spaces. These systems maintain plant organization while preventing branches from extending beyond the light coverage area or interfering with neighboring plants.
Pollination Techniques for Indoor Tomatoes

Maximizing fruit production in your AeroGarden requires understanding that tomatoes are self-pollinating plants containing both male and female parts within their flowers. Indoor environments lack the natural wind and bee activity that typically assists outdoor pollination.
Hand Pollination Methods
Gentle plant shaking provides the most straightforward approach to indoor tomato pollination. Shake your tomato plant gently 2 times daily once flowers begin opening to mimic natural wind movement that occurs outdoors.
Fan assistance offers a mechanical solution for consistent pollen distribution. Point a low-speed fan at your plants for several hours each day to simulate outdoor wind conditions that help dislodge pollen from the flowers.
Daily vibration sessions enhance pollination success rates when performed consistently. Focus on plants during their most active flowering periods and maintain regular schedules to ensure optimal pollen transfer between flower parts.
Using a Small Brush or Cotton Swab
Electric toothbrush vibration creates the most effective artificial bee pollination method for AeroGarden tomatoes. Use the back of a clean electric toothbrush to gently vibrate each flower for 2-3 seconds per bloom.
Cotton swab technique provides precise control over individual flower pollination. Insert a small clean cotton swab into each flower and gently rotate it to collect and transfer pollen between the male and female parts.
Brush selection matters for successful pollen transfer without flower damage. Choose soft-bristled paintbrushes or cotton swabs specifically designated for plant care to avoid contaminating your tomatoes with chemicals or residues.
Timing Pollination for Best Results
Light cycle coordination maximizes pollination effectiveness when performed during active growing periods. Conduct pollination activities every other day while your AeroGarden lights remain on to ensure plants stay active and receptive.
Morning sessions yield the highest success rates for pollen viability and transfer. Schedule pollination activities during the first 4-6 hours of your light cycle when flowers release the most viable pollen.
Flowering stage frequency determines optimal pollination scheduling throughout your growing cycle. Increase pollination frequency to daily sessions during peak flowering periods when multiple blooms open simultaneously on your plants.

Harvesting Your AeroGarden Tomatoes

Recognizing the perfect harvest moment ensures maximum flavor and nutritional value from your hydroponic tomatoes. AeroGarden tomatoes reach peak ripeness faster than traditional garden varieties due to controlled growing conditions.
Signs of Ripeness to Look For
Color development serves as the primary indicator of tomato maturity across all varieties. Red tomatoes display deep crimson hues while yellow varieties maintain bright golden tones with minimal green undertones.
Firmness testing reveals ripeness through gentle pressure application. Ripe tomatoes yield slightly to touch while maintaining structural integrity without soft spots or mushiness.
Size comparison against variety specifications confirms proper development. Cherry tomatoes measure 0.5 to 1 inch in diameter while larger determinate varieties reach their expected dimensions before harvest.
Surface appearance shows glossy skin texture with uniform coloration patterns. Mature tomatoes exhibit smooth surfaces without blemishes or green shoulders near the stem attachment point.
Proper Harvesting Techniques
Finger harvesting prevents plant damage through gentle twisting motions at the stem connection. Grasp the tomato between thumb and index finger while supporting the branch with your other hand.
Timing optimization occurs just before consumption for peak flavor retention. AeroGarden tomatoes maintain freshness for 3 to 5 days when stored at room temperature after harvest.
Stem removal happens during the picking process by twisting the fruit until it separates naturally. Avoid pulling or yanking motions that stress the plant structure and reduce future fruit production.
Sequential harvesting maximizes continuous production by removing ripe fruits promptly. Regular removal encourages the plant to redirect energy toward developing remaining fruits.
Maximizing Your Harvest Yield
Variety selection impacts total production capacity within AeroGarden systems. Microdwarf determinate tomatoes produce 15 to 30 fruits per plant while maintaining compact growth under 12 inches.
Plant density optimization follows manufacturer guidelines for pod spacing. Six pod AeroGarden models support two tomato plants maximum while larger units accommodate additional plantings based on available space.
Pruning strategies focus energy on fruit production rather than excessive foliage growth. Remove lower stems and branches that block light penetration while avoiding excessive pruning that reduces photosynthetic capacity.
Pollination consistency ensures continuous fruit set throughout the growing season. Hand pollinate flowers weekly using gentle shaking motions or cotton swab transfers to maintain production rates.
Environmental stability maintains fruit development through consistent temperature ranges. Keep AeroGarden units away from direct sunlight and maintain 70°F to 76°F temperatures for optimal fruit set conditions.
Troubleshooting Common Issues

Even experienced gardeners encounter challenges when growing tomatoes in AeroGarden systems. Common problems arise from environmental factors, nutrient imbalances, or maintenance oversights that affect plant health and fruit production.
Yellowing or Dropping Leaves
Overwatering causes the most frequent leaf yellowing in AeroGarden tomato plants. Check your water reservoir levels and ensure the pump cycles properly to prevent root saturation. Nutrient imbalances also trigger leaf discoloration when fertilizer concentrations exceed optimal levels.
Insufficient light coverage creates weak, yellowing foliage that eventually drops from the plant. Position LED lights 3-5 inches above plant tops to maintain proper light intensity. Adjust light height weekly as plants grow taller to prevent light burn or inadequate exposure.
Monitor your nutrient solution every 2 weeks and replace it completely to prevent salt buildup. Plants absorb nutrients at different rates, creating imbalances that manifest as yellowing leaves starting from the bottom of the plant.
Poor Fruit Development
Temperature fluctuations prevent proper fruit set when conditions fall outside the 70-76°F optimal range. Place your AeroGarden away from heating vents, air conditioning units, and windows that create temperature swings. Maintain consistent temperatures throughout the growing cycle for maximum fruit development.
Lack of pruning reduces fruit quality by directing plant energy toward excessive foliage growth instead of fruit production. Remove suckers between main stems and leaf branches weekly to concentrate nutrients in developing fruits. Prune lower leaves that touch the water surface to prevent disease and improve air circulation.
Poor pollination limits fruit formation even when flowers appear healthy and abundant. Gently vibrate plants during their peak flowering period to distribute pollen effectively. Use a small fan to create air movement that mimics natural wind patterns and improves pollination success rates.
Pest and Disease Management
Aphids and whiteflies target indoor tomato plants due to the controlled environment and lack of natural predators. Apply neem oil treatments every 7-10 days when pest populations appear, focusing on leaf undersides where insects typically gather. Inspect plants daily during your maintenance routine to catch infestations early.
Fungal diseases develop rapidly in humid conditions around the water reservoir and dense foliage. Maintain proper air circulation by spacing plants adequately and removing excess leaves near the base. Clean your AeroGarden reservoir every 2-3 weeks to prevent mold and bacterial growth.
Use targeted fungicides when symptoms appear, such as dark spots on leaves or white powdery residue on stems. Remove infected plant material immediately to prevent spread to healthy portions of the plant.
Nutrient Deficiency Symptoms
Nitrogen deficiency appears as yellowing leaves starting from the bottom of the plant and progressing upward. This symptom indicates depleted nutrient solution that requires immediate replacement with fresh fertilizer. Follow AeroGarden nutrient guidelines precisely to maintain proper nitrogen levels throughout the growing season.
Potassium deficiency manifests as weak stems and brown leaf edges that compromise plant structure and fruit support. Check your nutrient solution concentration and ensure you’re using balanced fertilizers designed for hydroponic tomato production. Replace nutrient solution every 2-3 weeks to prevent deficiencies from developing.
Calcium deficiency causes blossom end rot in developing fruits, appearing as dark, sunken spots on the bottom of tomatoes. This condition results from inconsistent watering cycles rather than actual calcium shortage in the nutrient solution. Maintain steady water levels and avoid letting the reservoir run completely dry between refills.
Monitor pH levels weekly to ensure they remain between 6.0-6.8 for optimal nutrient uptake. Adjust pH using appropriate answers when readings fall outside this range to prevent nutrient lockout that mimics deficiency symptoms.
Tips for Maximum Success

Implementing strategic techniques transforms your AeroGarden tomato cultivation into a highly productive venture. Success depends on selecting appropriate varieties and optimizing environmental conditions.
Choosing the Best Tomato Varieties
Micro dwarf tomatoes excel in smaller AeroGarden units because they remain compact and determinate in growth patterns. These varieties typically reach 5-12 inches in height and produce abundant fruit in indoor hydroponic conditions.
Select micro dwarf varieties like Tiny Tim or Red Robin for standard AeroGarden models with limited vertical space. Plant these compact cultivars when working with units that offer 12-24 inches of growing height.
Dwarf tomatoes perform optimally in larger units such as the AeroGarden Farm 24XL where lights extend up to 36 inches. These varieties grow 3-5 feet tall and accommodate the expanded vertical space available in premium models.
Choose determinate varieties over indeterminate types to maintain manageable plant sizes within confined growing chambers. Determinate tomatoes concentrate fruit production over shorter periods and require less ongoing maintenance.
Extending Growing Seasons
Temperature control ensures consistent fruit set by maintaining the optimal range of 70-76°F throughout the growing cycle. Position your AeroGarden away from direct sunlight through windows to prevent temperature fluctuations that disrupt plant development.
Monitor ambient room temperature daily and relocate units when seasonal heating or cooling creates unstable conditions. Place thermometers near the growing chamber to track temperature variations accurately.
Create year-round growing conditions by selecting temperature-stable locations within your home. Basements or interior rooms typically provide more consistent thermal environments than areas near windows or exterior walls.
Extend productive seasons by starting new seed pods every 4-6 weeks to ensure continuous harvests. Stagger plantings across multiple units when space permits to maximize fresh tomato availability.
Maximizing Space Efficiency
Pruning and thinning keeps tomato plants compact while directing energy toward fruit production rather than excessive foliage growth. Thin seedlings in early stages to ensure each seed pod contains only one healthy plant and reduces competition for nutrients.
Remove excess seedlings within the first 2-3 weeks after germination to prevent overcrowding stress. Cut weaker seedlings at soil level rather than pulling to avoid disturbing root systems of remaining plants.
Pod placement optimizes growing space by positioning only one fruiting plant every three holes throughout the growing deck. This spacing provides adequate room for plants to spread while maintaining proper air circulation and light penetration.
Space cherry tomato plants 6-8 inches apart when using larger AeroGarden models to prevent branch tangling. Allow 4-6 inches between plants in compact units to ensure each plant receives sufficient light exposure.
Trim lower branches regularly to focus plant energy on upper fruit-bearing sections. Cut branches below the first flower cluster to improve air circulation and reduce disease risk in dense growing environments.
Conclusion
Growing AeroGarden tomatoes transforms any indoor space into a year-round harvest haven. We’ve shown you everything from selecting the right varieties to mastering pollination techniques that ensure abundant fruit production.
The key to success lies in consistent care and attention to detail. By following our guidance on light management pruning techniques and environmental control you’ll achieve restaurant-quality tomatoes right from your countertop.
Your AeroGarden investment pays dividends through fresh flavorful tomatoes regardless of outdoor weather conditions. Start your indoor tomato journey today and experience the satisfaction of homegrown produce that’s always within arm’s reach.
Frequently Asked Questions
What AeroGarden models are best for growing tomatoes?
The AeroGarden Bounty Elite and Farm models are recommended for tomato cultivation as they provide at least 12 inches of height clearance. These models feature adjustable height mechanisms, built-in pump systems for nutrient circulation, and ample growing space to accommodate tomato plants throughout their growth cycle.
Which tomato varieties work best in AeroGarden systems?
Microdwarf and cherry tomato varieties are ideal for AeroGarden cultivation. These compact varieties stay under 12 inches tall and produce high yields in hydroponic systems. Determinate varieties are also recommended as they offer manageable growth patterns and consistent fruit production in indoor environments.
How often should I change the water and add nutrients?
Change the water in your AeroGarden every 2-3 weeks and add liquid nutrients according to the manufacturer’s schedule. Monitor water levels weekly and maintain the reservoir at full capacity. Always clean the water reservoir during water changes to prevent algae buildup and ensure optimal plant health.
What’s the optimal light schedule for AeroGarden tomatoes?
Maintain a 16-hour light cycle for optimal tomato growth and fruit development. Position LED lights 6-8 inches above plant tops, adjusting height as plants grow. Ensure consistent daily lighting by using the AeroGarden’s built-in timer to maintain regular light cycles throughout the growing period.
How do I pollinate tomatoes grown indoors?
Since indoor environments lack natural pollinators, hand pollination is necessary. Gently shake plants during flowering, use a small fan for air circulation, or employ tools like electric toothbrushes or cotton swabs to transfer pollen between flowers. Time pollination activities during the plants’ light cycle for best results.
What’s the ideal pH range for AeroGarden tomatoes?
Maintain pH levels between 6.0 and 6.8 for optimal tomato growth. Check pH weekly using test strips and adjust as needed. Proper pH ensures efficient nutrient uptake and healthy plant development. Most AeroGarden nutrient solutions are formulated to maintain appropriate pH levels automatically.
When should I start pruning my tomato plants?
Begin pruning early by thinning seedlings to prevent competition for nutrients. Remove suckers (shoots between main stem and branches) and lower leaves regularly to direct energy toward fruit production. Support heavy branches with clips and stakes to prevent breakage as fruits develop.
How do I know when tomatoes are ready to harvest?
Harvest tomatoes when they show full color development, feel firm but slightly soft, and have reached expected size for the variety. The surface should appear glossy and smooth. Harvest promptly at peak ripeness for maximum flavor and to encourage continued fruit production.
What temperature should I maintain for optimal growth?
Keep temperatures between 70°F and 76°F for optimal tomato growth and fruit set. Avoid placing your AeroGarden in areas with fluctuating temperatures, such as near heating vents or windows. Consistent temperature control is crucial for successful fruit development and overall plant health.
How can I troubleshoot yellowing or dropping leaves?
Yellowing or dropping leaves often indicate nutrient deficiencies, overwatering, or inadequate lighting. Check nutrient solution levels, ensure proper pH balance, and verify light positioning. Monitor for pests or diseases, and ensure adequate air circulation around plants to prevent these common issues.