We all dream of having a stunning garden that becomes the envy of our neighborhood, but the thought of expensive landscaping bills often stops us in our tracks. The good news? Creating a beautiful outdoor space doesn’t require very costly or hiring professional designers.
Budget-friendly gardening is entirely achievable when you know the right tricks and techniques. From repurposing household items into planters to choosing low-maintenance plants that deliver maximum visual impact, there are countless ways to transform your outdoor space without emptying your wallet.
We’ve discovered that some of the most charming gardens come from creative minds working with modest budgets rather than unlimited funds. Whether you’re starting with a blank slate or looking to refresh your existing garden, these affordable strategies will help you create an outdoor oasis that looks like it cost thousands while keeping your expenses minimal.
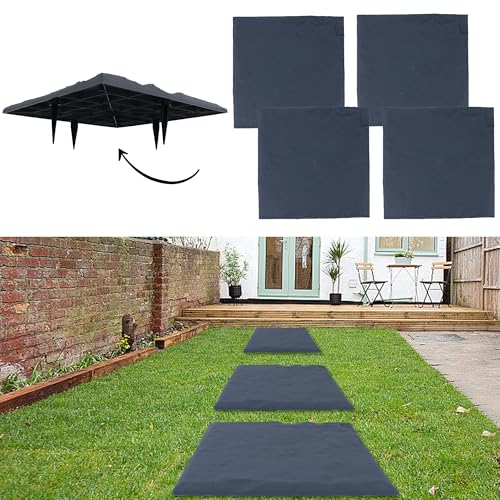
Create a Stunning Garden Path Using Gravel and Stepping Stones
Building a beautiful walkway doesn’t require breaking your budget or hiring professional contractors. We can transform any outdoor space with simple materials and strategic planning.
Choose Affordable Materials Like Crushed Stone or Wood Chips
Crushed stone offers exceptional value at approximately $30-50 per cubic yard, covering roughly 100 square feet at 2-3 inches deep. Pea gravel provides a smooth walking surface that’s gentle on bare feet, while decomposed granite creates a more formal appearance that compacts naturally over time.
Wood chips cost even less at $15-25 per cubic yard from local tree service companies or municipal recycling centers. Cedar chips naturally repel insects and maintain their color longer than other varieties, making them perfect for high-traffic areas near outdoor seating.
Recycled concrete chunks serve as excellent stepping stone alternatives when sourced from construction sites or demolition projects. We’ve found that breaking larger pieces with a sledgehammer creates irregular shapes that look more natural than purchased pavers.
Sand provides the foundation layer beneath any path material, typically costing $20-30 per cubic yard. River sand drains better than construction sand, preventing water pooling that can destabilize your pathway during heavy rains.
Design Curved Pathways to Add Visual Interest
Curved paths create mystery by hiding destinations from immediate view, making small gardens appear larger and more intriguing. We recommend using a garden hose to outline potential routes before committing to any excavation work.
Gentle S-curves work best in most residential settings, avoiding sharp turns that feel unnatural or difficult to navigate with garden carts or wheelbarrows. Radius curves of 6-8 feet provide comfortable walking while maintaining visual appeal.
Strategic plant placement along curved edges softens harsh lines and integrates the pathway into surrounding industry features. Low-growing perennials like hostas or ornamental grasses create natural borders without requiring frequent maintenance.
Varying pathway widths from 2 feet in narrow sections to 4 feet in gathering areas adds ever-changing visual elements. Wider sections accommodate benches or decorative planters that enhance the overall garden experience without important additional costs.


Build Raised Garden Beds from Recycled Materials

Constructing raised garden beds from recycled materials offers an excellent opportunity to create productive growing spaces while keeping costs minimal. We’ll explore how to transform discarded materials into functional garden infrastructure that enhances both plant growth and visual appeal.
Use Old Pallets or Reclaimed Wood
Pallets serve as ideal building blocks for raised garden beds due to their sturdy construction and free availability. We can source these materials from local businesses, construction sites, or online marketplaces where they’re often given away. Before using pallets, check for the HT (heat treated) stamp to ensure they’re safe for food production.
Reclaimed wood from old fences, decks, or demolished structures provides another cost-effective option for bed construction. These materials often possess character and weathered aesthetics that complement natural garden settings. When selecting reclaimed wood, avoid pieces treated with chemicals or painted surfaces that could leach harmful substances into the soil.
Assembly requires basic tools like a drill, screws, and measuring tape to create rectangular frames. We recommend building beds between 3-4 feet wide to allow easy access from both sides without stepping on the soil. Corner brackets or metal connectors can reinforce joints for added stability and longevity.
Fill with Compost and Native Soil Mix
Creating the optimal growing medium involves combining compost with native soil to provide plants with essential nutrients and proper drainage. We should aim for a ratio of approximately 50% compost to 50% native soil for most vegetable and flower gardens. This mixture ensures adequate organic matter while maintaining soil structure and beneficial microorganisms.
Native soil contributes local minerals and establishes natural drainage patterns that plants in your region have adapted to over time. Testing the existing soil pH helps determine if amendments are needed before filling the raised beds. Most vegetables thrive in slightly acidic to neutral soil with a pH between 6.0 and 7.0.
Layering materials creates the best results when filling raised beds. Start with a base layer of coarse materials like small twigs or leaves for drainage, then add the compost and soil mixture. This approach prevents waterlogging while providing plants with immediate access to nutrients as they establish their root systems.
Start a Container Garden with Repurposed Items

Container gardening transforms everyday household items into productive growing spaces while keeping costs minimal. We’ll show you how to repurpose common materials into thriving garden containers that rival expensive store-bought planters.
Transform Old Buckets and Tires into Planters
Old buckets become excellent planters with just a few simple modifications. We drill drainage holes in the bottom to prevent waterlogged roots and ensure healthy plant growth. Metal buckets work particularly well for herbs like basil and oregano, while larger plastic buckets accommodate vegetables such as tomatoes and peppers.
Tires offer surprising versatility as eco-friendly planters. We stack multiple tires to create raised planters for deeper-rooted vegetables like carrots and potatoes. The rubber material retains heat, extending the growing season for warm-weather crops. Painting tires with light colors prevents overheating and adds visual appeal to your garden space.
Both materials cost virtually nothing yet provide years of reliable service. We fill these repurposed containers with quality potting soil mixed with compost for optimal plant nutrition. This budget-friendly approach saves money while reducing waste that would otherwise end up in landfills.
Create Hanging Gardens from Plastic Bottles
Plastic bottles transform into space-saving vertical gardens with minimal effort. We cut the bottom portion off 2-liter bottles and use them as individual hanging planters for herbs, strawberries, and small flowering plants. Threading strong twine or wire through holes near the bottle neck creates secure hanging points.
Hanging these bottle planters from tree branches or wooden beams maximizes growing space. We arrange them at different heights to create visual interest while ensuring each plant receives adequate sunlight. This method works exceptionally well for apartment balconies and small patios where ground space is limited.
Multiple bottles create impressive vertical displays for minimal investment. We group bottles by plant type or color scheme to achieve professional-looking garden arrangements. Each bottle planter costs virtually nothing yet provides the same functionality as expensive hanging baskets sold at garden centers.
Grow Your Own Plants from Seeds and Cuttings

Growing plants from seeds and cuttings represents the most economical approach to building our garden inventory. Starting plants from scratch costs significantly less than purchasing established nursery specimens and gives us complete control over our garden’s development.
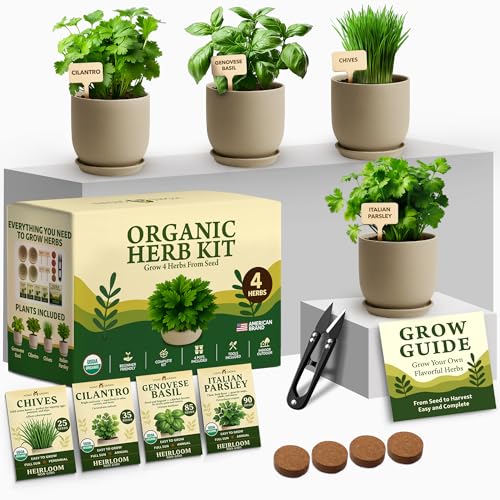
Save Money by Starting Herbs and Vegetables Indoors
Starting herbs and vegetables indoors before transferring them outside can save space and reduce initial costs while ensuring healthier seedlings. We control the environment completely when we begin our plants indoors, protecting tender seedlings from unpredictable weather conditions and pests.
Most vegetables, herbs, and flowers can be grown from seeds, which costs much less than buying nursery starts. Fast-growing vegetables like carrots and lettuce mature quickly even when grown from seed, making them perfect candidates for indoor starting. Creating our own seedling setup requires minimal investment in basic supplies like seed trays, potting mix, and adequate lighting.
Herbs like rosemary, mint, and basil can be grown from stem or leaf cuttings using this quick and inexpensive method. We simply take healthy cuttings from existing plants, place them in water or moist soil, and watch roots develop within weeks. This propagation technique works exceptionally well for herbs and certain vegetables like tomatoes, allowing us to multiply our plant collection without purchasing additional specimens.
Propagate Perennials from Existing Plants
Perennials like magnolia, dogwood, and peony can be divided and replanted to create more plants without additional purchases. Division works best during dormant seasons when plants aren’t actively growing, typically in early spring or late fall depending on the species.
We can increase our perennial collection by taking cuttings or using layering techniques from established plants. Layering involves bending a branch to the ground, covering part of it with soil, and allowing roots to develop before separating the new plant from the parent. This method proves particularly effective with shrubs and woody perennials that don’t divide easily.
Timing plays a crucial role in successful perennial propagation, with most divisions performing best when soil temperatures remain cool but not frozen. We should water newly divided plants regularly during their first growing season to help establish strong root systems. These propagation methods allow us to fill large garden areas with beautiful perennials while spending only the cost of our initial parent plants.


Design a Vertical Garden Using Wall Space

Vertical gardening transforms blank walls into productive growing spaces while maximizing our limited square footage. We can achieve stunning results using affordable materials and creative approaches that make the most of our existing wall space.
Install Trellises for Climbing Plants
Trellises provide essential support structures for climbing plants while adding architectural interest to our garden walls. We can build effective trellises using recycled materials like wooden pallets or old fencing sections instead of purchasing expensive commercial options.
Affordable climbing plants like morning glories, peas, and beans thrive on simple trellis systems and require minimal maintenance throughout the growing season. We should select fast-growing varieties such as honeysuckle or clematis that quickly cover large wall areas without demanding extensive care. Installing trellises against existing walls creates instant vertical growing space for vegetables like cucumbers and tomatoes that produce abundant harvests in small footprints.
Simple wooden stakes connected with garden twine form functional trellis systems for lightweight climbers at a fraction of commercial costs. We can secure these DIY structures to walls using basic hardware while ensuring adequate spacing for air circulation around our plants.
Create Living Walls with Pocket Planters
Pocket planters maximize our wall space by creating multiple growing zones in compact vertical arrangements. We can purchase affordable fabric pocket systems or create our own using recycled materials like plastic bottles and old containers.
DIY pocket planters from repurposed materials cost significantly less than commercial living wall systems while providing identical growing capabilities. We should focus on shallow-rooted plants like herbs, lettuce, and strawberries that thrive in the limited soil depth of pocket systems. Creating our own pocket arrangements allows customization of spacing and plant selection based on our exact growing needs and wall dimensions.
Wall-mounted pocket gardens work exceptionally well for herbs and small vegetables that we harvest regularly throughout the season. We can install these systems at comfortable heights for easy maintenance while creating impressive vertical displays that rival expensive professional installations.
Establish a Composting System for Free Fertilizer

Creating our own nutrient-rich compost transforms garden waste into valuable fertilizer without spending money on expensive store-bought amendments.
Set Up a Simple Three-Bin Compost System
Building a three-bin system allows us to maintain continuous compost production while separating materials at different decomposition stages. We can construct these bins using recycled materials like old pallets or wire fencing, keeping costs minimal while maximizing efficiency.
Position the first bin for fresh organic materials, the second for actively decomposing matter, and the third for finished compost ready to use. This rotating system ensures we always have mature compost available while new materials break down in the other bins.
Space the bins close enough for easy material transfer but with sufficient airflow between them. We’ll want each bin to measure approximately 3×3 feet, providing adequate volume for proper heat generation during the decomposition process.
Turn materials weekly in the active bin to accelerate breakdown and prevent odors from developing. Moving partially decomposed matter from bin to bin every few months maintains our steady supply of finished compost.
Use Kitchen Scraps and Yard Waste
Vegetable peels, coffee grounds, and eggshells from our kitchen provide nitrogen-rich “green” materials essential for healthy compost. These scraps decompose quickly and add valuable nutrients that plants need for vigorous growth.
Collect yard waste like fallen leaves, grass clippings, and small branches to balance our compost with carbon-rich “brown” materials. Shredding larger items like branches helps them break down faster and creates better texture in the finished product.
Maintain a ratio of roughly three parts brown materials to one part green materials for optimal decomposition. This balance prevents the pile from becoming too wet or developing unpleasant odors that might attract pests.
Avoid adding meat scraps, dairy products, or pet waste to prevent attracting rodents and creating health hazards. Diseased plant materials should also stay out of our compost pile to prevent spreading problems throughout the garden.
Layer materials alternately rather than dumping large amounts of single ingredients in one spot. This layering technique promotes even decomposition and prevents compact areas that might slow the composting process.
Add Lighting with Solar-Powered Garden Lights

Solar garden lights offer an energy efficient solution that eliminates electricity costs while creating beautiful outdoor ambiance. These budget friendly fixtures harness natural sunlight during the day and automatically illuminate your garden spaces at night.
Install Path Lights for Safety and Ambiance
Path lights transform dark walkways into welcoming passages that guide visitors safely through our garden spaces. We can position these solar powered fixtures along stone pathways, gravel trails, and wooden boardwalks to prevent accidents while creating elegant visual appeal. Strategic placement every 6 to 8 feet ensures adequate coverage without overwhelming the natural industry. Modern solar path lights feature LED technology that provides bright illumination for 8 to 12 hours after a full day of charging.
Decorative styles range from classic lantern designs to contemporary stake lights that complement various garden themes. Weather resistant materials like stainless steel and durable plastic ensure these fixtures withstand seasonal changes without requiring replacement. Installation takes minutes since we simply push the stakes into soft soil or secure them along existing borders. Ground level placement along flower bed edges creates subtle lighting that highlights plantings while maintaining safety standards.
Hang String Lights in Trees and Pergolas
String lights create magical overhead illumination that transforms ordinary outdoor spaces into enchanting evening retreats. We can drape solar powered string lights through tree branches to establish natural canopies of warm light above seating areas and dining spaces. Pergola installations allow for structured arrangements that define outdoor rooms while providing consistent lighting patterns.
Battery powered solar string lights eliminate the need for electrical outlets and extension cords that complicate traditional lighting setups. Modern LED string lights offer multiple color temperatures from warm white to daylight options that suit different moods and occasions. Weatherproof construction ensures these lights survive rain and snow while maintaining reliable performance throughout changing seasons.
Creative hanging techniques include wrapping lights around tree trunks, draping them between fence posts, and creating zigzag patterns across outdoor structures. Timer functions and automatic sensors allow these lights to operate independently without daily management. Removable designs enable seasonal adjustments and storage during harsh weather periods when we want to protect our lighting investments.
Create Garden Borders Using Natural Materials

Natural materials found around your property offer the perfect solution for creating stunning garden borders without spending a fortune. We can transform ordinary stones, bricks, and fallen wood into attractive edging that defines our planting areas beautifully.
Line Beds with Collected Stones or Bricks
Collected stones and bricks create durable borders that cost absolutely nothing. We recommend walking your property to gather flat stones of similar sizes, which work best for creating clean lines around flower beds and vegetable patches. Fieldstone, river rock, and weathered bricks from old construction projects make excellent choices for this project.
Arranging these materials requires minimal preparation but delivers maximum impact. We suggest digging a shallow trench about 2-3 inches deep to nestle the stones securely into place. This prevents shifting during heavy rains and creates a professional appearance that rivals expensive landscaping materials.
Different stone arrangements offer various aesthetic possibilities for our garden design. Single rows of large stones create bold, modern borders while double rows filled with smaller pebbles produce cottage garden charm. We can also stack flat stones to create raised borders that add vertical interest to our industry.
Use Fallen Logs as Natural Edging
Fallen logs provide rustic charm while defining garden spaces with zero material costs. We recommend selecting logs between 6-12 inches in diameter, as they’re substantial enough to stay in place but manageable for positioning around our beds. Cedar, oak, and pine logs work exceptionally well since they resist decay naturally.
Positioning logs strategically creates organic curves that enhance our garden’s natural beauty. We suggest partially burying one end of each log to anchor it securely, then allowing the natural shape to guide our border design. This technique works particularly well around tree bases and along curved pathways.
Log borders serve multiple functions beyond simple edging in our garden network. They retain soil moisture, provide habitat for beneficial insects, and slowly decompose to enrich our soil over time. We can even drill holes in the logs to create planting pockets for small flowers or herbs, maximizing their decorative potential.
Install a Rain Water Collection System

Installing a rain water collection system represents one of the most effective ways to reduce water bills while maintaining a thriving garden. We can carry out these simple answers to capture natural precipitation for irrigation needs.
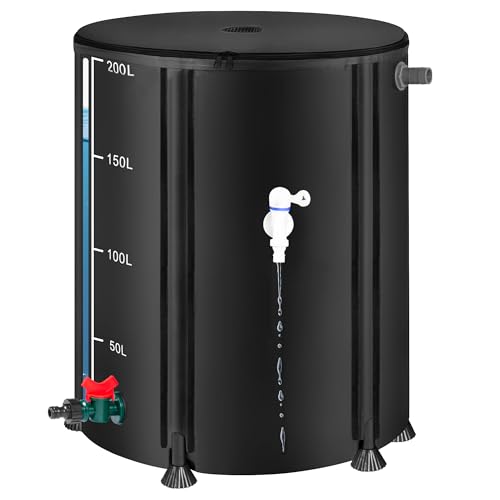
Set Up Rain Barrels for Irrigation
Rain barrels offer an incredibly cost-effective method for collecting thousands of gallons of water throughout the growing season. We position these containers directly under our downspouts to maximize collection efficiency during rainfall events. Standard rain barrels hold between 50-80 gallons of water, which provides enough irrigation for most small to medium gardens during dry periods.
Installing rain barrels requires minimal tools and can be completed in under an hour. We ensure the barrel sits on a stable platform like concrete blocks or a wooden stand to create proper water pressure for gravity-fed irrigation. Adding a spigot near the bottom allows us to attach hoses or fill watering cans easily.
Maintenance involves cleaning the barrel annually and checking that debris screens remain clear. We cover barrels with tight-fitting lids to prevent mosquito breeding and keep collected water fresh for plant use. During winter months in freezing climates, we drain barrels completely to prevent damage from ice expansion.
Design Simple Drainage Answers
Proper drainage prevents waterlogged soil conditions that can kill plants and create expensive foundation problems around our homes. We install French drains by digging trenches filled with gravel to redirect excess water away from garden beds and structures. These simple drainage systems cost significantly less than professional installations while providing effective water management.
Creating drainage answers starts with identifying problem areas where water pools after heavy rainfall. We dig shallow channels or install perforated pipes surrounded by gravel to guide water toward appropriate discharge points. Strategic placement of these drainage features protects both our plants and property investment.
Natural drainage improvements include adding organic matter like compost to heavy clay soils to improve water infiltration. We also create slight slopes in garden beds to encourage water movement toward designated collection or drainage areas. These modifications require only basic tools and readily available materials, making them accessible for any budget-conscious gardener.


Make Your Own Garden Decorations and Art

Creating unique garden decorations transforms our outdoor spaces into personalized sanctuaries without very costly. We can create stunning artistic elements using materials we already have around the house while expressing our creativity.
Create Wind Chimes from Recycled Materials
Building wind chimes from household items creates melodic garden accents while reducing waste in our homes. We can gather old keys, metal washers, small bells, or even aluminum cans to construct these musical decorations. Threading these materials onto fishing line or sturdy string allows us to create different tonal combinations that dance in the breeze.
Collecting items like bent spoons, bottle caps, or small metal tubes gives us the raw materials for unique sound makers. We should arrange these pieces at varying lengths to create natural wind movement and pleasant chiming sounds. Hanging our finished wind chimes from tree branches or garden hooks adds vertical interest while providing gentle background music for our outdoor relaxation.
Testing different material combinations helps us discover which sounds we prefer in our garden setting. Metal items typically produce clearer tones while wooden pieces create softer, more muted sounds that blend naturally with outdoor environments.
Paint Rocks and Pots for Colorful Accents
Transforming ordinary stones into vibrant garden features costs just pennies while adding personality to our industry design. We can collect smooth river rocks or purchase inexpensive stones from garden centers to create colorful pathway markers or plant separators. Painting these rocks with outdoor acrylic paint ensures our designs withstand weather conditions throughout multiple seasons.
Decorating terra cotta pots with bright colors and patterns turns basic containers into eye catching focal points. We should use weather resistant paints and sealers to protect our artwork from rain and sun damage. Creating themed designs like geometric patterns, nature motifs, or even game boards transforms simple pots into conversation starters.
Organizing painted rocks into garden games like chess sets or tic tac toe boards provides entertainment value beyond simple decoration. We can arrange these colorful stones to define garden borders, mark plant varieties, or create whimsical fairy garden elements that delight visitors of all ages.
Conclusion
We’ve shown you that creating a stunning garden doesn’t require very costly. With some creativity and resourcefulness you can transform any outdoor space into a beautiful oasis using recycled materials seed propagation and natural elements found right on your property.
The key to successful budget gardening lies in maximizing what you already have while making smart investments in versatile answers. From rainwater collection systems to vertical growing spaces these strategies will serve you well for years to come.
Your dream garden is within reach regardless of your budget. Start with one or two techniques that appeal to you most and gradually expand your efforts. Before you know it you’ll have created an outdoor space that rivals any expensive industry design.
Frequently Asked Questions
What is the most cost-effective way to start a beautiful garden?
The most budget-friendly approach is to repurpose household items as planters and grow plants from seeds or cuttings instead of buying mature plants. Focus on low-maintenance plants that provide maximum visual impact, and use recycled materials like old buckets, tires, and plastic bottles as containers.
How can I create garden paths without spending a lot of money?
Use affordable materials like gravel, crushed stone, or wood chips for pathways. Recycled concrete chunks make excellent stepping stones. Design curved paths to make your garden appear larger and more visually interesting while using the same amount of materials.
Can I build raised garden beds on a tight budget?
Yes, use recycled materials like old pallets or reclaimed wood to construct raised beds. Ensure materials are safe for food production, and fill beds with a mix of compost and native soil for optimal growing conditions.
What household items can be turned into planters?
Old buckets, tires, plastic bottles, and various containers can become effective planters. Simply drill drainage holes and stack materials like tires for deeper-rooted vegetables. Plastic bottles work great for vertical hanging gardens in small spaces.
How much money can I save by growing plants from seeds?
Growing from seeds costs significantly less than buying mature plants. You can start herbs and vegetables indoors with minimal investment, and propagate plants through cuttings or division to expand your garden collection without additional purchases.
What are the best budget-friendly climbing plants for vertical gardening?
Morning glories and peas are excellent affordable climbing plants that grow quickly and provide beautiful coverage. Use recycled materials to create simple trellises, maximizing vertical space without expensive commercial systems.
How do I create free fertilizer for my garden?
Build a simple three-bin compost system using recycled materials. Combine kitchen scraps and yard waste, turning weekly for faster decomposition. This creates nutrient-rich compost while recycling organic waste, eliminating the need to purchase fertilizers.
Are solar garden lights worth the investment for budget gardeners?
Solar-powered lights eliminate electricity costs while enhancing garden safety and ambiance. Path lights improve walkway visibility, while string lights create enchanting evening spaces. Modern LED options are affordable and long-lasting, making them cost-effective choices.
What natural materials can I use for garden borders?
Collect stones, bricks, or fallen logs from your property to create attractive borders. Flat stones and bricks make durable edging when placed in shallow trenches, while logs provide rustic borders that retain moisture and support beneficial insects.
How can rainwater collection help reduce gardening costs?
Installing rain barrels can collect thousands of gallons annually, significantly reducing water bills. The simple setup requires minimal investment but provides substantial long-term savings while ensuring your garden has consistent water access during dry periods.