Growing your own mint garden doesn’t have to drain your wallet or require years of gardening expertise. We’ve discovered that mint is one of the easiest herbs to propagate, and you can multiply your plants using simple techniques that work every single time.
Whether you’re starting with store-bought mint or cuttings from a friend’s garden, we’ll show you exactly how to turn one plant into dozens. The best part? Most propagation methods require nothing more than water, soil, and a few minutes of your time.
Ready to create an endless supply of fresh mint for your mojitos, teas, and culinary adventures? We’re about to share the proven methods that’ll have you propagating mint like a pro – no green thumb required.
Materials and Tools Needed
Basic supplies for mint propagation require items you likely already have at home. We gather these essential materials before starting the propagation process to ensure smooth execution.
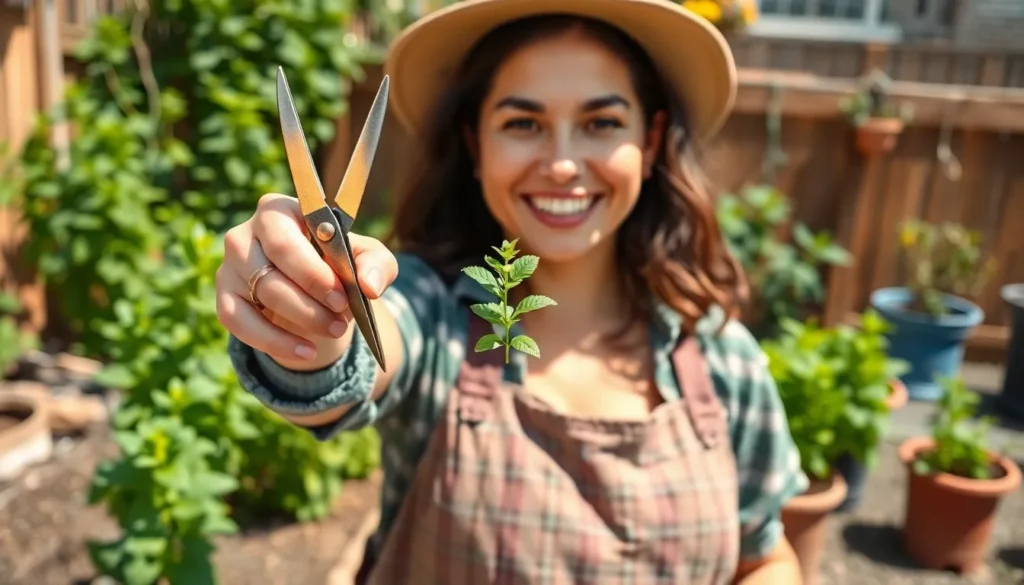
Essential Cutting Tools
Sharp, clean scissors or pruning shears cut mint stems effectively without damaging the plant tissue. Clean blades prevent bacterial transmission between plants. We sterilize cutting tools with rubbing alcohol before each use.
Containers and Growing Medium
Glass jars or clear containers hold water for rooting mint cuttings. Mason jars work perfectly for this purpose. We select containers that are 4 to 6 inches tall to accommodate stem length.
High-quality potting soil provides nutrients for transplanted mint cuttings. Standard potting mix contains the proper drainage and organic matter mint requires. We avoid garden soil as it may contain pathogens that harm young roots.
Water and Location Requirements
Room temperature water supports optimal root development in mint cuttings. Tap water works fine if left sitting for 24 hours to allow chlorine to evaporate. We change the water every 2 to 3 days to prevent bacterial growth.
A bright, indirect light location promotes healthy root formation without scorching delicate new growth. North or east-facing windows provide ideal lighting conditions. We avoid direct sunlight that can stress newly cut stems.
Optional Enhancement Materials
Rooting hormone accelerates root development in mint cuttings though it remains unnecessary for successful propagation. Liquid or powder forms both work effectively. We apply rooting hormone sparingly to the cut end of stems.
Small plant pots (3 to 4 inches in diameter) house successfully rooted cuttings when transitioning from water to soil. Drainage holes in the bottom prevent waterlogged conditions that cause root rot.


Understanding Mint Propagation Basics

Mint propagation involves creating new plants from existing ones using simple cutting techniques. Propagation works through stem cuttings that develop roots in water or soil within days.
Cut mint stems 2 inches above the soil line using clean scissors or pruning shears. Remove lower leaves from the stem to prevent rot during the rooting process. Place cut stems in fresh water where roots develop within a few days. Transfer rooted cuttings to containers filled with potting soil and compost mixture once roots form.
Types of Mint Suitable for Propagation
Most mint varieties propagate successfully through cutting methods. Common types include peppermint, spearmint, and chocolate mint. Each variety requires healthy cuttings with at least 2 nodes where leaves meet the stem.
Peppermint offers strong menthol flavor and adapts well to cutting propagation. Spearmint provides milder taste and roots quickly in water. Chocolate mint combines mint and chocolate scents while maintaining easy propagation characteristics.
Best Time to Propagate Mint
Spring and early summer provide optimal conditions for mint propagation. Active growth periods during these seasons support strong root development before colder weather arrives.
Mint can be propagated year-round indoors with proper care. Outdoor propagation works best from March through August when temperatures remain consistently warm. Plants focus energy on root establishment during active growing seasons rather than survival during dormant periods.


How to Propagate Mint from Cuttings

Cutting propagation transforms a single mint stem into a complete plant within weeks. Most gardeners find this method produces faster results than seed propagation.
Selecting Healthy Mint Cuttings
Healthy mint stems with abundant leaves create the best foundation for successful propagation. Flowering stems or those producing seeds divert energy from root development and reduce success rates.
Cut stems measuring 4 to 6 inches in length with multiple leaf sets attached. Longer cuttings provide more energy reserves for root formation. Shorter stems lack sufficient stored nutrients for robust development.
Young stems from the current growing season root faster than woody, mature growth. Fresh green stems bend easily without snapping and contain higher moisture content than older branches.
Preparing the Cuttings
Sharp scissors or pruning shears cut stems just above a leaf node at a 45-degree angle. Angled cuts increase surface area for water absorption and prevent stem ends from sitting flat against container bottoms.
Remove all leaves except the top 3 to 4 sets to prevent underwater decay. Submerged leaves decompose quickly and create bacterial growth that damages developing roots.
Clean cuts heal faster and resist infection better than torn or crushed stem ends. Sterilized tools prevent transferring diseases between plants during the cutting process.
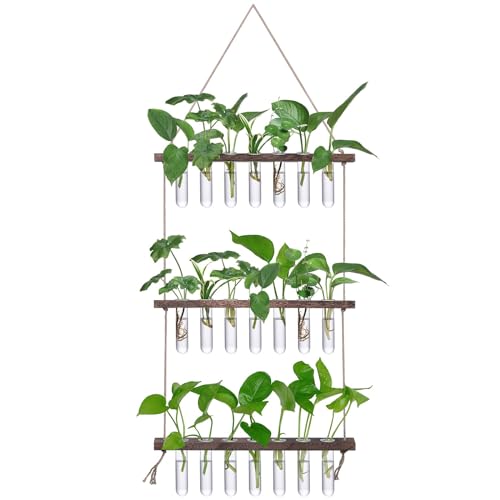
Rooting Mint Cuttings in Water
Place prepared cuttings in clear glass containers filled with room temperature water. Glass containers allow monitoring root development progress without disturbing the cutting.
Fresh water changes every 3 to 4 days prevent bacterial buildup that causes stem rot. Stagnant water develops harmful microorganisms within a week of initial placement.
Position containers in bright, indirect sunlight locations. Direct sunlight heats water temperatures above optimal ranges and encourages algae growth on container walls.
Roots develop within 2 weeks under proper conditions. White, branching roots indicate healthy development while brown or mushy roots signal bacterial problems requiring immediate water replacement.
Transplanting Water-Rooted Cuttings to Soil
Roots measuring 1 to 2 inches in length provide sufficient anchor strength for soil transplantation. Shorter roots struggle to establish in soil environments after water adaptation.
Fill small pots with quality potting soil mixed with compost for nutrient content. Dig holes slightly larger than the root system to accommodate growth without crowding.
Gently place rooted cuttings in prepared holes and cover roots completely with soil. Pack soil lightly around stems to eliminate air pockets while avoiding root damage from compression.
Water transplanted cuttings thoroughly until drainage occurs from pot bottoms. Consistent moisture during the first 2 weeks helps roots adapt from water to soil environments.
Direct Soil Propagation Method
Rooting hormone application on cut stem ends increases rooting success rates from 70% to 90% in soil propagation. Dip stems 1 inch deep in hormone powder before planting.
Plant treated cuttings directly in moist potting soil or compost mixtures. Insert stems 2 inches deep with at least 2 leaf nodes buried beneath soil surface.
Maintain consistent soil moisture without waterlogging during the 3 to 4 week rooting period. Soil that dries completely kills developing roots while oversaturated conditions cause stem rot.
Cover planted cuttings with clear plastic bags to create humidity chambers. Remove coverings once new growth appears indicating successful root establishment in soil conditions.
How to Propagate Mint by Division

Division offers another effective method for mint propagation, particularly suited for established plants that have developed extensive root systems.
When to Divide Mint Plants
Fall provides the optimal timing for dividing mint plants that have achieved several years of growth. Mature mint clumps that have formed dense root networks respond best to this propagation method. Plants with established growth patterns typically develop the robust root systems necessary for successful division after 2 to 3 growing seasons.
Step-by-Step Division Process
Lifting the plant carefully prevents root damage during the initial extraction phase. We use a garden fork to gently lift the entire mint clump from the soil, working around the perimeter to loosen the root ball without severing major roots.
Teasing apart the roots reveals natural separation points where the plant can be divided most effectively. Our hands work best for initial separation, though a fork assists with particularly tangled root sections.
Splitting the clump creates multiple new plants from a single established specimen. We employ a sharp spade or pruning saw to cut through dense root masses, ensuring each divided section contains both healthy roots and foliage portions.
Replanting Divided Mint Sections
Preparing the new planting site ensures optimal growing conditions for each divided section. We select locations with well-drained soil and exposure ranging from full sun to partial shade.
Replanting each section immediately prevents root desiccation and maintains plant viability. We position each division at the same depth as the original plant, firming the soil gently around the roots while keeping the soil moist but not waterlogged.
Caring for newly divided plants requires consistent attention during the establishment period. Container-grown divisions need winter protection through relocation to sheltered areas or frost cover application, as potted plants experience greater vulnerability than ground-planted specimens. Regular watering maintains adequate moisture levels while appropriate sunlight exposure supports healthy growth development.
Container gardening controls mint’s vigorous spreading nature and provides better management of divided plants. This approach prevents the aggressive expansion characteristic of mint varieties while maintaining easy access for harvesting and maintenance.

How to Propagate Mint from Seeds

Mint seeds offer another propagation method, though this approach requires more patience than cutting or division techniques. Growing mint from seeds takes longer but allows us to start multiple plants simultaneously.
Choosing Quality Mint Seeds
Reputable suppliers provide the foundation for successful mint seed propagation. Quality seeds from established garden centers or certified online retailers ensure germination rates between 65% to 85%. Fresh mint seeds work better than older stock, so check packaging dates before purchasing. Popular varieties like peppermint, spearmint, and chocolate mint seeds remain viable for 2 to 3 years when stored properly.
Organic seed options reduce chemical exposure during the growing process. Seeds labeled as non-GMO maintain the authentic characteristics of traditional mint varieties. Bulk seed packets cost less per plant than individual seedling purchases from nurseries.
Starting Seeds Indoors
Indoor seed starting gives us complete control over germination conditions. Fill seed trays or small pots with damp seed starting mix that drains well but retains moisture. Press mint seeds gently into the soil surface at 1/8 inch depth maximum. Light coverage works better than deep planting since mint seeds need some light exposure to germinate.
Mist the soil surface with a spray bottle to maintain consistent moisture without disturbing the tiny seeds. Cover seed trays with clear plastic wrap or humidity domes to create optimal growing conditions. Remove covers once seedlings emerge to prevent fungal problems.
Temperature control between 70°F to 80°F accelerates germination rates significantly. Heat mats placed under seed trays maintain consistent soil temperature even in cool rooms. Room temperature water prevents shocking delicate seeds during watering.
Germination Requirements
Mint seeds require exact conditions to sprout successfully within 10 to 15 days. Bright indirect light provides the energy needed for germination without scorching emerging seedlings. South-facing windows work well if we filter direct sunlight with sheer curtains.
Consistent soil moisture supports seed development but soggy conditions cause rot. Check soil daily by touching the surface with your finger. Water when the top layer feels dry but deeper soil remains slightly moist.
Fluorescent or LED grow lights positioned 6 to 8 inches above seed trays supplement natural light during winter months. Run artificial lights for 12 to 14 hours daily to mimic spring conditions. Seeds germinate faster under consistent light schedules than irregular exposure.
Transplanting Seedlings
Two true leaves indicate seedlings are ready for the next growth stage. Water seedlings from the bottom by placing trays in shallow water dishes to prevent damping off disease. This technique keeps stems dry while roots access needed moisture.
Hardening off prepares indoor seedlings for outdoor conditions over 7 to 10 days. Start by placing seedlings outside for 2 hours in filtered sunlight, then gradually increase exposure time. Bring plants indoors if temperatures drop below 50°F during the hardening process.
Transplant outdoors after the last frost date when soil temperature reaches 60°F consistently. Space seedlings 6 to 8 inches apart to accommodate mature plant spread. Plant at the same depth as they grew in seed trays to avoid stem rot issues.
Container planting works well for mint seedlings since we can control their spread and move plants as needed. Use pots at least 8 inches wide with drainage holes to support healthy root development.
Caring for Newly Propagated Mint

Newly propagated mint plants require exact care conditions to establish strong root systems and healthy growth patterns. Understanding these requirements ensures our mint cuttings transition successfully from their propagation phase to mature plants.
Watering Requirements
Consistent moisture without waterlogging creates the ideal growing environment for newly propagated mint. We maintain soil that feels damp to the touch but never soggy or saturated with standing water.
Regular watering schedules work best when we check the soil surface daily. The top inch of soil should dry slightly between waterings while the deeper layers remain consistently moist. Well-draining containers prevent root rot by allowing excess water to escape through drainage holes.
Container-grown mint requires more frequent watering than garden plants since pots dry out faster. We water slowly and evenly across the soil surface until water begins draining from the bottom. Morning watering gives plants time to absorb moisture before evening temperatures drop.
Light and Temperature Needs
Indirect or filtered light provides optimal growing conditions for newly rooted mint cuttings during their establishment phase. We position containers near bright windows with sheer curtains or in locations receiving morning sun with afternoon shade.
Established mint plants adapt to various lighting conditions including semi-shaded areas and sunny windowsills. Direct afternoon sunlight can stress young plants while insufficient light causes leggy growth and reduced leaf production.
Temperature ranges between 60°F and 70°F promote healthy root development and steady growth rates. We maintain consistent temperatures by avoiding locations near heating vents or air conditioning units. Indoor propagation allows better temperature control compared to outdoor growing conditions.
Sudden temperature fluctuations stress newly propagated plants and slow their establishment. We gradually acclimate indoor-grown mint to outdoor conditions over 7 to 10 days before permanent transplanting.
Fertilizing Young Mint Plants
Balanced water-soluble fertilizer applied monthly supplies essential nutrients without overwhelming developing root systems. We dilute fertilizer according to manufacturer instructions since over-fertilizing burns tender roots and stunts growth.
Young mint plants require less frequent feeding than mature specimens. The first fertilizer application occurs 2 to 3 weeks after transplanting once roots establish in their new growing medium. Fresh potting soil contains enough nutrients for initial growth phases.
Organic fertilizers like compost tea provide gentle nutrition for sensitive root systems. We avoid high-nitrogen fertilizers that promote excessive leaf growth at the expense of root development. Consistent light feeding produces stronger plants than heavy periodic applications.
Common Issues and Troubleshooting

Even though mint’s reputation for easy propagation, several problems can arise during the rooting and establishment process. Identifying these issues early allows us to take corrective action and ensure successful mint propagation.
Cuttings Not Rooting
Poor rooting conditions cause mint cuttings to fail in developing roots within the expected 10 to 14 day timeframe. We must ensure cuttings remain in consistently warm environments between 65°F and 75°F to stimulate root development. Direct sunlight damages delicate cutting tissues and prevents root formation, so we place propagation containers in bright, indirect light locations.
Water quality affects rooting success significantly when using the water propagation method. Changing water every 3 days prevents bacterial buildup that inhibits root growth, as recommended by propagation experts. Fresh, room temperature water provides optimal conditions for healthy root development in mint cuttings.
Cutting preparation errors reduce rooting success rates in mint propagation. We select healthy stems with multiple leaf nodes since roots emerge from these points. Removing lower leaves prevents underwater decay while maintaining top leaf sets provides energy for root development.
Wilting or Dying Propagated Plants
Overwatering ranks as the primary cause of wilting in newly propagated mint plants, creating waterlogged soil conditions that suffocate developing roots. We check soil moisture by inserting our finger 1 inch deep into the potting medium before watering. Proper drainage prevents water accumulation around root zones and maintains healthy soil conditions.
Temperature stress contributes to plant deterioration when mint propagations face extreme environmental conditions. Maintaining consistent temperatures between 60°F and 70°F supports healthy growth in newly established plants. Sudden temperature changes shock young mint plants and cause widespread wilting symptoms.
Light exposure problems manifest as yellowing leaves and stunted growth in propagated mint plants. We provide 4 to 6 hours of bright, indirect sunlight daily for optimal photosynthesis without leaf burn. Indoor propagations benefit from placement near north facing windows that offer consistent, gentle lighting conditions.
Slow Growth Problems
Insufficient nutrients limit growth rates in newly propagated mint plants that require gentle feeding during establishment periods. We apply diluted water soluble fertilizer at quarter strength every 2 weeks to support healthy development. Balanced fertilizers with equal nitrogen, phosphorus, and potassium ratios provide comprehensive nutrition for growing mint plants.
Limited root space restricts mint growth when containers become too small for expanding root systems. Transplanting to larger pots with 6 to 8 inch diameters allows adequate room for root development and vigorous growth. Well draining potting soil mixed with compost creates ideal growing conditions for established mint plants.
Pruning practices influence growth rates when mint plants focus energy on flower production rather than leaf development. We pinch flower buds as they appear to redirect plant energy toward producing fresh foliage. Regular harvesting of top growth encourages bushier plant development and increases overall mint production rates.
Tips for Successful Mint Propagation

Successful mint propagation depends on proper care techniques and environmental conditions. These essential strategies maximize your propagation success rates.
Preventing Root Rot
Root rot prevention requires careful moisture management and proper drainage techniques. Overwatering creates waterlogged conditions that suffocate mint roots and promote fungal growth.
We maintain soil moisture without creating soggy conditions by checking the top inch of soil before watering. Dry surface soil indicates the plant needs water, while damp soil suggests waiting another day or two.
Proper drainage prevents water accumulation around developing roots. We ensure containers have adequate drainage holes and use well-draining potting mix that allows excess water to escape quickly.
Water quality affects root health significantly. We use filtered or distilled water when possible, as chlorinated tap water can stress developing root systems and slow growth.
Fungal infections spread rapidly in consistently wet environments. We change water in rooting containers every 3 to 4 days to prevent bacterial buildup and maintain oxygen levels around developing roots.
Encouraging Faster Growth
Filtered light placement accelerates mint establishment and root development. We position propagating mint in bright, indirect light rather than direct sunlight to prevent stress during the vulnerable rooting period.
Temperature consistency promotes faster root formation and overall growth. We maintain temperatures between 65°F and 75°F for optimal metabolic activity in developing mint plants.
Regular water changes in rooting containers provide fresh nutrients and oxygen to developing roots. We replace stagnant water every 3 to 5 days to maintain healthy growing conditions.
Humidity levels around 50% to 60% create ideal conditions for mint propagation. We create mini greenhouse environments by covering water rooting containers with clear plastic bags to maintain consistent moisture levels.
Pruning techniques redirect plant energy toward root development. We remove flower buds and excess foliage from cuttings to focus growth energy on establishing strong root systems.
Container vs. Garden Planting
Container planting offers superior control over mint’s aggressive spreading habits. We use containers at least 8 inches deep and 10 inches wide to accommodate mint’s root system while preventing unwanted garden invasion.
Garden planting works best in designated areas where mint’s spreading nature becomes an advantage. We plant mint in semi-shaded locations with morning sun and afternoon shade for optimal growth conditions.
Soil mixture requirements differ between container and garden settings. We combine equal parts fresh compost and high-quality potting soil for containers, while garden plantings benefit from well-amended existing soil.
Spacing considerations vary significantly between planting methods. We provide 2 inches between plants in containers to prevent overcrowding, while garden plantings can accommodate 12 to 18 inches between individual plants.
Frost protection becomes easier with container plantings that we can move indoors during cold weather. Garden planted mint requires mulching or other protective measures when temperatures drop below 20°F.
Water management differs between container and garden environments. Container mint requires daily watering checks during warm weather, while established garden mint typically needs watering only during extended dry periods.


Conclusion
We’ve shown you that propagating mint doesn’t require advanced gardening skills or expensive equipment. Whether you choose cutting propagation water propagation division or seed starting each method offers reliable results when you follow our guidelines.
Your success depends on maintaining consistent moisture providing adequate light and choosing the propagation method that fits your timeline and resources. Remember that mint’s vigorous growth habit makes it one of the most forgiving plants for beginners to propagate.
With these techniques you’ll soon have an abundant supply of fresh mint for cooking teas and other culinary adventures. Start with one healthy plant today and watch your mint collection multiply effortlessly in the weeks ahead.
Frequently Asked Questions
What materials do I need to propagate mint?
You’ll need sharp, clean scissors or pruning shears, glass jars or clear containers, high-quality potting soil, and room temperature water. Optional items include rooting hormone and small plant pots. Most of these materials are commonly found at home, making mint propagation an affordable gardening project.
When is the best time to propagate mint?
Spring and early summer are optimal for outdoor mint propagation. However, indoor propagation can be done year-round with proper care. For division method, fall is the best time when mature plants have developed robust root systems after 2-3 growing seasons.
How long does it take for mint cuttings to root?
Mint cuttings typically develop roots within 1-2 weeks when placed in water. This method is often faster than seed propagation, allowing a single mint stem to transform into a complete plant within just a few weeks under proper conditions.
What mint varieties can I propagate at home?
Common mint varieties suitable for propagation include peppermint, spearmint, and chocolate mint. Each variety has unique characteristics and propagation success rates. All these varieties respond well to cutting, division, and seed propagation methods with proper care.
How do I prevent my mint cuttings from rotting?
Remove lower leaves from cuttings before placing them in water to prevent rot. Change the water every 2-3 days, use filtered water when possible, and ensure proper drainage in containers. Maintain clean tools and containers to prevent bacterial transmission.
Can I grow mint directly from seeds?
Yes, mint can be grown from seeds, though it requires more patience than cutting or division methods. Choose quality seeds from reputable suppliers, start indoors with proper soil conditions, and maintain consistent moisture and light for successful germination.
How do I care for newly propagated mint plants?
Provide consistent moisture without waterlogging, maintain temperatures between 60°F and 70°F, and ensure bright, indirect light. Use diluted water-soluble fertilizer for gentle nutrition, and avoid overwhelming young plants with excessive nutrients during establishment.
Should I grow mint in containers or directly in the garden?
Container planting is recommended for better control over mint’s aggressive growth and easier maintenance. However, garden planting is suitable if you have space and want larger harvests. Both methods require well-drained soil and proper spacing considerations.