Money trees have become one of the most popular houseplants for good reason – they’re stunning low-maintenance additions that supposedly bring prosperity to your home. But like any thriving plant these beauties need regular trimming to maintain their iconic braided trunk and lush green canopy.
We’ve discovered that many plant parents feel intimidated by the thought of trimming their money tree. The fear of damaging this symbol of good fortune keeps countless people from giving their plants the care they desperately need. Without proper pruning your money tree can become leggy overgrown and far less attractive than the gorgeous specimen you originally fell in love with.
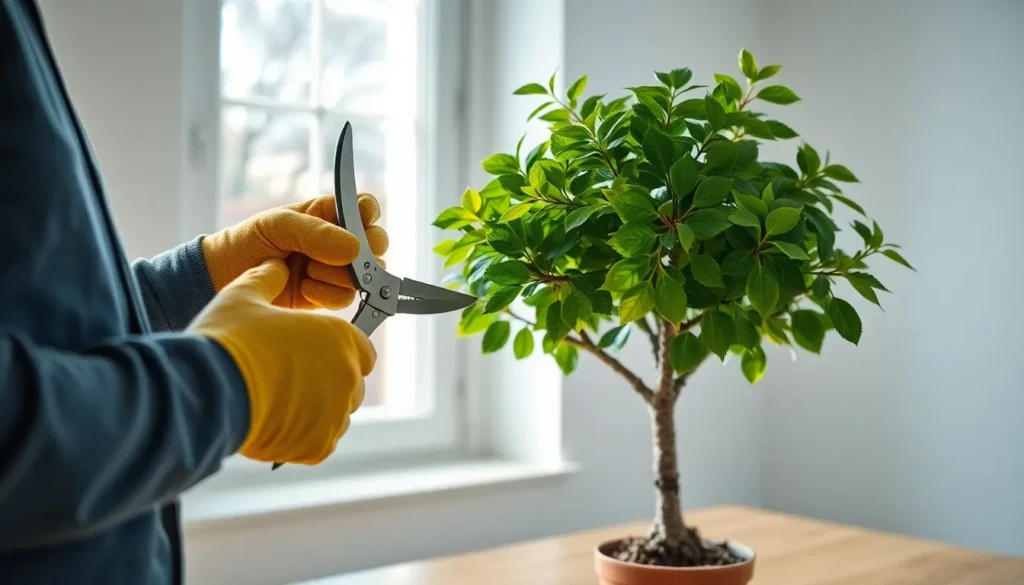
The truth is that trimming a money tree isn’t just safe – it’s essential for encouraging healthy growth and maintaining that perfect bushy appearance. We’ll walk you through the exact steps to confidently prune your money tree so it continues thriving and looking its absolute best year after year.
Tools and Materials Needed
Clean, sharp pruning shears form the foundation of successful money tree trimming. We recommend using bypass pruners with blades measuring 6 to 8 inches for optimal control and precision when cutting through branches up to 1 inch in diameter.
Rubbing alcohol or disinfectant wipes prevent the spread of plant diseases between cuts. Apply the disinfectant to pruning shear blades before starting and between each major pruning session to maintain sterile cutting conditions.
Garden gloves protect your hands from potential irritation and provide better grip control during the trimming process. Choose fitted gloves that allow finger dexterity while handling small branches and leaves.
Small hand saw or loppers become necessary when dealing with thicker money tree trunks exceeding 1 inch in diameter. These tools handle the braided trunk sections that standard pruning shears cannot accommodate effectively.
Clean cloth or paper towels serve multiple purposes during money tree maintenance. Use them to wipe pruning tools clean, remove plant debris, and clean any sap residue from cutting surfaces.
Collection container or tarp keeps your workspace organized by catching fallen leaves, branches, and plant debris. Position the container directly beneath the money tree before beginning any cutting activities.
Magnifying glass or reading glasses help identify small problem areas such as pest damage, disease spots, or tiny dead branches that require precise removal. Enhanced vision ensures thorough inspection of all plant sections.
Plant wound sealant (optional) protects larger cuts from infection and promotes faster healing on thick trunk sections. Apply the sealant sparingly to cuts exceeding 0.5 inches in diameter following manufacturer instructions.
When to Trim Your Money Tree

Timing your money tree pruning correctly ensures optimal plant health and promotes vigorous new growth.
Signs Your Money Tree Needs Trimming
Dead or damaged leaves signal the most urgent need for trimming action. Yellow leaves indicate natural aging or overwatering stress. Brown leaves show potential disease or environmental damage that requires immediate removal.
Overgrown or leggy growth patterns develop when plants stretch toward light sources. Branches extending beyond the desired canopy create unbalanced appearances. Sparse foliage on lower stems indicates energy redirection to upper growth areas.
Crowded or dense branch structures restrict proper air circulation throughout the plant. Multiple stems competing for the same growing space reduce individual branch vigor. Overlapping branches create shadowed areas that encourage pest infestations and fungal problems.
Monitoring these visual indicators helps us determine precise trimming schedules for our money trees.
Best Time of Year for Trimming
Maintenance pruning occurs year round for removing dead leaves and damaged branches. We perform these essential tasks immediately upon discovering problematic foliage regardless of season.
Spring pruning optimizes shaping activities as money trees enter their active growth period. March through May provides the ideal window for major structural adjustments. Plants respond most vigorously to pruning cuts during these months when energy reserves are highest.
Regular inspection every 2-3 weeks during growing season helps us identify trimming opportunities before problems become severe.
Preparing Your Money Tree for Trimming

Proper preparation ensures successful pruning results and protects your money tree from unnecessary stress. Following systematic preparation steps creates the optimal conditions for healthy trimming outcomes.
Inspecting the Plant for Health Issues
Examine your money tree thoroughly for dead, damaged, or diseased foliage before making any cuts. Yellow leaves signal overwatering issues, while brown edges indicate insufficient humidity or watering problems.
Look for soft or mushy stems that show signs of rot or disease. Diseased areas require immediate removal to prevent spread throughout the plant structure.
Check leaf attachment points where stems meet the main trunk for signs of weakness or damage. Focus attention on areas with dense foliage where air circulation remains limited.
Document problem areas using your phone camera to track improvement after trimming. Mark branches showing leggy growth patterns that extend beyond the desired canopy shape.
Identify crowded sections where multiple stems compete for light and space. These areas benefit from selective thinning to improve air circulation by 30-40%.
Cleaning Your Tools
Sterilize your bypass pruners using 70% isopropyl alcohol before starting any cuts. Clean tools prevent bacterial and fungal transmission between different plant sections.
Wipe cutting blades with disinfectant solution after each major cut sequence. Reapply alcohol to tools when moving between healthy and potentially diseased plant areas.
Prepare a small container with fresh disinfectant for quick tool cleaning during the trimming process. Replace the solution every 15-20 cuts to maintain effectiveness.
Test sharpness levels by making practice cuts on paper or thin cardboard. Sharp tools create clean cuts that heal faster and reduce plant stress by 25-30%.
Keep cleaning cloths and extra disinfectant supplies within easy reach during the trimming session. Efficient tool maintenance prevents workflow interruptions and maintains sterile conditions.
How to Trim a Money Tree Step by Step

Executing proper trimming techniques transforms your money tree into a healthier and more attractive houseplant. Follow these systematic steps to achieve professional pruning results.
Removing Dead or Yellowing Leaves
Identify problematic foliage by examining each leaf for signs of yellowing, browning, or disease damage. Dead leaves appear completely brown or black while yellowing leaves show gradual color change from green to yellow.
Locate the base of each damaged leaf where it connects to the stem or branch. Position your sterilized pruning shears at a 45-degree angle approximately 1/4 inch above the leaf node. Make clean cuts in one swift motion to prevent tearing or crushing the plant tissue.
Remove entire leaf clusters when multiple leaves on the same node show damage rather than attempting to save individual leaves. This approach prevents disease spread and encourages robust new growth from healthy nodes.
Pruning Overgrown Branches
Assess branch density by examining areas where foliage appears overcrowded or where branches cross and rub against each other. Dense growth patterns restrict air circulation and create conditions favorable for pest infestations.
Cut overgrown branches just above a leaf node that faces the direction you want new growth to develop. Target branches that extend beyond the desired canopy outline or grow inward toward the plant’s center. Remove no more than 25% of the total foliage during a single pruning session to avoid shocking the plant.
Focus on branches that appear weak, spindly, or significantly longer than surrounding growth. These branches often drain energy from healthier parts of the plant and rarely contribute to the overall structure.
Shaping Your Money Tree
Plan your desired silhouette before making any cuts by visualizing the final shape and identifying which branches support that structure. Most money trees benefit from a balanced, symmetrical appearance with even distribution of foliage.
Begin shaping from the top of the plant and work downward to maintain perspective on the overall form. Trim branches that disrupt the plant’s natural symmetry by cutting them back to points where they align with the established canopy line.
Create a fuller appearance by pinching or cutting the growing tips of healthy branches. This technique encourages lateral branching and results in denser foliage coverage within 4-6 weeks of pruning.
Trimming the Trunk for Height Control
Measure your money tree’s current height against your desired maximum height before beginning trunk modifications. Most indoor money trees thrive when maintained between 3-6 feet tall.
Cut the main trunk just above a strong leaf node or branch junction using clean, sharp pruning shears. Select a cutting point that leaves at least 2-3 healthy nodes below the cut to ensure adequate energy reserves for recovery and new growth.
Apply pruning sealant to cuts larger than 1/2 inch in diameter to prevent moisture loss and reduce infection risk. New shoots typically emerge from nodes below the cut within 2-4 weeks, creating a bushier growth pattern instead of continued vertical growth.
Different Trimming Techniques

Money tree pruning involves three distinct approaches that serve different purposes depending on your plant’s current condition and growth goals.
Light Pruning for Maintenance
Light pruning maintains your money tree’s health through regular removal of problematic foliage. We focus on eliminating dead, damaged, or yellow leaves that drain energy from healthy growth. Clean, sharp scissors or pruning shears make precise cuts just above healthy leaf nodes to encourage new development.
Maintenance trimming occurs throughout the growing season whenever we notice declining leaves. Each cut stimulates fresh growth at the node location. We examine the entire plant systematically, removing any foliage that appears discolored or wilted.
Heavy Pruning for Reshaping
Heavy pruning controls your money tree’s size and creates desired shapes through strategic branch removal. Spring timing produces optimal results because plants actively grow during this period. We identify oversized areas that require reduction and cut back stems just above leaf nodes.
Fuller shapes develop when we cut back top stems to encourage lower branch growth. This technique redirects the plant’s energy downward, creating bushier appearances. We remove no more than 25% of total foliage during single pruning sessions to prevent shock.
Major reshaping requires careful planning before making cuts. We visualize the desired silhouette and mark areas for removal. Each cut influences future growth patterns, so deliberate decisions produce better outcomes.
Pinching Method for New Growth
Pinching encourages branching and stimulates new growth through gentle tip removal. We pinch off the tips of new growth using our fingers or small scissors. This method works particularly well for younger plants or bonsai-style cultivation where size control matters most.
Regular pinching sessions throughout the growing season maintain compact forms. We target actively growing tips every 2-3 weeks during peak growth periods. Each pinched tip develops multiple new shoots, creating denser foliage patterns.
Bonsai enthusiasts rely heavily on pinching techniques to achieve miniature tree appearances. We combine pinching with light pruning to maintain desired proportions while encouraging healthy development.
Post-Trimming Care

Post-trimming care determines the recovery success and long-term health of your money tree. Proper attention to watering, lighting, and fertilization during the first 2-4 weeks after pruning ensures optimal healing and promotes vigorous new growth.
Proper Watering After Trimming
Watering immediately after pruning prevents shock and supports the healing process. Check soil moisture levels before adding water to avoid overwatering stressed plants. The soil remains moist but never waterlogged during the recovery period.
Heavy pruning requires thorough watering within 24 hours of cutting to help the plant cope with the stress. Monitor the top 2 inches of soil daily for the first week after trimming. Reduce watering frequency by 25% compared to your normal schedule since trimmed plants have fewer leaves to support transpiration.
Drainage becomes critical after pruning sessions. Excess water pools around wounded areas and creates conditions for root rot or fungal infections. Empty saucers within 30 minutes of watering to prevent standing water accumulation.
Light and Temperature Requirements
Bright indirect light accelerates healing and encourages new growth after trimming. Position your money tree 3-6 feet from south-facing windows or use sheer curtains to filter intense direct sunlight. Wounded areas become susceptible to sunburn during the recovery phase.
Temperature consistency between 65°F to 75°F (18°C to 24°C) optimizes the healing environment for freshly pruned money trees. Avoid placing trimmed plants near heating vents, air conditioning units, or drafty windows that create temperature fluctuations. Stable conditions reduce additional stress on the recovering plant.
Humidity levels between 40-60% support faster recovery and prevent leaf edges from browning. Use humidity trays filled with pebbles and water or group plants together to increase local moisture levels around your trimmed money tree.
Fertilizing Your Trimmed Money Tree
Balanced houseplant fertilizer diluted to half strength supports healthy regrowth once new foliage begins appearing 2-3 weeks after pruning. Avoid fertilizing immediately after trimming since wounded plants cannot effectively process nutrients during the initial healing phase.
New leaf emergence signals the optimal timing for post-trimming fertilization. Apply diluted 10-10-10 or 20-20-20 fertilizer every 4-6 weeks during the active growing season from spring through early fall. Stop fertilizing during winter months when growth naturally slows.
Organic alternatives like diluted fish emulsion or compost tea provide gentle nutrition for recovering money trees. These options release nutrients slowly and reduce the risk of chemical burn on sensitive, newly trimmed plants.
Common Mistakes to Avoid

Money tree trimming mistakes can severely damage your plant’s health and appearance. Recognizing these common errors helps you achieve better pruning results.
Over-Trimming Your Money Tree
Removing more than one-third of the plant’s foliage creates excessive stress that leads to decline. Money trees require time to recover from pruning cuts, and aggressive trimming overwhelms their natural healing processes. Stick to the 25% removal rule during each pruning session to maintain plant vigor.
Signs of over-trimming include wilting leaves, stunted growth, and yellowing foliage that appears weeks after cutting. Recovery from severe trimming takes 3-6 months, during which your money tree remains vulnerable to diseases and pests. Focus on gradual shaping over multiple sessions rather than dramatic changes in single trimming events.
Using Dirty or Dull Tools
Contaminated pruning tools spread bacteria and fungi between cuts, introducing infections directly into fresh wounds. Clean your scissors or pruning shears with 70% isopropyl alcohol before each use to eliminate pathogens. Dull blades create ragged cuts that heal slowly and invite disease.
Sharp tools produce clean cuts that close quickly and minimize plant stress. Replace or sharpen your pruning tools when they begin crushing stems instead of slicing cleanly through plant tissue. Sterilize tools between different plants to prevent cross-contamination of diseases.
Trimming at the Wrong Time
Major pruning outside the spring growing season reduces your money tree’s ability to recover and produce new growth. Active growth periods from March to May provide optimal conditions for healing and branching responses. Winter pruning forces the plant to use stored energy reserves when metabolism runs slowly.
Emergency removal of dead or damaged material can occur year-round without harming the plant. Schedule structural changes and shaping cuts during peak growing months when your money tree actively produces new leaves and branches. Late fall and winter pruning delays recovery until the following spring growth cycle begins.
Troubleshooting Common Issues

Money tree trimming occasionally produces unexpected results that concern plant owners. Recognizing and addressing these common post-pruning problems ensures your money tree recovers quickly and continues thriving.
Brown Tips After Trimming
Brown leaf tips after trimming typically result from over-pruning or contaminated cutting tools. Excessive removal of foliage stresses the plant and disrupts its natural moisture balance. Unsterilized pruning shears introduce harmful bacteria that cause tissue damage and browning.
Clean your cutting tools with 70% isopropyl alcohol before each use to prevent disease transmission. Reduce pruning frequency by limiting cuts to only damaged or diseased areas. Water your money tree moderately after discovering brown tips since the plant requires less moisture with reduced foliage.
Monitor the browning pattern to determine severity. Isolated brown tips indicate mild stress while widespread browning suggests severe over-pruning that requires immediate care adjustments.
Slow Growth After Pruning
Slow growth following pruning occurs when excessive plant material gets removed during trimming sessions. Money trees redirect energy toward healing cut sites rather than producing new growth when more than 25% of foliage gets pruned. Insufficient light and nutrients compound this growth slowdown.
Position your money tree in bright indirect light for 6-8 hours daily to support recovery. Apply balanced liquid fertilizer at half strength once new leaves emerge to provide essential nutrients without overwhelming the stressed plant. Remove only necessary growth during future pruning sessions to maintain the plant’s energy reserves.
Track new leaf production over 4-6 weeks to assess recovery progress. Healthy money trees typically show signs of new growth within 3-4 weeks when proper care conditions exist.
Leaf Drop Following Trimming
Leaf drop after trimming indicates pruning stress that overwhelms the money tree’s adaptive capacity. Plants naturally shed healthy leaves to conserve energy when healing from extensive cutting. Environmental changes during the recovery period intensify this stress response.
Maintain consistent growing conditions with temperatures between 65°F to 75°F and humidity levels of 40-60%. Water when the top inch of soil feels dry to prevent additional stress from drought or overwatering. Avoid moving or repotting your money tree for 4-6 weeks after pruning to minimize environmental disruption.
Expect some leaf drop as a normal healing response but monitor the rate of loss. Gradual leaf drop over 2-3 weeks indicates normal recovery while rapid loss suggests severe stress requiring immediate environmental adjustments.
How to Propagate Cuttings from Trimming

Transform your trimmed money tree branches into new plants through strategic propagation techniques. These healthy stem cuttings create opportunities for expanding your collection or sharing with others.
Preparing Cuttings for Rooting
Select healthy stem cuttings with at least 2-3 leaves from your trimmed branches. Cut the stem approximately 6 inches long just below a node where new roots will emerge. Remove any lower leaves that would sit underwater during rooting to prevent decay.
Examine each cutting for signs of disease or damage before proceeding. Clean cuts heal faster and root more successfully than ragged edges. Allow the cut end to dry for 30 minutes to form a protective callus that reduces infection risk during propagation.
Water Propagation Method
Fill a clear glass container with room temperature water and place your prepared cutting inside. Position the stem so at least one node remains submerged while keeping all leaves above the waterline. Clear containers allow you to monitor root development progress easily.
Change the water every 3-4 days to prevent bacterial growth and maintain oxygen levels. Place the container in bright indirect light away from harsh sun exposure. Roots develop within 2-4 weeks when conditions remain consistent.
Monitor root length before transplanting to soil. Roots measuring 1-2 inches provide sufficient strength for successful soil transition.
Soil Propagation Method
Combine equal parts potting soil and perlite to create well-draining potting mix for your cuttings. Fill small 4-inch pots with this mixture and create holes using your finger or pencil. Insert each cutting into the prepared hole and bury several nodes beneath the soil surface.
Press soil gently around the stem to eliminate air pockets while maintaining good drainage. Water lightly to moisten the soil without creating waterlogged conditions. Cover the pot with a clear plastic bag to maintain humidity levels during root development.
Roots form within 4-8 weeks when soil moisture stays consistent but not saturated. Test for root development by gently tugging the cutting after 6 weeks. Resistance indicates successful root establishment and readiness for normal care routines.
Conclusion
Trimming your money tree doesn’t have to be intimidating when you’re equipped with the right knowledge and tools. We’ve covered everything from proper timing and preparation to step-by-step techniques that’ll keep your plant healthy and thriving.
Remember that consistent care and regular maintenance pruning will yield better results than sporadic heavy trimming sessions. By following our guidelines and avoiding common mistakes you’ll develop the confidence to shape your money tree into the beautiful houseplant it’s meant to be.
Your newly trimmed money tree will reward your efforts with robust growth and that lush appearance that makes these plants so beloved. Take your time practice these techniques and watch as your plant care skills flourish alongside your thriving money tree.
Frequently Asked Questions
When is the best time to trim a money tree?
Spring (March to May) is the optimal time for major structural pruning when plants are actively growing. However, maintenance pruning can be done year-round. Remove dead or damaged leaves immediately when spotted. Inspect your plant every 2-3 weeks during growing season to catch issues early.
How much of my money tree can I safely trim at once?
Never remove more than 25% of the foliage at one time. This prevents shock and stress to the plant. If extensive pruning is needed, spread it across multiple sessions over several months. Focus on dead, damaged, or problematic growth first before addressing structural changes.
What tools do I need to trim my money tree?
Essential tools include clean, sharp bypass pruners, 70% isopropyl alcohol for disinfection, garden gloves, and a collection container for debris. For larger branches, use small hand saws or loppers. Consider plant wound sealant for bigger cuts and a magnifying glass for detailed inspection.
How do I know when my money tree needs trimming?
Look for dead or yellowing leaves, overgrown or leggy growth patterns, and crowded branches restricting air circulation. Signs include wilting foliage, sparse growth, and an unbalanced appearance. Regular inspection helps identify these issues before they become serious problems.
Can I propagate cuttings from my trimmed money tree branches?
Yes! Healthy stem cuttings can be propagated through water or soil methods. Select 4-6 inch stems with several nodes, make clean cuts, and either place in water until roots develop or plant directly in well-draining soil mix. Keep cuttings in bright, indirect light.
What care does my money tree need after trimming?
Water immediately after pruning to prevent shock, then monitor soil moisture carefully. Provide bright indirect light and maintain temperatures between 65-75°F with 40-60% humidity. Wait until new leaves emerge before fertilizing, then use balanced fertilizer at half strength.
What common mistakes should I avoid when trimming my money tree?
Avoid over-trimming (removing more than 25% of foliage), using dirty or dull tools that can spread disease, and major pruning during dormant periods. Don’t cut randomly—plan your approach and visualize the desired shape before making cuts. Always sterilize tools between plants.
How often should I trim my money tree?
Light maintenance pruning can be done as needed throughout the year. Remove dead or damaged leaves immediately. During growing season, inspect every 2-3 weeks for pinching opportunities. Major structural pruning should only be done once per year in spring.