Start by choosing garden mums instead of florist varieties. Garden mums are bred to handle outdoor conditions better and will give you more reliable results. Place them where they get full sun—at least six hours daily—and plant them in soil that drains well. Soggy soil causes root rot, so amend heavy clay with compost or sand if needed.
Water at the base of the plant consistently, keeping the soil moist but not waterlogged. This steady approach prevents stress that invites pests and disease.
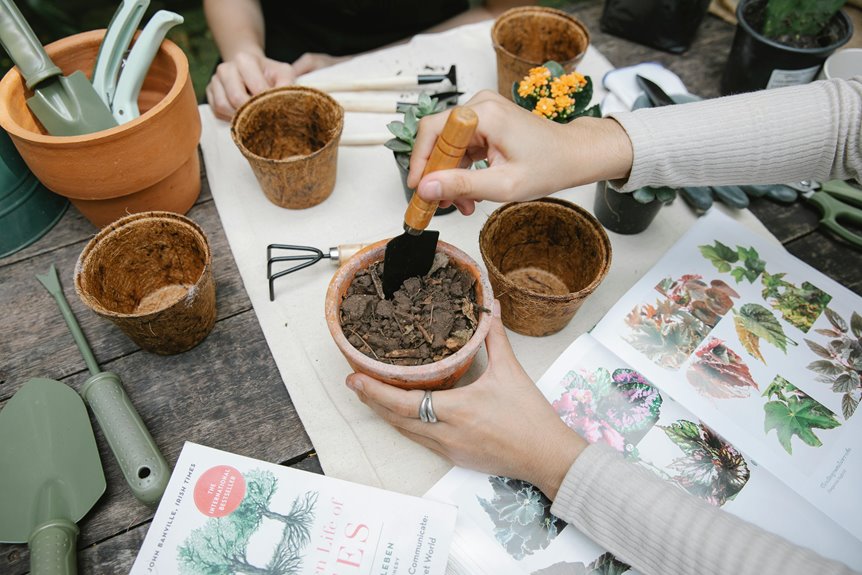
Pinch the stems when plants reach 6 inches tall, then again at 1 foot. Remove the top half-inch of growth to force the plant to branch out sideways instead of growing straight up. More branches mean more flower buds and a fuller plant overall.
Space plants 18–30 inches apart to let air move between them. Good airflow reduces fungal problems. After the first frost, add 2–3 inches of mulch around the base to insulate the roots through winter.
Feed with a balanced fertilizer like 10-10-10 every two weeks until flower buds appear, then switch to a bloom formula with higher phosphorus (the middle number). This shift directs the plant’s energy toward flowers rather than leaves.
Check plants weekly for common pests like spider mites, aphids, and whiteflies, as well as powdery mildew and leaf spot disease. Remove any affected leaves right away and dispose of them in the trash, not your compost bin. Catching problems early keeps them from spreading.
Chrysanthemum Basics: Where They’re From and What They Are

Chrysanthemums show up everywhere when fall arrives because they bloom naturally during this season. These flowers belong to the genus Chrysanthemum, specifically the species C. morifolium, which is part of the Asteraceae family. This plant family is the largest group of flowering plants, containing over 23,000 species. Mums originated in China and Europe, and people call them the “Queen of Fall Flowers” because of their reliable autumn blooms.
You need to understand one key difference when shopping for mums. Garden mums are hardy perennials with strong root systems that survive winter and grow back year after year outdoors. Florist mums, by contrast, are greenhouse-grown annuals meant for temporary indoor displays and won’t survive outdoor winters. Knowing which type you’re buying helps you choose the right plant for your situation and care for it correctly.
Garden Mums vs. Florist Mums: Which Should You Buy?

When you’re shopping for mums, understand the key differences between garden mums and florist mums. Your choice depends on what you want from the plant.
Garden mums are hardy perennials with strong, deep root systems. They’ll survive winter in zones 5–9, which means they can come back year after year in your garden. Pick garden mums if you want a long-term landscape investment that produces repeat blooms.
Florist mums have shallow roots and are typically treated as seasonal decorations. They won’t reliably overwinter in your garden, so they work best as short-term color in containers and arrangements. Choose florist mums when you want temporary color without expecting the plant to return next season.
Rooting Systems And Hardiness
Why do some mums come back year after year while others disappear after one season? The answer lies in their root systems and hardiness. Garden mums develop deep, branching root systems that let them survive winter and return as true perennials. Florist mums, bred for short-term indoor displays, lack these robust roots and won’t survive outdoor overwintering.
When you’re selecting plants, you’re choosing between temporary decorations and lasting garden additions. Garden mums need spring planting to give them the longest establishment period before fall blooming. This timing matters because spring planting allows stronger root development and better perennial rebloom compared to fall planting.
In cold zones, garden mums can overwinter with proper protection. Use a 3- to 4-inch layer of mulch around the base after the ground freezes. Pull back the mulch in early spring once new growth appears. This simple protection rewards your garden care with reliable seasonal color year after year.
Seasonal Use And Longevity
Understanding your mum’s root system tells you exactly what to expect after the blooms fade. Garden mums are perennial plants built for outdoor use and will come back year after year. Plant them in spring when the soil is workable. This gives them time to develop strong roots before winter arrives.
Florist mums work differently. They’re bred for short-term indoor display and lack the hardiness to survive outdoors. They won’t return next season, so treat them as temporary decorations rather than long-term investments.
If you want chrysanthemums that come back annually, choose garden mums and plant them in spring. Use florist mums for fall decorating indoors only. This distinction helps you make smart purchasing decisions based on what you actually want from your plants.
Sunlight and Soil: Creating the Right Growing Environment

Getting the foundation right makes a real difference with chrysanthemums. Position your plants where they get full sun—that means at least 5–6 hours of direct light each day. This keeps them healthy and encourages more flowers.
Next, deal with your soil. Chrysanthemums do best in soil that drains well and has organic matter mixed in. If you have heavy clay soil, add compost or peat moss to improve drainage and help roots develop properly. Space plants 18–30 inches apart so air can move between them, which cuts down on disease.
When you water, aim the water at the soil around the roots. Don’t spray the leaves, since wet foliage invites fungal problems. In cooler climates, spread 2–3 inches of mulch around each plant to keep moisture in and protect the roots.
Watering and Drainage: Getting the Foundation Right
Once you’ve got your soil and sunlight sorted, your watering routine becomes the next piece of the puzzle. Water at the soil level, keeping roots consistently moist without waterlogging them. During the first few weeks of establishment, aim for about one inch of water per week. After that, increase to 2–3 waterings weekly as the plant matures. Water in the morning so foliage dries completely, which reduces fungal diseases and protects blooms.
Drainage matters just as much as irrigation. Poor-draining soil causes runoff and root rot. Fix this by mixing organic matter into your soil or by using raised beds and containers instead. Add 2–3 inches of mulch around the base to retain soil moisture and insulate the roots.
Container-planted mums dry out faster than garden mums, so monitor them more often and stick to a consistent watering schedule. Check drainage holes regularly to prevent standing water. This balance between moisture and drainage is what your mums need to grow properly.
Pinching Mums: When and How to Double Your Blooms

To get your mums to produce more flowers and a fuller shape, pinch them back at specific times during their growth. Pinching removes small sections of growth, which encourages your plants to develop more flowering shoots instead of growing tall and spindly. This technique reduces leggy growth while boosting flower density.
When to Pinch Your Mums
Start your first pinch when plants reach 6 inches tall. Remove the top 3/4 inch of growth to encourage branching. When the plant reaches 1 foot tall, perform your second pinch using the same method—remove another 3/4 inch from the top. This promotes a bushier overall shape.
Time your final pinch about 100 days before your desired bloom date. Remove the top 3/4 inch of growth one last time. This spacing allows bud formation to happen properly without further interruption.
How to Pinch
Use your thumb and forefinger to grip the tip of the stem just above a set of leaves. Pinch firmly and pull upward to remove the top growth cleanly. You don’t need special tools for this task. Make sure you remove only the tender new growth at the tip, not entire branches.
Fertilizing Your Mums: Timing and Feeding Schedules

When should you start feeding your mums, and how do you know when to stop. Begin fertilizing once your mums are ready for blooming, then discontinue after flower buds form. During the growing season, use a balanced fertilizer to support healthy development. The key is applying light and frequent feedings rather than heavy doses. This approach maintains steady nutrient availability for developing shoots and buds.
For container mums, switch to a bloom-forward formula like 5-10-5 at half strength every 2–3 weeks until buds appear. Once buds develop, reduce your feeding schedule significantly. Avoid fertilizing after your final pinch, as excessive nutrition delays flowering and encourages unwanted vegetative growth. Also skip feeding during extreme temperatures. This feeding schedule helps your mums produce abundant, vibrant blooms.
Overwintering Chrysanthemums: Protecting Perennials Through Cold
After finishing your feeding schedule, your mums need preparation for winter. Once a hard frost hits, cut back your chrysanthemums. Then apply mulch around the base—aim for 2 to 3 inches in most areas, or up to 4 inches of pine straw if you live in a colder zone. This layer protects the crown and roots through the cold months.
For potted mums, move them to a cool spot with good light. Water only when the soil dries 2 to 3 inches down from the surface. Make sure water drains well so the soil doesn’t stay wet. Standing water causes root rot.
For garden mums in the ground, cut back on fertilizer for 2 to 3 weeks after the hard frost. Watch for damage when temperatures rise and fall—the freeze-thaw cycle stresses plants. Add more mulch if needed to protect against this stress.
If you’re thinking about planting new mums, wait until spring. Fall planting often leads to poor establishment because the plants don’t have time to settle in before winter arrives. Spring planting gives them a better chance to survive the following winter.
Common Pests and Diseases: Spotting and Stopping Them

Even healthy-looking mums can hide pest problems like aphids, spider mites, and thrips. Check your plants regularly—at least once a week—to catch problems early. Look under leaves and along stems where pests like to hide.
Diseases such as powdery mildew and leaf spot develop when conditions favor them. Poor air circulation, wet foliage, and crowded spacing create the right environment for these problems. Your spacing, drainage, and watering habits matter as much as spotting damage itself. Space plants 12 to 18 inches apart to allow air to flow between them. Water at the base of plants in the morning rather than overhead to keep foliage dry.
Once you identify a problem, take action with these steps:
Remove infected material. Deadhead leaves, flowers, or stems showing disease signs. This reduces the number of spores or pests on your plant and slows the problem’s spread.
Improve conditions. Thin out crowded plants if needed. Check that soil drains well and isn’t staying wet after watering. These changes prevent new problems from developing.
Apply treatments when needed. Use neem oil or pyrethrin spray when pests appear. Follow the label directions for mixing and application rates. Spray in early morning or late evening when beneficial insects are less active. Repeat treatments every 7 to 10 days if the problem continues.
Identifying Common Pest Infestations
Catch pest problems early by scouting your chrysanthemums regularly. Walk through your plants at least once a week and look for signs of common pests before they spread.
Check the undersides of leaves for spider mites, which leave fine webbing on the plant. Look at new growth for clusters of aphids—these insects reproduce quickly, so spotting them early matters. Watch the foliage for powdery mildew, which appears as a white coating and spreads faster when humidity is high or air circulation is poor.
You have several effective options for managing these pests. Neem oil spray works well against aphids and other soft-bodied insects. Pyrethrin, a natural insecticide, handles a range of pests effectively. Mix according to label directions and apply in the early morning or late evening when beneficial insects are less active.
Prevent many pest and disease problems by improving growing conditions. Space plants far enough apart so air flows between them. Water at the soil level in the morning rather than overhead, keeping foliage dry. Remove dead leaves and debris around plants, which can harbor pests and disease. Regular scouting combined with these preventive steps will catch problems when they’re still small and easy to control.
Managing Diseases And Prevention
Stopping pests before they spread is good, but preventing diseases from the start is better. Focus on creating conditions where powdery mildew, Botrytis, and aphids can’t get a foothold.
Start with drainage. Make sure your containers have drainage holes and the soil doesn’t stay wet. Soggy soil is an open invitation for problems. Space your plants so air can move around the leaves. Place them where they get full sun. This matters because good air circulation keeps foliage dry.
Water at the base of plants, not from above. Overhead watering wets the leaves and creates conditions diseases love. Add mulch around plants to reduce soil splash and keep moisture levels more consistent.
Check your plants often. When you spot diseased or dead leaves or stems, remove them right away. If aphids show up, spray them with Neem oil or insecticidal soap. These steps work together to create an environment where chrysanthemums grow well and diseases struggle to take hold.
Propagating Mums: Division and Stem Cuttings

You can expand your mum collection through two reliable methods: division and stem cuttings. Both work best in spring when new growth appears.
Division Method
Dig up the entire clump and use a sharp knife to separate it into smaller sections. Discard any parts that look dead or diseased. Each new division needs healthy roots and at least one fresh growth shoot. Once separated, plant each division into fertile, well-drained soil right away.
Stem Cuttings Method
Take cuttings from healthy spring growth about 3 to 4 inches long. Strip off the lower leaves from each cutting. Dip the cut end into rooting hormone powder, then push it into sterile rooting medium like perlite or sand. Keep the medium moist but not waterlogged while roots develop over the next few weeks.
Spacing and Planting
After propagating by either method, space your new plants 18 to 30 inches apart. This distance allows air to move freely around the plants, which reduces disease and helps them establish quickly before summer heat arrives. Use fertile, well-drained soil for best results. You’ll want to repeat this propagation process every 3 to 5 years to keep your mums vigorous and healthy.
| Method | Best Timing | Key Step |
|---|---|---|
| Division | Spring | Separate with knife |
| Stem Cuttings | Spring | Apply rooting hormone |
| Replanting Both Methods | Every 3–5 years | Space 18–30 inches apart |
Why Your Mums Won’t Flower: Diagnosis and Solutions

Once you’ve successfully propagated and planted your mums, the next challenge is getting them to actually bloom. Several common issues prevent flowering, but you can work through each one.
Insufficient sunlight – Mums need 5–6 hours of daily sun. Without it, they stay green and leafy without producing flowers. Check your plant’s location during morning, afternoon, and evening. If shade covers the area for more than half the day, move the pot or plant to a sunnier spot.
Poor drainage – Waterlogged soil stops roots from developing properly and prevents buds from forming. Feel the soil two inches below the surface. It should feel moist but not soggy. If water sits on top or the soil stays wet for days after watering, amend it with perlite or sand to improve drainage.
Incorrect pinching timing – Pinching means removing the top inch of stem growth to encourage bushier plants with more blooms. Do this regularly from spring through mid-July. Stop pinching by August 1st. Late pinching creates tall, spindly plants with few flowers at the top.
Wrong day length – Mums flower when days shorten to about 10 hours of light. This happens naturally in late summer and fall. If your plant sits under outdoor lights or near a porch light at night, the extra light tricks the plant into thinking it’s still growing season. Keep artificial light away from your mums after sunset during late summer.
Improper fertilization – High-nitrogen fertilizer promotes leaf growth at the expense of flowers. From spring through early August, use a balanced fertilizer like 10-10-10. Once buds appear in late August, switch to a bloom-focused formula with higher phosphorus, such as 5-10-10.
Start by checking your plant’s sunlight exposure, soil moisture, and pinching schedule. Verify that you’ve switched to bloom fertilizer once buds show. Address these factors one at a time, and your mums will flower reliably each season.


