How Do You Care for a Bleeding Heart Plant
Light and Location
Place your bleeding heart where it gets morning sun and afternoon shade. This partial shade setup keeps the plant happy without exposing it to intense midday heat. The plant actually prefers cooler conditions, so this light pattern works well for its needs.
Watering Schedule
During spring and summer, water two to three times per week. Before watering, stick your finger into the soil about one inch deep. If it feels dry at that depth, go ahead and water. When fall arrives, cut back significantly on watering since the plant goes dormant during colder months and doesn’t need as much moisture.
Soil and Mulch
Use rich, organic soil that drains well. Poor drainage causes root rot, which kills these plants quickly. After planting, spread a two to three-inch layer of mulch around the base. Keep the mulch a few inches away from the stem to prevent moisture buildup against the plant itself.
Seasonal Adjustments
Your care routine changes with the seasons. Spring and summer require regular watering and attention since the plant is actively growing. Once temperatures drop and the plant enters dormancy, reduce your watering to match its slower growth rate. This seasonal shift is straightforward to follow once you understand that the plant needs less water when it’s not actively producing new leaves.
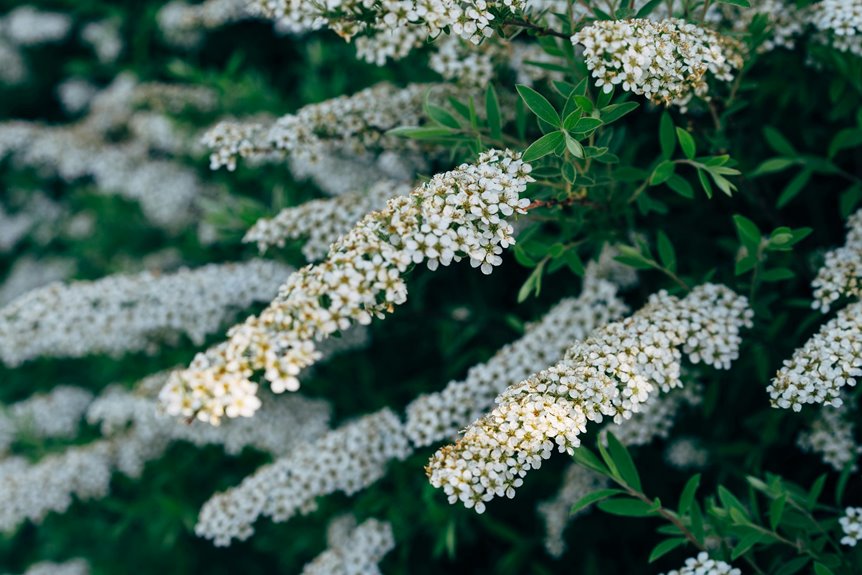
Why Bleeding Hearts Love Shade and Cool, Moist Soil
Bleeding hearts need shade because they evolved in forest environments where direct sunlight rarely reaches the ground. Bright sun stresses these plants and causes them to struggle. Plant your bleeding heart where it gets morning sun but stays shaded in the afternoon. This setup mimics the filtered light of a woodland floor.
The soil requirements work together with shade to keep your plant healthy. Your bleeding heart needs soil that stays consistently moist but not waterlogged. Mix in 2-3 inches of compost or aged leaf mold to create rich, well-draining soil that holds water without becoming soggy. This prevents root rot while giving the plant the moisture it needs.
Shade and moist soil work as a team. When you shade your plant, water evaporates more slowly from the soil, so it stays cool and damp longer. Without shade, heat dries out the soil quickly, and your bleeding heart will wither or go dormant even if you water regularly.
Add 2-4 inches of mulch around the base of your plant, stopping a few inches away from the stem. Mulch reduces water loss and keeps the soil temperature stable throughout the growing season. Use shredded bark, wood chips, or compost as your mulch material. Reapply it each spring as it breaks down.
Getting Your Soil Right: What Bleeding Hearts Need
You’ll want to focus on three key elements to create the right home for your bleeding heart: rich organic matter that mimics forest soil, a balanced drainage and moisture setup that keeps things consistently moist without waterlogging, and a slightly acidic to neutral pH between 6.0 and 7.0. Getting these basics right means your plant won’t struggle, even if your garden soil isn’t naturally ideal.
Start by building your soil with organic matter. Bleeding hearts come from forest floors, so they want soil that feels loose and rich. Mix in 2 to 3 inches of compost or aged leaf mold into your planting area. This gives the roots something soft to push through and helps the soil hold moisture without becoming compacted.
Next, handle drainage carefully. Your soil needs to stay moist but not soggy. If your garden has heavy clay, add perlite or coarse sand to improve drainage. If water runs through too quickly, add more compost to help it stick around. The goal is soil that feels damp when you squeeze it but doesn’t clump into a tight ball.
Finally, check your pH. Most garden soil tests run between 6.0 and 7.0, which works well for bleeding hearts. If your soil is more alkaline, work in sulfur or use composted pine needles to lower the pH gradually over a few seasons. A basic soil test kit from a garden center takes the guesswork out of this step.
Organic Matter Importance
You need soil loaded with organic matter to support bleeding hearts properly. This means building a living ecosystem in your soil that feeds your plant all season long.
Add compost annually. Every spring, spread a 2- to 3-inch layer of finished compost over the soil around your plants. This boosts soil structure, adds nutrients, and gives your bleeding hearts steady nutrition without extra work.
Mulch with organic materials. Lay 2 to 3 inches of shredded bark, wood chips, or straw around the base of each plant. Keep mulch 2 inches away from the stem. This keeps soil moisture consistent, blocks weeds, and creates the calm growing conditions bleeding hearts prefer.
Use compost or leaf mold when planting. Mix 2 to 3 inches of compost into the planting hole before you set the plant in place. This improves how well the soil holds water and slows down nutrient release, which means your plant gets fed gradually through the growing season.
This straightforward approach works because you’re following what plants actually need. No complicated formulas required—just organic matter doing its job in the soil.
Drainage and Moisture Balance
Soil needs to hold moisture while draining well at the same time. Bleeding hearts require consistently moist soil but will develop root rot if water sits around their roots. The balance matters because one extreme leads to wilting and the other to decay.
Start by applying 2 to 3 inches of mulch around your plant. Mulch reduces water evaporation from the soil surface and keeps the root zone at an even moisture level. Use wood chips or shredded bark, and keep the mulch a few inches away from the plant stem to prevent rot.
Your watering schedule depends on the season. During spring and summer when temperatures rise, water more frequently to maintain consistent moisture. Check the soil by pressing your finger 2 inches down—if it feels dry, water until the soil is damp but not soggy. In winter when the plant goes dormant, reduce watering since the plant needs less water.
Location matters for managing moisture naturally. Plant bleeding hearts in partial shade near building foundations or in low-lying areas where soil stays naturally moist. These spots receive less direct sun, which means less evaporation. Make sure the area has proper drainage so water doesn’t pool. Good drainage prevents standing water while the partial shade helps retain soil moisture.
Soil Composition and pH
Soil Composition and pH
Bleeding hearts need specific soil conditions to grow well. The foundation you build matters more than anything else you’ll do for these plants.
Start by checking your soil pH. Bleeding hearts prefer slightly acidic to neutral soil, around 6.0–7.0. Outside this range, they struggle to absorb nutrients and grow poorly. If you don’t know your soil’s current pH, run a soil test before making changes. This tells you exactly what you’re working with.
Mix in organic matter to improve your soil structure. Add compost or leaf mold—aim for 2 to 4 inches worked into the top 8 to 10 inches of soil. Organic matter holds moisture better and provides steady nutrition as it breaks down. This is especially important because bleeding hearts like consistent moisture without waterlogging.
Whether your soil is clay or sand, you can make it work. Clay soil needs organic matter to loosen it up and improve drainage. Sandy soil needs organic matter to help it hold water longer. The key is managing moisture carefully. Keep the soil consistently moist but not soggy.
Top-dress with compost once a year, spreading 1 to 2 inches around the base of the plant. This adds nutrients over time without the risk of over-fertilizing. Skip heavy feeding—bleeding hearts don’t need much. A soil test helps you avoid adding nutrients your plant doesn’t need.
Spring Cleanup: Clear Dead Foliage Safely
As your bleeding heart plants emerge in early spring, clear away dead foliage before new shoots fully develop. Tender growth can be damaged by raking or rough handling, so timing matters.
Use your hands or soft tools to remove last year’s dead leaves. Work carefully around any emerging sprouts. Skip the rake—it will disturb delicate new growth sitting just below the soil surface.
If you’re building a garden for fireflies and pollinators, don’t bag or chip the debris. Instead, move it to the garden’s edge. Beneficial insects need this material to emerge safely and complete their life cycles.
After clearing the area, apply fresh mulch in a thin layer. This step maintains soil moisture and keeps weeds down. A 1 to 2-inch layer of mulch works well for most plants without smothering delicate new growth.
Watering Bleeding Hearts: Consistency Without Waterlogging

How often should you water your bleeding heart plants? You need to keep the soil consistently moist without letting it get waterlogged. The right watering schedule depends on the season.
Keep bleeding heart soil consistently moist without waterlogging—the right schedule depends on your season.
Spring and summer care: Water 2–3 times per week during the growing season. Before you water, stick your finger into the soil about an inch deep. If it feels dry at that depth, go ahead and water. If it still feels moist, wait another day or two. This approach prevents both drainage problems and the dry conditions that stress the plant.
Fall and winter adjustments: Once your bleeding hearts go dormant in fall, cut back on watering significantly. Overwatering dormant plants causes root rot and mushy stems. Wait until you see new shoots emerging in spring before you return to regular watering.
Watch for warning signs: Yellowing leaves and mushy stems mean you’re watering too much. Wilting leaves and crispy brown edges mean the soil is too dry. Pay attention to these signals and adjust your watering frequency accordingly. You’ll develop a feel for what your plants need as you observe them over a few weeks.
Mulch to Lock In Moisture and Block Weeds

Apply a 2-3 inch layer of organic mulch around your bleeding hearts. Compost or shredded leaves work well for this purpose. Spread the mulch around the base of the plant, but keep it away from the stems. Piling mulch against the stems can cause rot and damage your plant.
Mulch serves two main functions. It holds moisture in the soil during dry periods, and it blocks weeds from growing and competing with your bleeding hearts for water and nutrients.
Refresh your mulch in early spring and after heavy rain. This keeps the moisture level consistent in your soil and maintains effective weed control throughout the growing season.
Moisture Retention Benefits
Why does mulch make such a difference for bleeding hearts? Mulch protects your plants by creating the right growing conditions and reducing how much you need to water them.
Reduces evaporation – Apply a 2–3 inch layer of mulch around your plants. This layer buffers temperature changes and keeps soil consistently moist, so you’ll water less often during dry periods.
Improves soil structure – Organic mulches like compost and leaf mold break down over time and increase your soil’s water-holding capacity. Your soil naturally retains more moisture as these materials work into it.
Suppresses weeds – Weeds compete with your bleeding hearts for water and nutrients. Mulch blocks weed growth, so your plants can access available water without that competition.
Reapply mulch as needed throughout the growing season to keep these benefits working. A protective layer around your plants makes watering more straightforward and reliable.
Weed Suppression Strategies
Weeds compete directly with your bleeding hearts for water and nutrients, so mulch is your best defense. Apply organic mulch around your plants to block weeds while keeping soil moisture in place.
| Mulch Type | Moisture Retention | Weed Blocking | Soil Improvement |
|---|---|---|---|
| Compost | Excellent | Good | Excellent |
| Leaf Mold | Very Good | Very Good | Good |
| Shredded Bark | Good | Excellent | Fair |
| Wood Chips | Good | Good | Fair |
Pick organic materials that improve your soil while blocking light from reaching weed seeds. The best mulch types do both jobs at once—compost and leaf mold excel at both, while shredded bark is stronger at blocking weeds specifically.
Apply mulch in a moderate 2-3 inch layer around your plants. Keep it away from the plant stems so it doesn’t trap moisture against the shoots and cause rot. Too much mulch smothers emerging growth, so stick to this depth range.
Reapply mulch every few weeks throughout the growing season to maintain consistent weed suppression and moisture retention. As mulch breaks down, it adds organic matter to your soil and creates a better environment for your bleeding hearts to grow. This approach reduces weeds without heavy chemical use or constant hand-pulling.
Spot and Stop Bleeding Heart Pests and Diseases

Monitor for common pests
Check your bleeding heart plants regularly for aphids and slugs. Look closely at the stems and undersides of leaves where these pests hide. Aphids are small, soft-bodied insects that cluster on new growth. Slugs leave slime trails and chew irregular holes in foliage. If you spot an infestation, apply an appropriate mollusk control product according to the label instructions. Hand-picking slugs in the evening is also effective for light infestations.
Manage soil moisture properly
Root rot develops when soil stays waterlogged, so drainage matters more than most plant needs. Plant bleeding hearts in soil that drains well but holds enough moisture to keep roots from drying out. The goal is moist soil, not soggy soil. Water when the top inch of soil feels dry to the touch. If water pools on the surface after watering, your drainage needs improvement. Mix in compost or perlite when planting to help water move through the soil more easily.
Watch for overwatering and underwatering signs
Leaf yellowing or wilting points to an irrigation problem. If leaves yellow and soil feels wet, cut back on watering. If leaves wilt and soil feels dry, water more frequently. Adjust your watering schedule based on rainfall and temperature. During hot spells, you may need to water more often. In cooler periods with regular rain, you may need to water less.
Deer and rabbits generally skip bleeding hearts, so you won’t need to defend against these common garden herbivores.
Light Requirements: Finding the Right Sun-Shade Balance

Once you’ve dialed in your watering and pest management, focus on getting the light conditions right. This matters just as much as those other factors for keeping your bleeding heart healthy and producing blooms.
Bleeding hearts do best in partial shade. Position your plant to receive morning sun with afternoon shade, particularly in hot climates where intense rays can scorch the leaves. The goal is bright, filtered light—not direct sun beating down all day.
Bleeding hearts thrive in partial shade with morning sun and afternoon protection—bright, filtered light prevents leaf scorch and promotes healthy blooms.
For indoor plants, place the pot near a south or west-facing window and hang a sheer curtain to filter the direct rays. This setup gives you the brightness the plant needs without the harshness.
Watch what happens with the light levels. Too much direct light weakens the foliage and stunts growth. Too little light results in sparse blooms and thin, spindly stems. When you hit that middle ground—bright conditions with filtering—your plant will maintain good leaf color and steady flower production throughout the season.
Fertilizing Bleeding Hearts: Why Less Is More

Keep fertilizer applications minimal. Bleeding hearts do well in moderately fertile soil and don’t need heavy feeding schedules. Start by testing your soil before adding any fertilizer. A simple spring application of compost or leaf mold might be all your plant needs.
The reason to hold back on fertilizer is straightforward: excess nutrients push leafy growth at the expense of the delicate heart-shaped flowers. You want flowers, not just foliage. Apply a 1- to 2-inch layer of compost around the base of the plant each spring, working it into the top inch of soil. Skip additional feeding unless your soil test shows specific nutrient deficiencies. If your soil lacks nitrogen, phosphorus, or potassium, apply a balanced, slow-release fertilizer like a 10-10-10 formula at half the recommended rate in early spring. More frequent or heavier applications will only waste money and damage the plant’s flowering potential.
Minimal Nutrient Needs
Minimal Nutrient Needs
Bleeding hearts don’t need much fertilizer to grow well. They actually perform better with a light hand when it comes to feeding. Here’s how to approach it:
Test your soil first. Before you add any fertilizer, run a soil test. This tells you what nutrients are already present in your soil and what’s actually missing. Testing prevents you from adding too much or too little.
Use compost as your main nutrient source. Spread a 1 to 2-inch layer of compost around the base of your plants each spring. This method feeds them slowly as the compost breaks down, which is exactly what bleeding hearts need. No harsh chemicals required.
If you do fertilize, go light. Choose a balanced fertilizer like Garden-tone and apply it at half the recommended strength. Use it only once in spring. Organic compost does most of the work for you.
Understand why less is better. Too much fertilizer pushes your plants to make lots of leaves instead of flowers. Extra nutrients also increase the risk of rot, especially if your soil doesn’t drain well. Bleeding hearts prefer moist soil that’s rich in organic matter but low in added fertilizer. You’re actually helping them by holding back on feeding.
Spring Compost Application
Bleeding hearts respond well to a simple spring compost application. Apply a 1-to-2-inch layer of compost around the base of each plant in early spring, before new growth emerges. This light top-dressing adds nutrients gradually without overwhelming the plant.
Compost improves your soil structure and increases organic matter as it breaks down. This creates a better environment for root growth and water retention. The slow nutrient release from compost matches what bleeding hearts actually need to perform well.
Avoid synthetic fertilizers. They push excessive leaf growth at the expense of flowers. Your bleeding hearts need steady, mild nutrition—not the heavy feeding that chemical fertilizers provide. Compost alone supplies what these plants require to flower reliably year after year.
If you don’t have compost available, leaf mold works as an alternative. Make leaf mold by collecting fallen leaves in a bin and letting them decompose over one to two years, or purchase bagged leaf mold from a garden center.
Keep the compost layer away from the plant stems themselves. Pull it back slightly so it sits on the surrounding soil. This prevents rot and disease issues that can develop when organic matter sits directly against the base.
Soil Testing First
Before you reach for any fertilizer, get a soil test done. Testing reveals what your soil actually needs, so you’re not guessing or wasting money on products you don’t need.
Here’s what a soil test tells you:
- Avoid unnecessary fertilization – Most bleeding hearts grow well without added fertilizer if your soil has adequate nutrients
- Identify real deficiencies – Tests show whether you genuinely need balanced fertilizer like Garden-tone
- Use compost strategically – If soil tests show poor fertility, mix compost into the top few inches alongside any fertilizer application
When tests confirm nutrient deficiency, apply balanced fertilizer lightly into the topsoil and water thoroughly. This prevents root burn while distributing nutrients evenly. Less fertilizer is better than more when it comes to keeping bleeding hearts healthy.
Stake Bleeding Heart Stems as They Arch

When your bleeding heart plant starts putting on growth in spring, that’s the time to add stakes for support. Use lightweight stakes positioned near the crown to help manage those arching stems. Secure them with soft plant ties that won’t damage the delicate growth.
Install your staking support before new growth unfurls completely. This timing minimizes disruption to roots and emerging shoots. Choose stakes or small trellises that blend into your garden rather than stand out. A natural look works better than something that draws attention.
As your plant develops, check those ties periodically and adjust them as needed. Hold stems upright without constricting new shoots. This ongoing attention prevents the plant from flopping once flowering begins, keeping your bleeding heart looking neat throughout the season.
Manage Summer Dormancy and Prepare for Regrowth

Once your bleeding heart finishes flowering and the stems start to weaken, the plant enters its natural dormant phase. This is normal and expected, not a problem.
Cut back the dead stems to ground level after flowering ends, then remove them completely. This step prevents disease from spreading and makes room for new growth to emerge from the base.
Apply 2 to 3 inches of mulch around the base of the plant. Use materials like shredded bark or wood chips to keep the soil consistently moist and block out weeds. Bleeding hearts need steady moisture during their regrowth period, so this layer helps maintain that condition.
Provide afternoon shade during the hottest months of summer. If possible, plant in a cooler microclimate—such as under a tree canopy or on the north side of a structure—to reduce heat stress. This encourages the plant to put energy into producing new foliage rather than shutting down early.
These steps support healthy regrowth and help your bleeding heart return with vigor each season.
Cut and Arrange Bleeding Heart Blooms

Bleeding heart flowers work well as cut arrangements indoors. You get to see the rose-pink outer petals and white inner petals up close without leaving your home.
When and How to Cut
Pick stems during spring through early summer when your plant is actively flowering. This timing gives you the longest vase life. Cut stems carefully and place them in clean water right away. Recut each stem at a 45-degree angle before arranging. The angled cut increases water uptake and keeps flowers fresher longer.
Caring for Your Arrangement
Your cut bleeding hearts will last about two weeks in a vase. Change the water every few days and recut the stems at the same angle each time. Keep the vase in a cool spot away from direct sunlight and ripening fruit, which releases ethylene gas and shortens flower life.
Protecting Your Plant
Leave plenty of foliage on the plant when you cut. The leaves power photosynthesis, which keeps your bleeding heart healthy for next season. Don’t remove more than one-third of the stems from any single plant.
Preventing Drooping
Support each stem with a small stake or tie loosely to a thin bamboo rod if flowers start to droop. This simple step maintains the arrangement’s appearance throughout the vase life.
Divide Overcrowded Plants: When and How

Your bleeding heart plant will eventually become crowded as it matures, and you might notice it’s not performing as well as it once did. Division helps bring new life to overcrowded plants, but timing matters.
When to Divide
Wait until your plant is established before attempting division. If your bleeding heart is under five years old and growing well, leave it alone. Only divide if the plant is over five years old or visibly struggling with dense growth.
Late summer is the best time to divide. At this point, the plant goes dormant, which means the roots experience less stress compared to spring division. When you see shoots beginning to appear, act quickly. Split the plant before the leaves fully unfurl to keep shock to a minimum.
How to Divide
Each section you create needs plenty of roots attached. Cut carefully through the root ball so that every piece has a good portion of the root system. Sections with minimal roots will struggle to establish themselves.
Plant the divided portions in prepared soil and water them thoroughly. Space them at least 12 inches apart to give each new plant room to grow. This approach lets you control the size of your plants and when they bloom while keeping your bleeding heart healthy for years ahead.
Companion Plants That Pair Well With Bleeding Hearts

Why grow bleeding hearts alone when companion plants can add variety to your garden? Choose plants that need the same growing conditions you’re already providing for your bleeding hearts.
Companion plants add garden variety while sharing your bleeding hearts’ growing conditions, creating harmonious mixed plantings.
In woodland borders, pair bleeding hearts with ferns, hostas, and astilbe. These combinations work because they all prefer shade and similar soil conditions. The early-spring blooms of bleeding hearts create nice color contrasts with these foliage plants.
Add shade-tolerant plants that leaf out later in the season, such as hardy geraniums or heucheras. These plants keep your garden looking interesting after your bleeding hearts stop flowering.
Plant everything in partial shade with rich, moisture-retentive soil. Work 2 to 3 inches of compost into the soil before planting to improve water retention. Layer 2 to 3 inches of mulch around the base of all plants. This mulch suppresses weeds and keeps soil moisture consistent throughout the growing season.
Avoid planting sun-loving annuals near your bleeding hearts. Direct sun and heat stress these plants and reduce their blooms. Keep sun-loving plants at least 4 to 6 feet away from your bleeding heart grouping.
This mixed planting approach means each plant supports the others by sharing similar needs and not competing for resources.
Container Growing: Potting and Care Tips

When growing bleeding hearts in containers, pick a large fiberglass pot. This gives the plant room to spread out. Bleeding hearts can stay in the same container for 4–5 years before needing to be repotted.
Your soil mix matters a lot. Mix together 2 parts potting soil, 1 part perlite or coarse sand, and 1 part compost or organic matter. This blend mimics a forest floor and gives the plant what it needs. Keep the soil consistently moist, but don’t let it become waterlogged.
After you set up the right pot and soil, focus on two things: creating a regular watering schedule and learning how the plant’s needs change with the seasons. These details will keep your bleeding heart healthy year-round.
Selecting The Right Container
How big should your container be? You’ll want to choose a large outdoor container that gives your bleeding heart room to spread. Since these plants grow 2–3 feet tall and wide, picking the right size matters.
Drainage holes – Your container needs generous drainage holes on the bottom. Bleeding hearts like moisture, but they’ll rot if soil stays soggy. Good drainage prevents water from pooling around the roots.
Container depth and width – Select a pot that’s spacious enough to hold the plant at its full size. A pot that’s too small will crowd the roots and limit growth. Aim for at least 12–18 inches deep and wide to give the plant room to develop properly.
Long-term use – Your container can support the plant for 4–5 years before you need to repot or divide it. This gives you time before making another investment.
Soil Mix And Drainage
Getting your soil mix right keeps your bleeding heart healthy in a container. You need to create a blend that mimics the forest floor where these plants naturally grow.
Mix together 2 parts potting soil, 1 part perlite or coarse sand, and 1 part compost or organic matter. This combination holds steady moisture while draining quickly, which is exactly what your bleeding heart needs.
Here’s what each component does:
| Component | Ratio | Purpose |
|---|---|---|
| Potting soil | 2 parts | Base structure |
| Perlite/sand | 1 part | Drainage improvement |
| Compost | 1 part | Nutrients and moisture |
The resulting soil drains well and provides good aeration for root health while preventing waterlogging.
When selecting your container, choose one with generous drainage holes. This matters more than you might think. Without proper drainage, water sits around the roots and causes rot.
Water your bleeding heart thoroughly until water drains from the bottom. Then let the top layer of soil dry slightly before watering again. This rhythm keeps the soil consistently moist without becoming soggy. Check the soil by pressing your finger about an inch down. If it feels dry at that depth, water. If it still feels damp, wait another day or two.
Watering And Seasonal Care
Your bleeding heart’s watering needs shift dramatically between seasons. You’ll need to adjust how often you water based on what time of year it is and what’s happening with your plant.
Spring and Summer: Water 2–3 times weekly or whenever the top inch of soil feels dry to the touch. During these months, your plant is actively growing and needs consistent moisture to support that growth.
Fall and Winter: Water less frequently. Let the soil dry out slightly between waterings, but don’t let it dry out completely. Your plant is slowing down during these cooler months and doesn’t need as much water.
Watch for these signals: Yellowing leaves or mushy stems mean you’re watering too much. Wilting leaves or crispy edges mean the plant isn’t getting enough water. Adjust your watering schedule based on what you see.
Container-grown plants need soil that stays moist but never soggy. The exact watering frequency depends on your home’s temperature and humidity levels. Pay attention to how your soil feels and how your plant responds, and you’ll figure out the right rhythm for your space.
Propagate From Seeds and Division for More Plants

If you want more bleeding heart plants, you have two options: division and seeds. Division works faster and gives you more reliable results.
Division Method
Divide your plants in late fall or early spring when they’re dormant. Dig up an established plant and carefully separate it into sections. Make sure each section has a good amount of roots attached to it. Plant these divisions right away in prepared soil. You’ll get flowers within the first year. Named varieties like Alba and Gold Heart will stay exactly the same as the parent plant when you divide them.
Seed Method
Growing from seeds takes longer and is less predictable. Collect fresh seeds and give them cold, moist stratification to wake them up for germination. This means keeping the seeds cold and damp for several weeks before planting. Even with proper conditions, plants grown from seed typically need two to three years before they flower. Self-seeded plants that drop seeds naturally follow the same timeline.
Which Method to Choose
Most gardeners prefer division because you get flowers faster and know exactly what you’re getting. Pick division if you want dependable results within a year. Choose seeds only if you have patience and don’t mind waiting several years to see blooms.


