To care for your anthurium, give it bright, indirect light from an east or west-facing window. This light level triggers blooms without burning the leaves.
Water when the top two inches of soil feel dry to the touch. Use a pot with drainage holes to prevent water from sitting at the roots, which causes rot. A good soil mix combines orchid bark, peat moss, and perlite in equal parts. This mixture drains well while holding enough moisture for the plant to absorb.
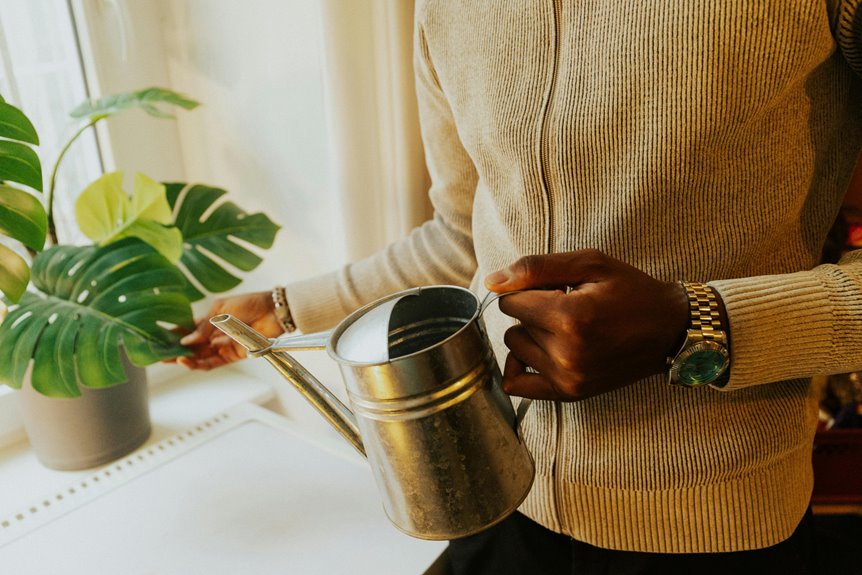
Keep the temperature between 65–85°F. Humidity should stay at 60–80%. You can raise humidity by misting the leaves two to three times per week or by grouping plants close together so they share moisture in the air around them.
During winter, reduce watering frequency and lower the light exposure for six weeks. This rest period signals the plant to rebloom when conditions improve again in spring.
Lighting Your Anthurium for Best Blooms

Why does your anthurium bloom less than it should? Light is the primary factor. Place your anthurium where it gets bright, indirect light. This is the condition it needs for consistent blooming.
Light is the primary factor in anthurium blooming. Provide bright, indirect light for consistent, regular blooms.
East or west-facing windows work well for this purpose. They provide a good balance of brightness without intense direct rays. North-facing windows also work if light stays diffuse throughout the day.
Direct sun will scorch the leaves and damage the plant, so keep it away from unobstructed window exposure. Low light causes weak growth and fades leaf color. Position your plant in a bright room where sunlight filters through sheer curtains or reflects off nearby walls. This diffuse light keeps your plant healthy without stress.
When you get the lighting right, your anthurium will produce blooms on a regular basis.
Watering Your Anthurium: Frequency and Technique

Check the top 2 inches of soil with your finger. When that layer feels dry, it’s time to water. This simple check beats guessing and prevents the two main problems: underwatering and overwatering.
Use a pot with plenty of drainage holes. Water from the bottom by setting the pot in a tray of water, or water from the top and let excess drain completely. The goal is moist soil, not waterlogged soil. Waterlogged conditions lead to root rot, which kills the plant.
For most situations, a weekly watering schedule works well. However, adjust based on your specific conditions. During rest periods with lower light, reduce how often you water. When new shoots are emerging and the plant is actively growing, stick to the weekly schedule. If your home has high humidity, space out your waterings since the soil dries more slowly.
Watch for warning signs. Wilting leaves and brown tips mean you’re not watering enough—increase your frequency. Yellowing leaves and soft, mushy stems mean you’re watering too much—decrease your frequency and check that your drainage holes are actually working. Root rot is harder to fix than adjusting your watering habits, so prevention matters.
Best Soil for Anthuriums: Potting Mix Guide

Getting the watering routine right is only half the battle—your soil choice matters just as much. You need a breathable potting mix designed for anthuriums. Combine orchid mix with peat moss, shredded bark, perlite, charcoal, and sphagnum moss. This mixture gives your plant the drainage it needs while keeping moisture at a moderate level without becoming waterlogged.
The balance matters here. Your potting mix should stay moderately moist, never waterlogged. Good drainage prevents root rot, which will kill anthuriums quickly. Your container must have clear drainage holes at the bottom—this is not optional.
When you repot every two to three years, place fresh bark at the bottom of your new pot. Position your anthurium at the same depth it was growing before. Water slowly after repotting and let the liquid drain completely from the bottom before you set the pot down.
Temperature and Humidity for Anthurium Success

Keep your Anthurium in a warm environment between 65–85°F. Temperatures below 60°F will damage both the foliage and flowers, so avoid cold drafts and sudden temperature drops.
Humidity is equally important for healthy growth. Aim for 60–80% humidity by choosing one of these methods: run a humidifier in the room, mist the leaves with water every few days, or place the pot on a pebble tray filled with water. The water evaporates around the plant, raising humidity naturally. Any of these approaches will support better blooms.
During winter, adjust your care routine. Reduce how often you water since the plant needs less moisture in cooler months, and decrease light exposure to give your Anthurium a proper rest period. This dormant phase allows the plant to recharge so it can produce new blooms when spring arrives.
Ideal Temperature Range
What temperature does your Anthurium need? Keep your plant between 65–85°F (18–29°C) for healthy growth and flowering. Your best target is 65–75°F (18–24°C) during everyday conditions—this range balances temperature and humidity well.
Cold temperatures below 60–65°F will damage the leaves and flowers. Protect your plant from drafts, cold air vents, and sudden temperature changes. Position your Anthurium away from air conditioning units and heaters, which create unstable conditions. A stable location with consistent warmth is what your plant needs to produce healthy blooms.
Humidity Levels Matter
Your Anthurium needs humidity between 60–80% to grow well. When humidity drops below this range, you’ll see brown leaf edges and fewer flowers. This isn’t optional—it’s a requirement for healthy plants in most homes.
Several practical methods can raise humidity around your plant. A humidifier is the most direct approach. Misting the leaves a few times per week works if you’re consistent. Grouping multiple plants together creates a humid pocket of air around all of them. Pebble trays are another option: fill a shallow tray with pebbles, add water until it barely covers them, and set your pot on top. The water evaporates and surrounds the plant with moisture.
Bathrooms and kitchens naturally have higher humidity than living rooms, so these are good placement options if your plant gets enough light there. Make sure air still moves around the leaves to prevent mold. Pair humidity with temperatures between 65–85°F to prevent leaf damage and support flowering.
Seasonal Rest Adjustments
Your Anthurium will respond well to a winter rest period of about six weeks. During this time, reduced light and cooler temperatures help trigger rebloom. You’ll need to shift your care routine.
Reduce watering substantially. Since the plant isn’t actively growing, it needs less moisture. Check the soil before watering and only water when the top inch feels dry.
Keep temperatures between 18–26°C (65–70°F) in a space without drafts. Cold air or temperature swings can stress the plant and interfere with the rest cycle.
Move your plant to a dimmer area. Less light supports the recovery process and signals the plant that it’s time to rest.
Skip feeding during this period. The plant isn’t putting energy into new growth, so it won’t use the nutrients. Wait until you see new leaves forming before you resume your normal feeding schedule.
Avoid overwatering or raising humidity levels during winter rest. Extra moisture actually works against rebloom and delays the flowering cycle. Watch for new growth and healthier leaves as signs that the rest period is working. Once you see these changes, you can return to normal watering and feeding in spring.
Fertilizing During the Growing Season

During the growing season from March through September, fertilize your Anthurium once a month. This regular feeding supports steady growth and encourages blooms.
Always dilute your fertilizer to half strength or weaker. Full-strength fertilizer burns roots and leaves, which damages your plant. Choose a balanced fertilizer formula, or select one higher in phosphorus if you want to encourage flowering.
Think of this monthly routine as part of your regular plant care. You’re providing your Anthurium with what it needs during its active growing phase. Once fall arrives, stop fertilizing altogether. This seasonal approach lets your plant rest naturally through winter and keeps it healthy year-round.
When and How to Repot Your Anthurium

Your Anthurium needs repotting every two to three years. Spring and summer are your best times to do this because the plant is actively growing and can handle the change more easily.
Start by taking your plant out of its pot and looking at the roots. If they’re circling around the inside of the container in a tight mass, it’s time to repot.
What you’ll need:
- A clean pot that’s 1–2 inches larger in diameter than the current one, with drainage holes
- Fresh potting soil made from orchid bark, peat moss, perlite, and sphagnum moss mixed together
The repotting steps:
- Fill your new pot with the soil mixture until it’s partially full
- Place your Anthurium in the pot at the same depth it was growing before—the top of the root ball should be at the same level as before
- Fill in around the base with more soil, pressing gently to remove air pockets
- Water slowly until water drains from the bottom
After repotting, keep your plant out of direct sunlight while it adjusts to its new container. Water consistently to keep the soil lightly moist and maintain humidity around the leaves. This support helps the plant recover from the stress of being moved.
Pruning Spent Flowers and Damaged Growth

To keep your anthurium healthy, remove wilted flower spikes at soil level. This redirects the plant’s energy toward new blooms instead of sustaining dying flowers. While pruning, also trim away any brown or yellow leaves and damaged stems you notice. Removing this unhealthy foliage prevents disease and keeps your plant looking better overall.
Before you start, put on gloves. Anthurium sap irritates skin. Clean and sterilize your pruning tools with a cloth and 70% isopropyl alcohol or a 10% bleach solution to avoid spreading disease between cuts.
Removing Wilted Flower Spikes
How do you know when it’s time to remove those faded flower spikes from your anthurium? When the blooms wilt and lose their vibrant color, that’s your signal to act. You’ll want to trim these spent spikes close to the soil line using clean, sharp pruning shears to encourage fresh growth and rebloom.
What to do:
- Wear protective gloves to shield your skin from the plant’s sap, which can cause irritation
- Cut wilted spikes at the base using your pruning shears. While you’re at it, remove any brown or yellowing leaves
- For upright but older spikes, cut just above the base to minimize plant stress
After pruning, maintain consistent watering and humidity levels. This supports recovery and prepares your anthurium for its next flowering cycle.
Trimming Damaged Foliage
Why wait until damage spreads throughout your anthurium when you can address it right away. Regularly trimming damaged foliage keeps your plant healthy. Remove brown or yellow leaves promptly, along with any damaged growth that looks diseased or dead. This step improves air circulation around your plant and stops problems from getting worse.
When you’re ready to prune, grab clean, sterilized pruning shears to reduce disease risk. Wear gloves during this task since anthurium sap irritates skin. Make cuts near the soil line for spent growth, removing the entire affected area. While you’re pruning, inspect your plant closely for pests or disease. If you spot issues, treat them right away with appropriate solutions.
How to Encourage Anthuriums to Rebloom

Since anthuriums need a specific trigger to produce flowers, give your plant a structured winter rest period. This six-week break signals your plant that it’s time to rebloom.
What to do during the rest period:
- Move your anthurium to a dimmer area and reduce light exposure significantly. Lower the temperature by about 10-15 degrees Fahrenheit from your normal room temperature.
- Cut back on watering. Let the soil dry more between waterings so your plant can conserve energy for flowering. Water only when the top inch of soil feels dry to the touch.
- Maintain medium to high humidity using a misting bottle or pebble tray. Mist the leaves every few days or place the pot on a tray filled with pebbles and a shallow layer of water, making sure the pot sits above the water line.
After the six-week rest:
Resume normal care with bright, indirect light and warmer temperatures. Move the plant back to its usual location. Watch for new leaf growth and flower spikes as signs that the plant is recovering. Once you see these indicators, return to regular feeding with a balanced fertilizer applied every four weeks during the growing season.
Identifying and Treating Spider Mites, Mealybugs, and Fungus Gnats
Once you’ve got your anthurium’s blooming cycle on track, monitor regularly for three common pests: spider mites, mealybugs, and fungus gnats. Look for webbing on leaves, sticky residue on stems, or insects visible to the naked eye.
To prevent and control infestations early, wipe your leaves every week with horticultural soap or neem oil spray. Mix the spray according to package directions, spray both sides of leaves thoroughly, and wipe them down with a soft cloth. This removes dust and potential pest eggs while supporting overall plant health.
For fungus gnats specifically, top-dress your soil with Mosquito Bits or Diatomaceous Earth to reduce larval populations. Sprinkle a half-inch layer across the top of the soil, keeping it away from the plant stem. These products work by disrupting the larvae before they mature into flying insects.
Avoid overwatering your anthurium, since excess moisture creates the damp environment these pests prefer. Let the top inch of soil dry out between waterings. Check soil moisture by inserting your finger into the pot—water only when it feels dry at that depth.
Fixing Yellowing and Browning Leaves

Overwatering is the most common reason anthurium leaves turn yellow. When soil stays too wet, it suffocates the roots. Let the top 2 inches of soil dry out between waterings to prevent this problem.
Insufficient light and low humidity create stress that causes yellowing and brown leaf tips. Move your plant to a spot with bright, indirect light and increase humidity to 60% or higher. This addresses both issues at once.
If you’ve let these problems go too long, root rot may have started. Check the drainage holes in your pot. If the roots look mushy or smell bad, repot the plant into fresh, well-draining soil. This gives the roots a chance to recover.
Overwatering Causes Yellow Leaves
Yellow leaves on your anthurium plant are almost always a sign that you’re watering too much. Overwatering causes root rot and leaf yellowing, so you need to change your watering habits right away.
What to do about watering
Let the top two inches of soil dry out completely between waterings. Water about once a week, but adjust this schedule based on your season and how humid your space is. Your goal is to avoid keeping the soil soggy.
Set up your pot for success
Make sure your pot has drainage holes in the bottom. Use a well-draining soil mix—look for potting soil labeled for indoor plants or aroids, which won’t hold excess water. These two things work together to keep roots from sitting in wet conditions.
Fix the problem if it’s already happening
If you see yellow leaves now, cut back on watering immediately. Move your anthurium to a spot with bright, indirect light. Check the roots by carefully removing the plant from its pot. If they look dark, mushy, or smell bad, repot the plant into fresh, dry soil. This stops root rot from spreading and gives your plant a chance to recover.
Insufficient Light and Humidity
What’s really going on with your anthurium’s leaves when they’re not suffering from overwatering? Insufficient light and humidity are likely culprits. Your plant needs medium to bright indirect light to perform well. Position it near an east or west-facing window where it gets steady light throughout the day, or place it in a north-facing spot with diffused rays. Direct sun will scorch the leaves and cause browning, so keep it away from unfiltered afternoon light.
Humidity matters just as much as light. Anthuriums need 60–80% humidity to stay healthy. You have a few practical options to raise humidity levels. Mist the leaves every two to three days using a spray bottle filled with distilled water. Set up a humidifier nearby if misting alone isn’t working. You can also group multiple plants together, since they release moisture into the air around each other.
Monitor your plant regularly to catch problems early. If yellowing continues even after you’ve adjusted the light and humidity, look at your watering routine. Let the top two inches of soil dry out between waterings. Small adjustments to light, humidity, and watering frequency work together to bring your plant back to health.
Root Rot and Drainage Issues
When you see yellowing and browning leaves despite adjusting light and humidity, root rot is often the hidden problem in your pot. Root rot develops when soil stays too wet, suffocating roots and causing decay.
Check your watering schedule – Allow the top 2 inches of soil to dry between waterings. Stop keeping the soil constantly moist, as this is the main cause of root rot.
Inspect the roots – During repotting, look for black, mushy roots. Use clean scissors or pruning shears to trim away any damaged sections. Remove only the affected parts.
Improve drainage immediately – Switch to a well-draining potting mix made with orchid bark, perlite, and sphagnum moss. Make sure your pot has multiple drainage holes at the bottom. If your current pot lacks adequate drainage, repot into one that does.
After treating root rot, water the rootball thoroughly once. Then move to a regular watering schedule of once per week, checking that the top 2 inches of soil have dried first. The plant will recover over the next few weeks with proper drainage and a consistent watering routine.
How to Propagate Anthuriums by Division

Division works well for multiplying your Anthurium plants. The best time to do this is between March and September when the plant has active growth and energy to recover from the separation.
Start by carefully taking your plant out of its pot and separating it into multiple sections. Each division needs healthy roots attached and at least one or two leaves. Look for natural separation points where roots cluster together, as these divisions are more likely to succeed.
Get a clean pot that’s only 1–2 inches larger than each division’s root ball. Fill it with fresh bark or coarse potting mix, which drains better than regular soil. Place each division at the same depth it was growing before, then water slowly until water drains from the bottom.
Put your new divisions in a spot with indirect light while they adjust to their new pots. Keep humidity between medium and high levels. The temperature should stay between 65–85°F. These conditions help the roots establish and new growth begin. After a few weeks, you can gradually introduce them to their permanent lighting conditions.


