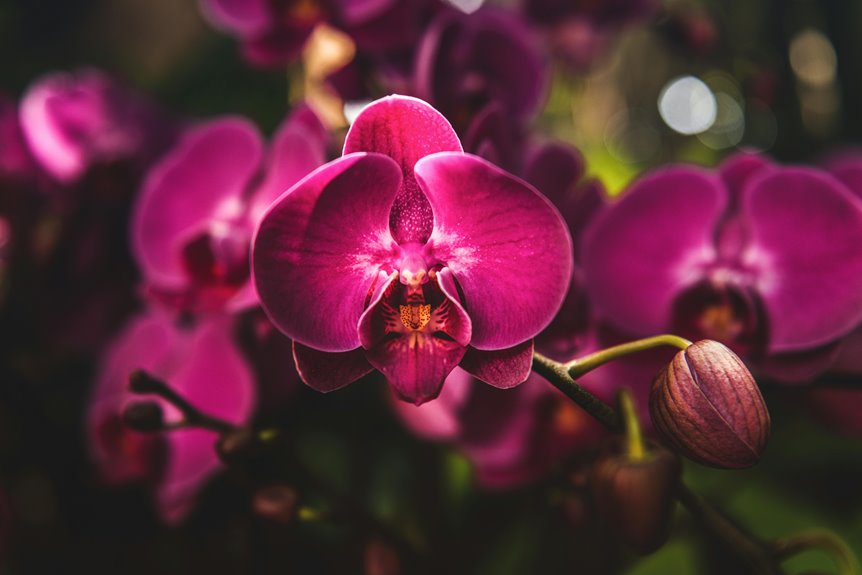
After your orchid finishes blooming, give it a rest period of several weeks. This downtime lets the plant rebuild its energy stores for the next bloom cycle.
Start by trimming the flower spikes. If a spike has turned brown, cut it off at the base. For green spikes still in good condition, cut above a node—that small bump on the stem where new growth can emerge. This directs the plant’s resources toward strengthening the roots and leaves instead of maintaining dead flowers.
Water your orchid once a week during this recovery phase. The growing medium should stay moist but never waterlogged. Soggy conditions invite root rot, which is difficult to fix.
Place your plant where it gets bright indirect light. This might mean a few feet back from an east or west-facing window. Keep nighttime temperatures between 55 and 65°F. Cooler nights actually signal the orchid that it’s time to start forming new flower buds.
Skip fertilizer while the plant recovers. Once you spot new growth emerging from the base or top of the plant, switch to feeding at half the recommended strength. Use a balanced orchid fertilizer and apply it every two weeks.
When fresh roots start to show, that’s your signal to repot. Use an orchid-specific potting mix—usually a blend of bark, sphagnum moss, and perlite. Regular potting soil compacts too much and suffocates orchid roots. Choose a pot with drainage holes and repot during the spring when growth naturally accelerates.
Step 1: Give Your Orchid Time to Rest and Recover

After your orchid’s blooms drop, let it rest instead of pushing it toward flowering again. This rest period helps your plant recover from blooming and rebuild its energy stores. During this time, your orchid strengthens its roots and foliage to support the next flowering cycle.
Keep the plant in bright indirect light and maintain stable temperatures. Water carefully without making sudden changes to its conditions. This rest phase typically lasts several weeks. Your orchid needs this time to develop a stronger foundation for future growth.
Skipping the rest period weakens the blooms that come next. When you respect this natural cycle, your orchid performs better over time because you’re meeting what it actually needs to stay healthy.
Step 2: Trim the Flower Spike Correctly

Once your orchid’s rest period is underway, handle the flower spike to direct your plant’s energy effectively.
You have two options based on the spike’s condition. If the spike is brown, cut it down to about one inch from the base. This removes the dead tissue completely. If the spike is still green, you can encourage a secondary bloom by cutting just above a node at about half an inch from that node. This approach lets new flowers develop from the same stem.
Pruning concentrates your plant’s energy toward root development and foliage growth instead of maintaining a dying spike. This focused energy allocation supports stronger future blooms and sets up your orchid for successful rebloom cycles.
Step 3: Adjust Your Orchid’s Watering Schedule

After your orchid stops blooming, water once per week. Keep the potting medium moist but never waterlogged. This schedule supports healthy roots and prevents the moisture problems that lead to rot.
Check your roots regularly to gauge hydration levels. Bright green roots mean your watering is on track. Silvery white roots indicate they’re drying appropriately between waterings. Mushy or dark roots signal rot, so trim them away immediately with clean scissors.
The biggest mistake orchid owners make is letting water sit around the crown or between the leaves. This creates crown rot, which damages your plant quickly. Always water at the base of the plant and allow excess water to drain completely.
If your roots look shriveled or stressed, cut back on watering frequency temporarily. When you do water next, give the pot a gentle soak for a few minutes to rehydrate them. The goal is building a consistent routine that keeps your roots in good condition long-term.
Step 4: Create Ideal Light and Temperature Conditions
Why does lighting matter so much after your orchid finishes blooming? Proper light and temperatures directly influence whether your plant will rebloom. You’re setting the foundation for future flowers right now.
What to do:
Place your orchid in an east or south-facing window where it gets bright indirect light. Keep daytime temperatures around 75°F and nighttime temperatures around 65°F. Rotate the plant occasionally so all sides receive even light and grow evenly. Position it away from direct sun, which can burn the delicate leaves.
Avoid placing your orchid near drafts or strong air conditioning vents. These conditions stress the plant and make it harder to rebloom.
For fall rebloom:
If you want your orchid to flower in fall, move it to a cooler location at night. Keep nighttime temperatures between 55°F and 65°F while maintaining the same bright indirect light during the day. This temperature drop signals the plant to produce flower buds. Consistent light and temperature conditions help your orchid grow and eventually produce new blooms.
Step 5: Skip Fertilizer While Roots Recover

After blooming, your orchid’s roots need time to recover. Fertilizing during this period actually works against you because it stresses already-weakened roots and leads to weak growth patterns. Hold off on feeding until you see new root activity or fresh leaves starting to emerge.
Once you spot that new growth, resume fertilizing at 25–50% strength. This lighter application gives your plant the nutrients it needs without pushing it too hard while it’s recovering. Timing your fertilizer applications correctly determines whether your orchid bounces back with strong development or struggles through a prolonged recovery period.
Why Fertilizer Delays Recovery
Skipping fertilizer might seem wrong when you’re trying to help your orchid recover, but it’s actually one of the best things you can do for stressed roots.
Salt accumulation: Fertilizer leaves behind salts in the growing medium. These salts damage delicate roots that are just starting to rehydrate and rebuild themselves.
Reduced nutrient absorption: During recovery, your orchid simply can’t absorb nutrients the way it normally does. Feeding your plant now does more harm than good because the weakened roots can’t process what you’re giving them.
Weakened root systems need rest****: Fresh roots can’t handle full-strength nutrients yet. They need time to strengthen before they can manage a regular feeding schedule.
Better chances for future blooms****: Holding back on fertilizer now actually improves your orchid’s ability to rebloom down the road. Your plant can redirect energy toward building strong roots instead of processing unnecessary nutrients.
Wait 4 to 6 weeks after blooming stops completely. Watch for green, firm new roots and fresh leaf growth. Once you see these signs, you can start feeding again. Use diluted fertilizer at 25 to 50 percent strength and apply it gently as part of your post-bloom care routine.
Timing Your Feeding Schedule
Wait until your orchid finishes its rest period and begins showing new growth before you start fertilizing again. During this waiting time, concentrate on watering properly and letting the leaves develop well.
When you’re ready to feed, dilute your orchid fertilizer to 25–50% strength. This weaker solution stops fertilizer burn while your roots regain their strength. Watch your plant’s leaves for tip burn or other stress signals.
If you want a simpler method, mix a controlled-release fertilizer into your potting medium before planting. This type releases nutrients slowly as your roots recover, matching what your plant actually needs without overdoing it.
Step 6: Repot When New Roots Appear

Why wait to repot your orchid? Timing matters. Repot during your orchid’s resting phase after blooming, specifically when you spot new roots emerging. This approach helps your plant establish itself in fresh medium and supports healthier growth.
What you need to do:
Use orchid-specific potting mix designed for drainage. Select a clear pot so you can monitor root health and airflow. When handling roots, trim away any dead or mushy tissue using sterilized scissors. Be gentle with the healthy roots to avoid damage.
After repotting, hold back on watering to prevent root rot. Place your orchid in bright indirect light while it recovers. Once new growth starts appearing, resume your regular watering schedule and light feeding.
Step 7: Trigger Rebloom With Cooler Nights

To trigger rebloom, move your orchid to a cooler location. Nighttime temperatures need to drop to 55°F–65°F. This temperature range mimics what orchids experience in their natural habitat, which signals them to produce new flower spikes.
During the day, keep temperatures around 65°F–75°F and place the plant where it receives bright, indirect light. The difference between daytime and nighttime temperatures is what actually prompts flowering. Without this shift, your orchid won’t know it’s time to rebloom.
If your home stays warm throughout the day and night, you’ll need to find a specific spot that cools down at night. A window in an unheated room, a basement area with natural light, or a cooler bedroom can work. Check the temperature with a thermometer to confirm it’s dropping into the target range after sunset.
Temperature Drop Strategy
Your orchid will bloom again when it experiences a temperature shift. This happens because cooler nights trigger the hormones that make your plant flower. You need to create the seasonal change your orchid naturally responds to.
Move your orchid to a cooler location during evening hours. The goal is a nighttime temperature between 55°F and 65°F. During the day, keep temperatures around 75°F. Make sure your plant gets bright, indirect sunlight every day. Avoid placing it near cold drafts, which will stress the plant rather than help it.
This strategy works by mimicking what happens in your orchid’s natural habitat. The temperature difference between day and night signals that a new season is arriving. Your plant responds by preparing to produce new flowers. Stick with this routine consistently for the best results.
Optimal Nighttime Conditions
Your orchid blooms when it senses seasonal changes. The key trigger is cooler nighttime temperatures. Move your plant to a spot where nights stay between 55°F–65°F (13°C–18°C) for several weeks or months. This temperature drop signals your orchid that flowering season has arrived, mimicking what happens in its natural habitat.
During daylight hours, keep the area around 65–75°F (18–24°C) and give your plant bright indirect sunlight. This combination provides the energy needed for blooms to develop. Avoid placing your orchid near vents, windows with drafts, or anywhere temperatures swing wildly. Steady conditions matter more than hitting exact numbers.
Water less frequently during this cooler period. Let the growing medium dry out a bit between waterings. This drier state, paired with the temperature drop at night, pushes your orchid toward flowering while reducing the risk of root problems. You’re basically recreating the seasonal shift that tells your plant it’s time to bloom.
Bright Indirect Light Placement
Once you’ve established that cooler nighttime pattern, lighting becomes your next lever for pushing your orchid toward another bloom cycle. Bright indirect light fuels your plant’s energy recovery during the rest period and prepares it for rebloom.
Position your orchid where it receives consistent, filtered light throughout the day. Place it near an east or west-facing window with sheer curtains blocking direct sun. Direct rays will scorch delicate leaves and waste the energy your plant needs for flowering.
Keep the plant away from dark corners that limit photosynthesis. Rotate your orchid every few days so all sides receive equal light exposure. This consistent lighting strategy, combined with your temperature work, creates the conditions your orchid needs to develop the next flower spike.


